VitOS Orbiter
User Operation Manual
Basic Functions and Online Music
June 5th, 2023
Content
3.4.1. Streaming Music Display/Hide
3.5.1.2.5.2. ldeal Discography
3.5.1.5.1.2. Add To Play Queue
3.5.1.5.1.3.1. Create Playlists
3.5.1.5.1.4. Add To My Favorite
3.5.1.5.1.5. Remove From My Favorite
3.5.1.5.2. Playlist Operations
3.5.1.5.2.1. Play This Playlist
3.5.1.5.2.2. Add To Play Queue
3.5.1.5.2.3.1. Create Playlists
3.5.1.5.2.4. Add To My Favorite
3.5.1.5.2.5. Remove From My Favorite
3.5.1.5.2.6. Edit Playlist Information
3.5.1.5.3.1. Play This Album From This Track
3.5.1.5.3.2. Play This Playlist From This Track
3.5.1.5.3.4. Add To Play Queue
3.5.1.5.3.5. Add To My Favorite
3.5.1.5.3.6. Remove From My Favorite
3.5.1.5.3.7.1. Create Playlists
3.5.1.5.3.8. Remove From This Playlist
3.5.1.5.3.10.1. Collection Artist
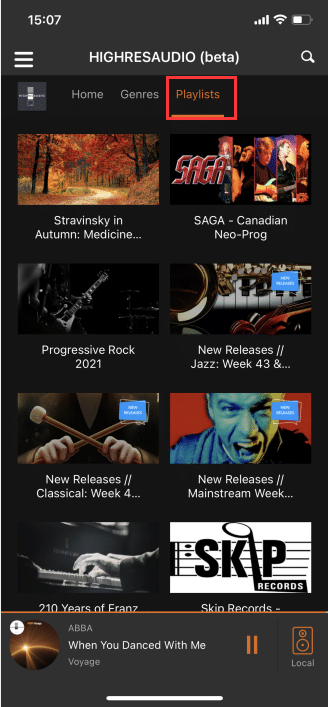
3.5.2.2.4. Universal Highlights
3.5.2.2.6. High-Res Essentials
3.5.2.2.7. PentaTone Highlights
3.5.2.2.11. Newly Added Albums
3.5.2.5.2.2. Remove My Playlist
3.5.2.5.3.1. Play This Album From This Track
3.5.2.5.3.2. Play This Playlist From This Track
3.5.2.5.3.4. Add To Play Queue
3.5.2.5.3.5. Add To My Favorite
3.5.2.5.3.6. Remove From My Favorite
3.5.2.5.3.7.1. Create Playlists
3.5.4.1. Set Spotify Connect Status
3.5.4.2. Set Spotify Connect Device Name
3.5.4.3. Restart Spotify Connect
3.5.4.4. Download The Spotify App
3.5.4.5.2. Connect the device to start playback
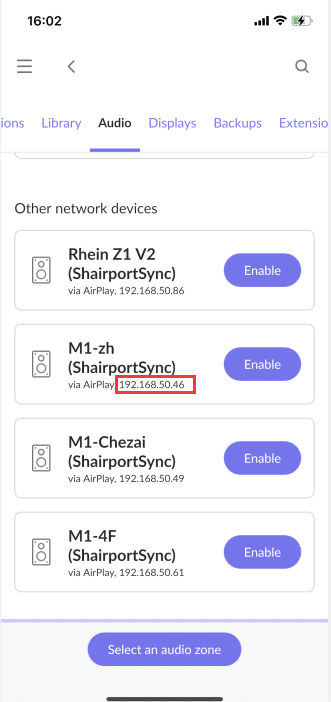
3.5.5.2. Set Airplay 2 Device Name
3.5.6.1. Set Roon Ready Status
3.5.6.3. Download Roon Remote App
3.5.6.4.1. Enable Audio Device
3.5.6.4.2. Small Player Selection Device
3.5.6.4.3. Large Player Selection Device
3.5.6.4.4. The Connected Device Starts To Play
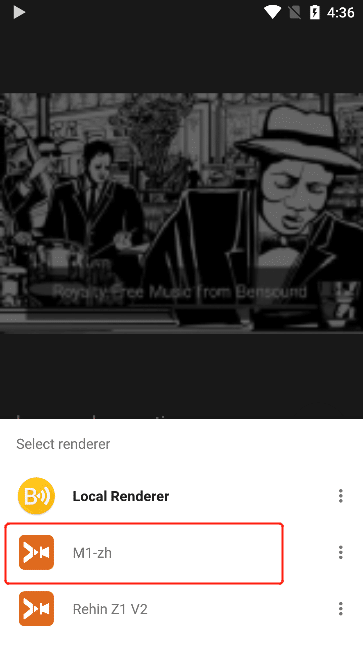
3.5.7.1. Set DLNA Rederder State
3.5.7.2. Set DLNA Rederder Device Name
3.5.7.3. Player App For iOS Devices
3.5.7.4. Download BubbleUPnP for Android
3.5.8.3.3. Popular Stations in Your Area
3.5.8.3.4. What Do You Want to Listen To?
3.5.8.5.1. Local Music Stations
3.5.8.6.2. Episodes You’ll Love
3.5.8.7.1. Nonstop Sports Talk
3.5.8.7.2. This Week’s Top Sports Podcasts
3.5.8.7.3. Global Sports Radio
3.5.8.7.4. Top Premier League Podcasts
3.5.8.13.2.4. Favorites Featured
3.5.10.1. Set TIDAL Connect Status
3.5.10.2. Set TIDAL Connect Device Name
3.5.10.3. Restart TIDAL Connect
3.5.10.5. Connect to TIDAL App
3.6.2.6.1. Play Queue Operation
1. Software Overview
1.1. Overview
VitOS Orbiter is mainly a professional music control software, which can be used for iOS \ Android devices (including mobile phones and tablets),It is the key to execute Silent Angel-M1 and Silent Angel- Z1, efficiently operate playback and access music data, freely Wandering in Hi-Fi music, you deserve better music and better life! And can open the door of Hi-Fi music life .
2. Operating Environment
This software can run on Android and iOS mobile phones.
3. Instructions
3.1. Software Installation
Android users can download and install by searching for " VitOS Orbiter " in the Google Play;
Apple users can search for "VitOS Orbiter" in the APP Store to download and install.
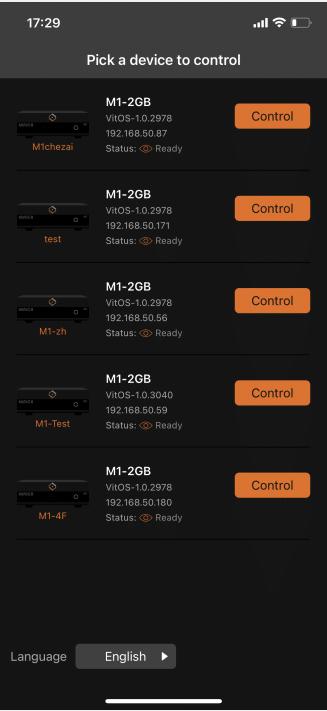
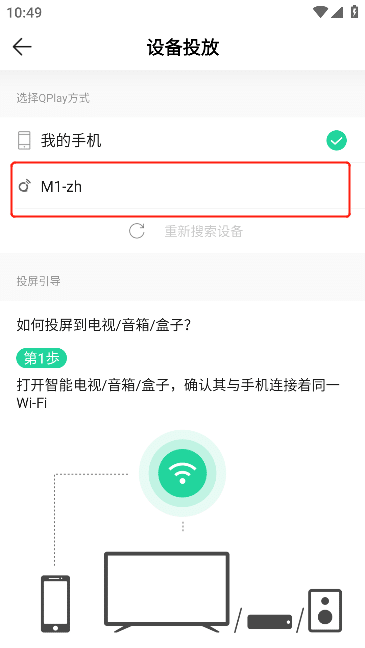
3.2. Device Dicovery
After the installation is complete, the user can click the desktop icon to enter the APP Device Dicovery interface, as shown in the figure below.
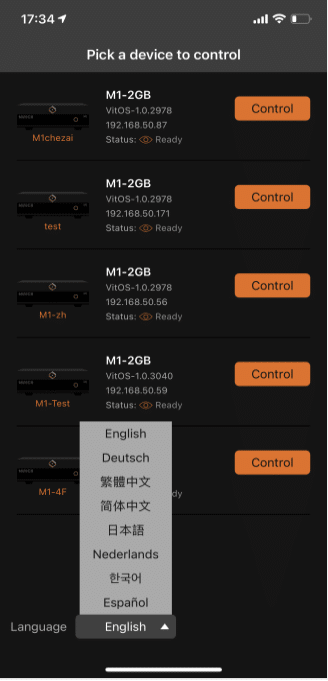
3.3. Software Language
In the Device Dicovery interface click the "Language" option in the lower left corner to select the language used by the APP.
3.4. Device Control
Select the device to be controlled, and click the "Control" button next to the device to enter the APP. For the first connection to the device, you need to select the display/hide of the streaming music in the sidebar menu. You can select the menu or click to select all Check all menus, and then click "OK".

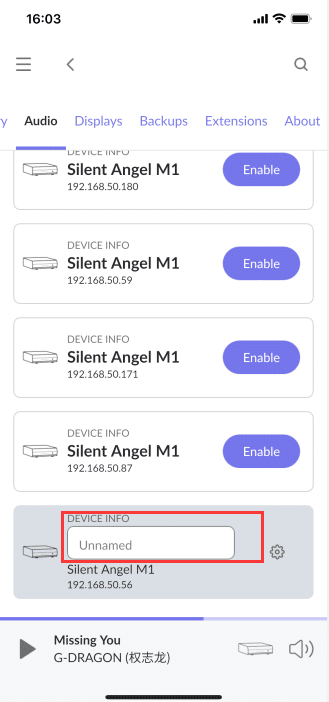
3.4.1. Streaming Music Display/Hide
If the streaming music is not set to be displayed, you can click "Show/Hide" to enter the menu to set, click the button corresponding to the streaming music and slide the color gray to the left, which means that the streaming music is hidden in the left sidebar menu, click Streaming The button corresponding to the music slides to the right and the color is orange, which means that the streaming music is displayed in the left sidebar menu.

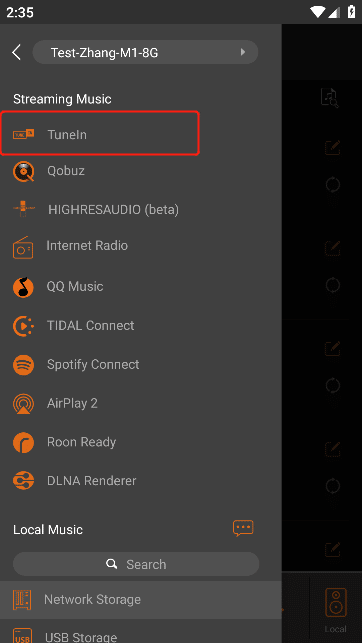
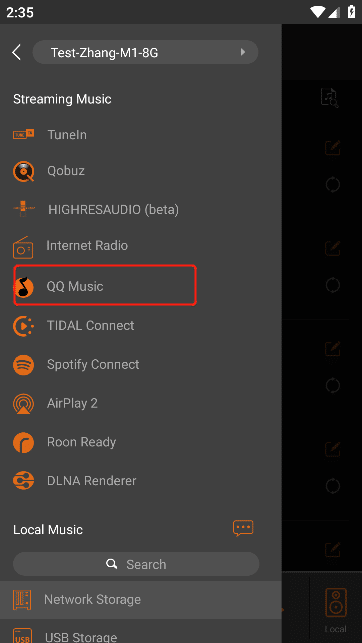
3.5. Streaming Music
Click the menu button in the upper left corner to see the "Streaming Music" menu list .
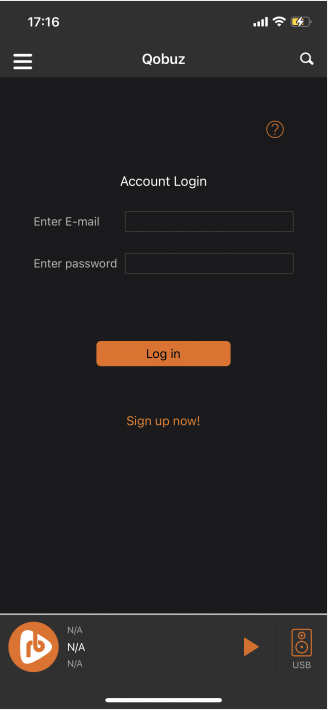
3.5.1. Qobuz
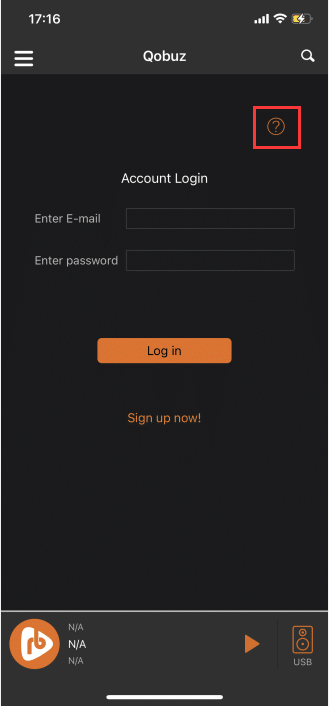
Click "Qobuz" to enter the "Qobuz Login" interface .
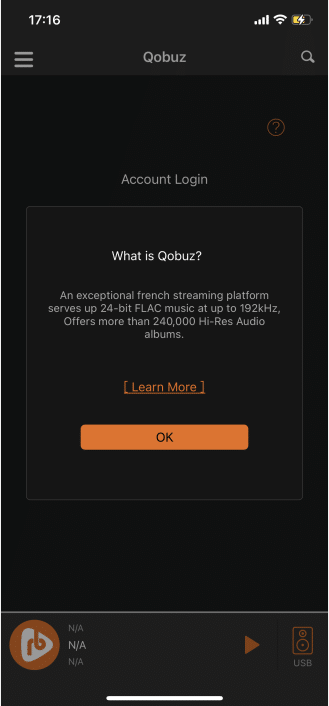
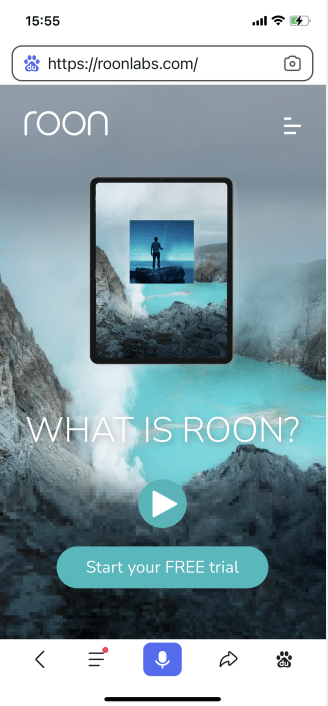
Click the "?" button in the upper right corner to pop up the "What is Qobuz? " interface.
3.5.1.1. Qobuz Login
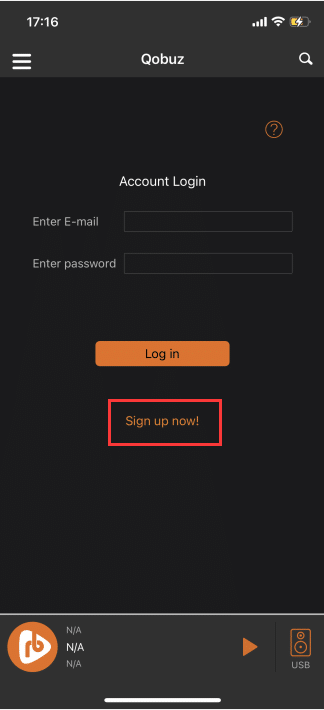
If you do not have a " Qobuz account", click the "Sign up now!" button to jump to the " Qobuz official website " to register.
On the "Qobuz Login" interface, fill in the "Account" and "Password" of Qobuz .
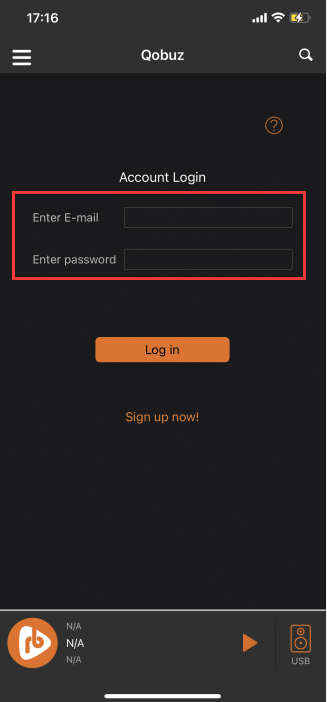
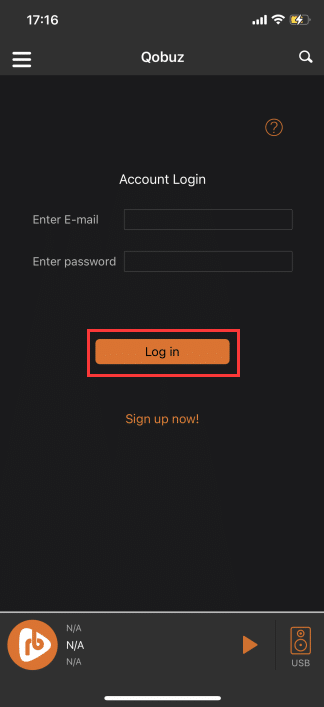
After filling in the "Account" and "Password", click the "Log in" button, after successful login, you will enter the " Qobuz " online music interface .
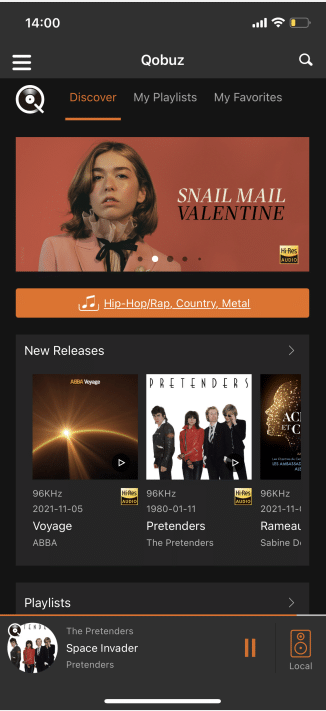
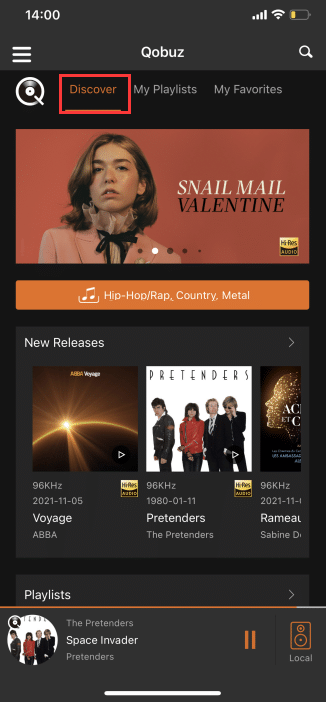
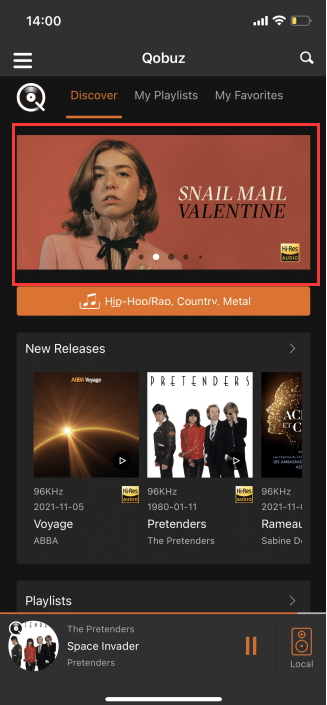
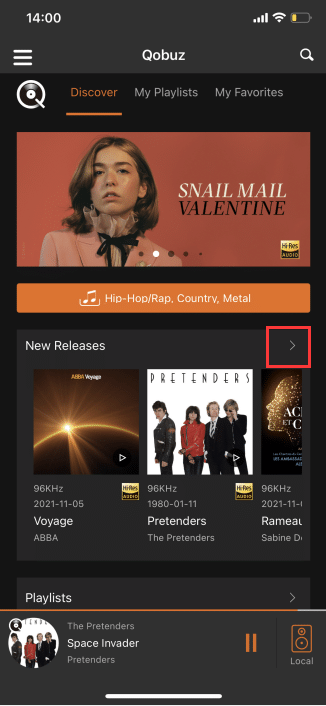
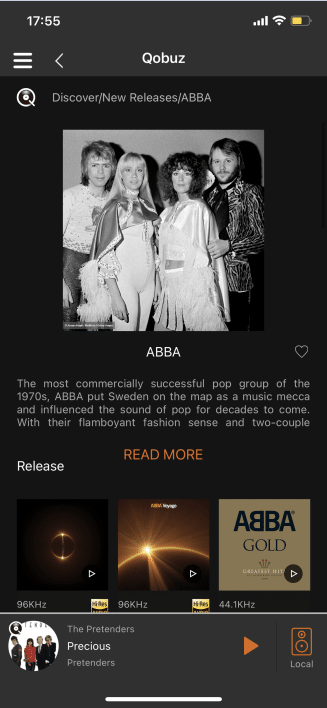
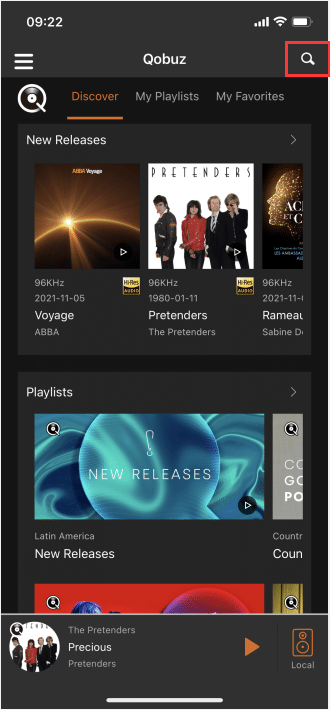
3.5.1.2. Discover
the Login is successful, you will enter the "Discover" interface. You can also click "Discover" in the upper menu to enter this interface .
3.5.1.2.1. Banner Album
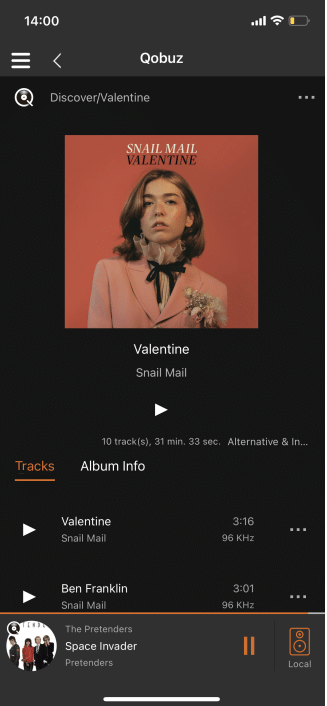
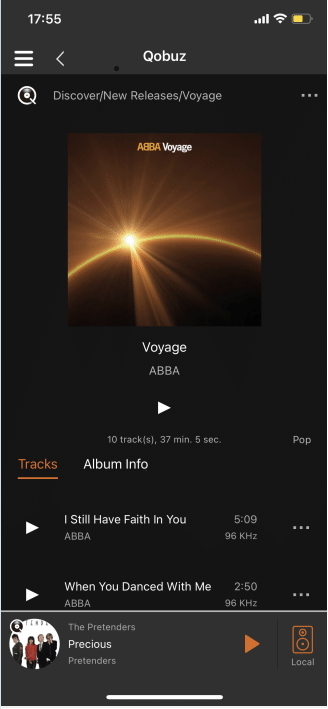
Click on any banner album to enter the "Album Track" interface .
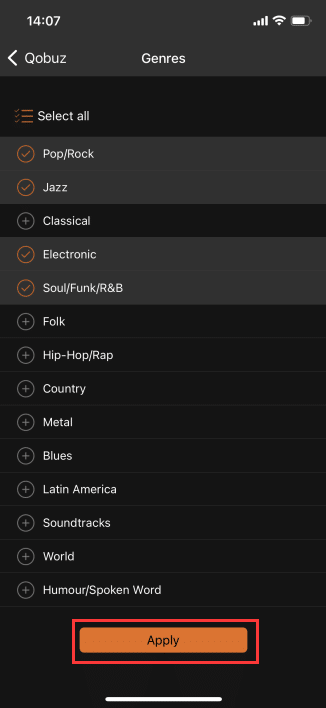
3.5.1.2.2. All Genres
Click "All Genres" to enter the interface for checking "Style" .
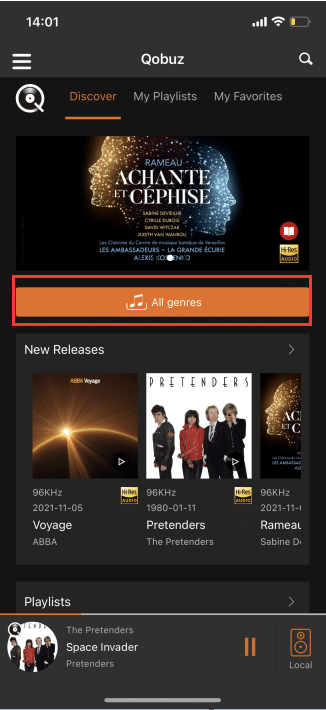
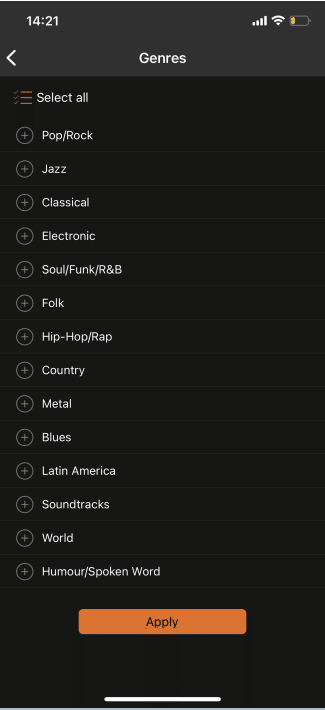
On the "Style" interface, you can click "+" to select a single style, and click "Checked Style" again to cancel the selected style .
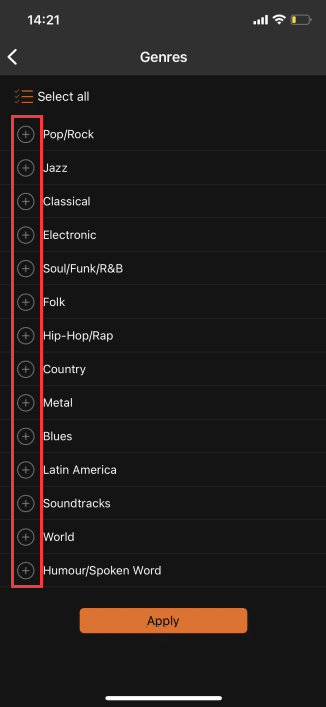
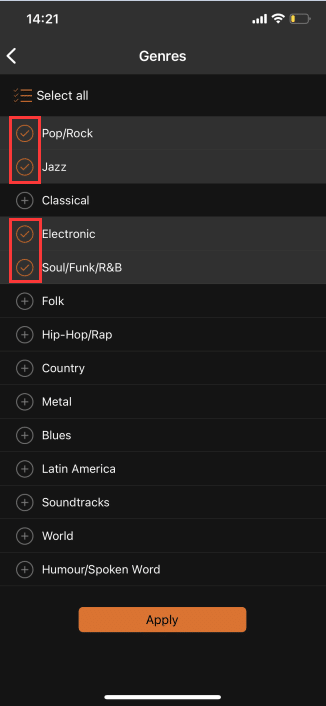
Click "Select All" to select all genres, click "Select All", and then click "Deselect All" .
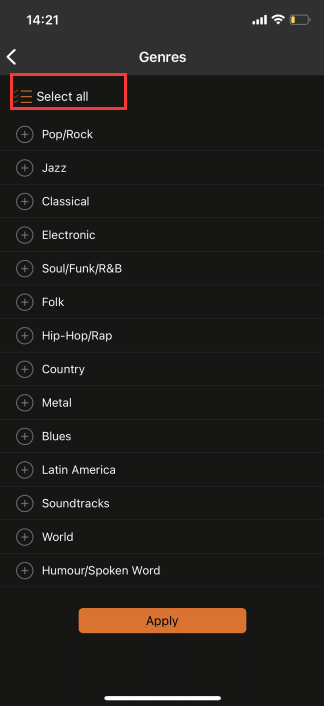
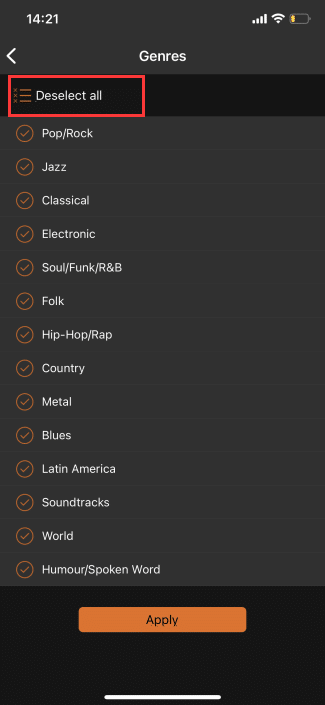
Select "Genre" and click the "Apply" button, the "Discover" interface will only display songs of the checked genre type.
3.5.1.2.3. New Releases
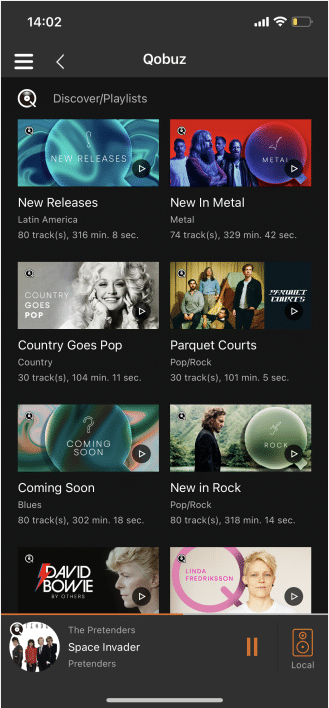
Click ">" on the right side of "New Releases " to enter the "All New Releases" interface .
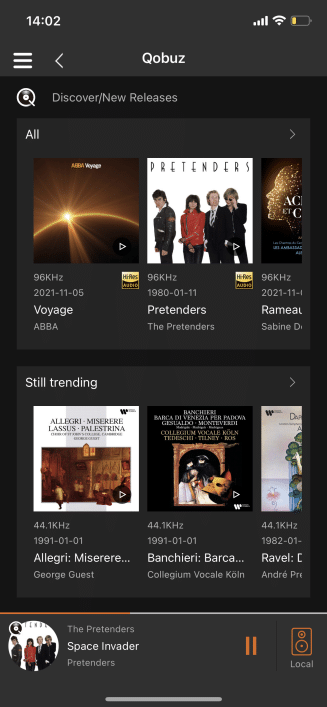
3.5.1.2.3.1. All
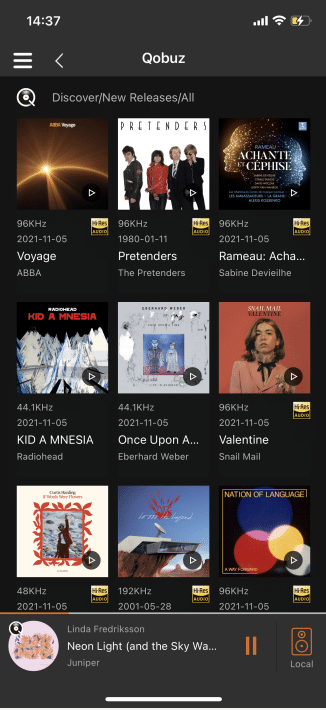
Click ">" on the right side of "All " to enter the "New Release All Albums" interface .
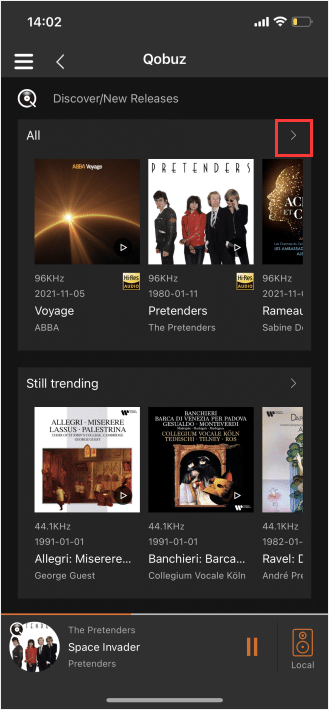
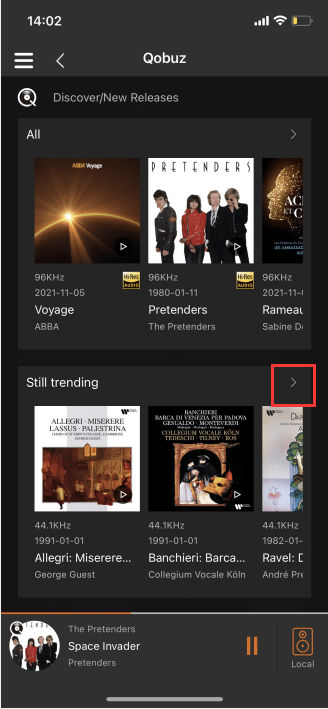
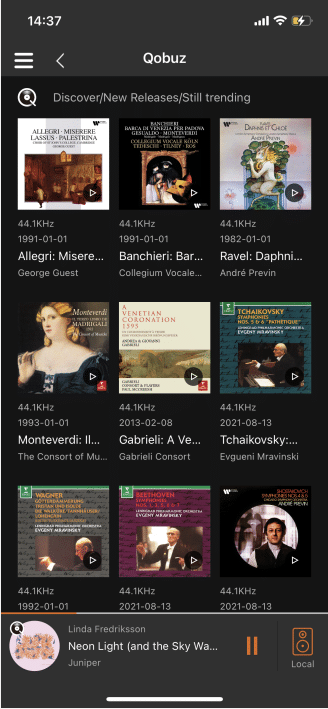
3.5.1.2.3.2. Still Trending
Click ">" to the right of "Still Trending " to enter the "New Release All Still Trending Albums" interface .
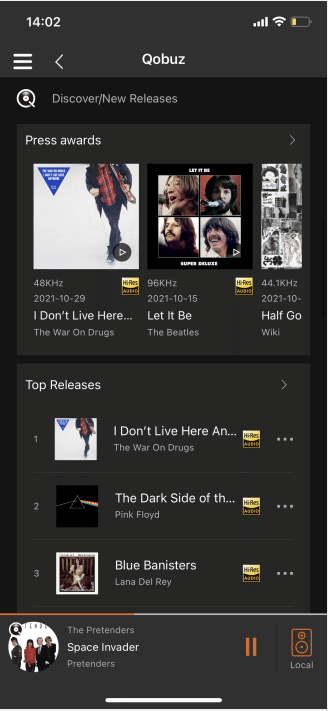
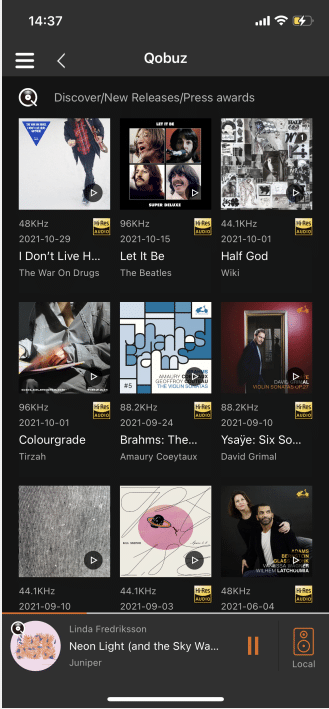
3.5.1.2.3.3. Press Awards
Click ">" on the right side of "Press Awards" to enter the "New Release All Press Awards Albums" interface .

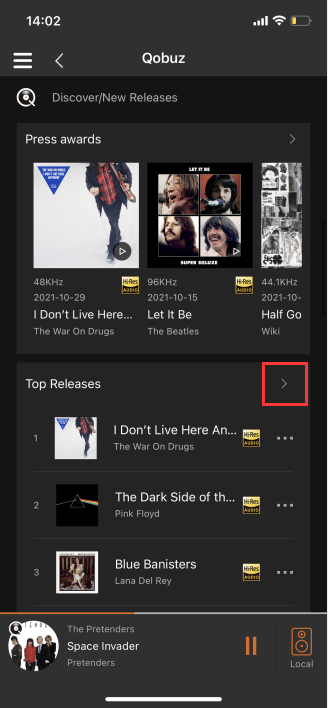
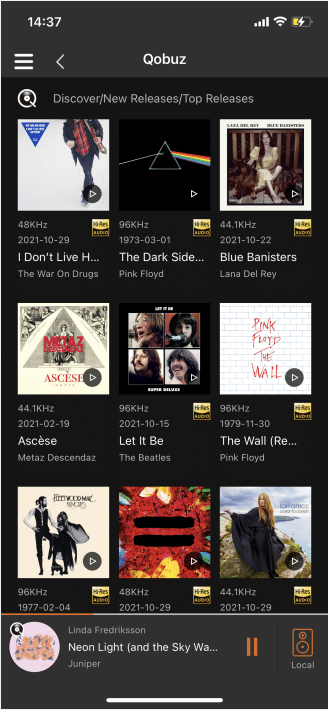
3.5.1.2.3.4. Top Releases
Click the ">" on the right side of "Top Releases " to enter the "New Release All Hot Release Albums" interface .
3.5.1.2.4. Playlist
Click ">" on the right side of "Playlist " to enter the "All Playlist" interface .
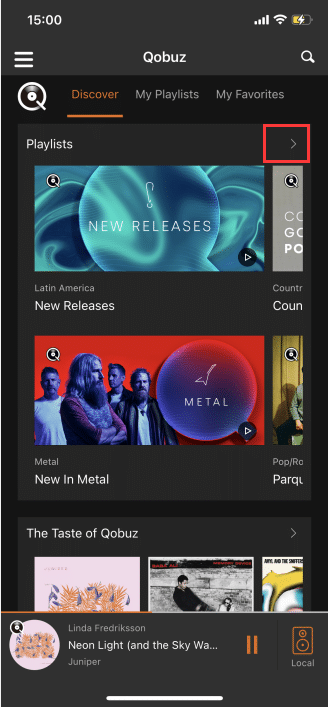
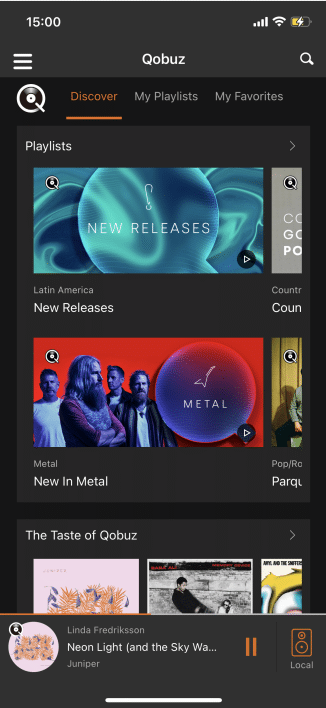
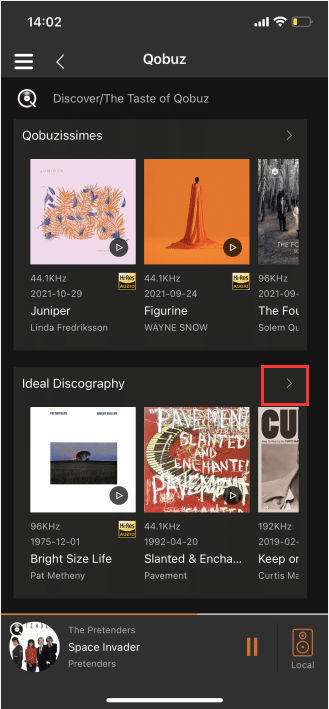
3.5.1.2.5. The Taste Of Qobuz
Click the ">" on the right side of "The Taste Of Qobuz" to enter the "The Taste Of Qobuz's portfolio" interface .
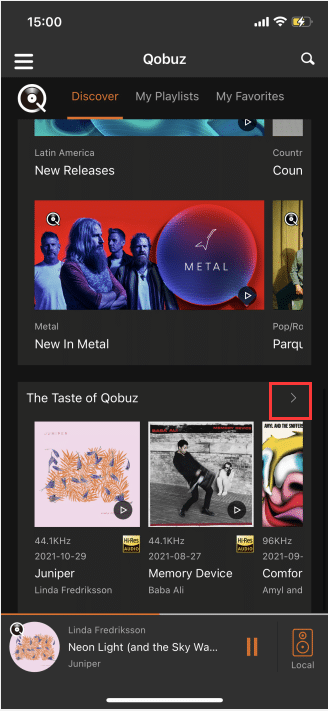

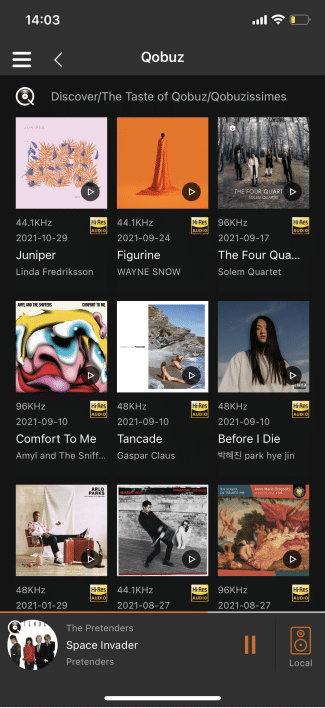
3.5.1.2.5.1. Qobuzissimes
Click the ">" on the right side of "Qobuzissimes" to enter the The Taste Of Qobuz "Qobuzissimes Albums" interface .
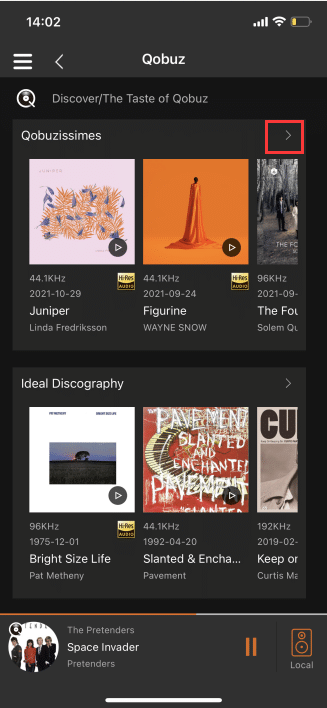
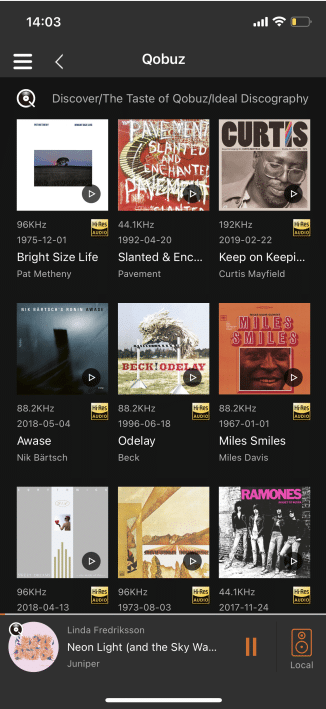
3.5.1.2.5.2. ldeal Discography
Click the ">" on the right side of "Ideal Discography" to enter the The Taste Of Qobuz "All Ideal Discography" interface .
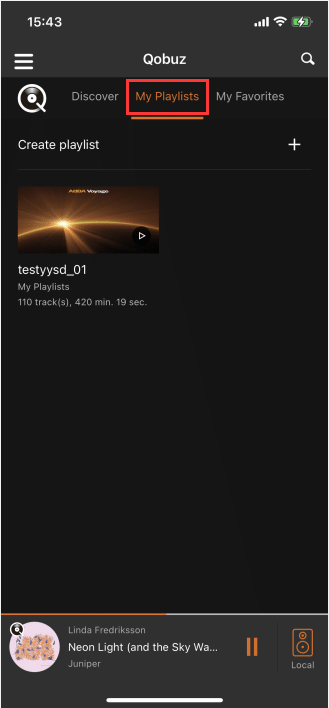
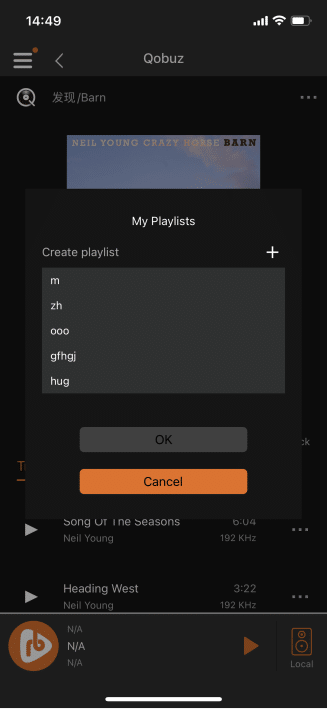
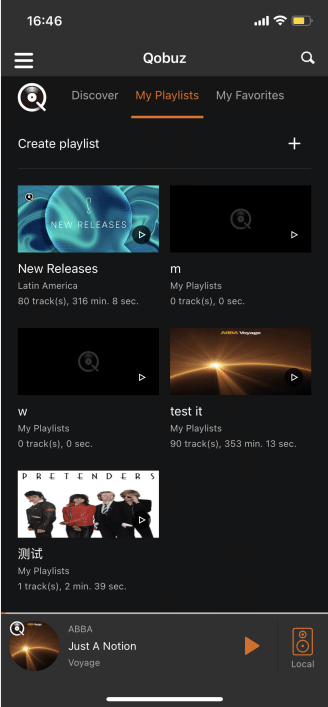
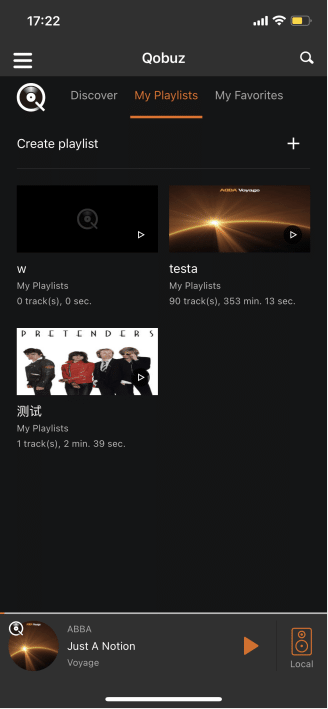
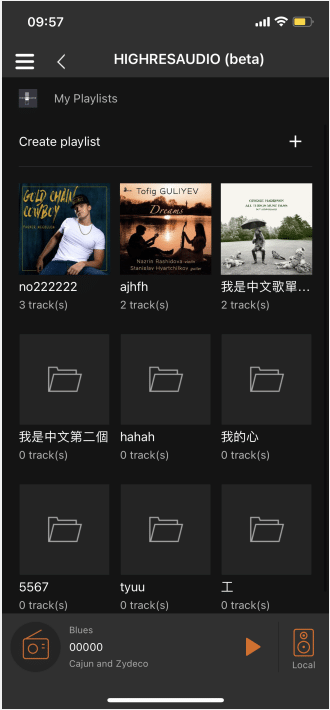
3.5.1.3. My Playlists
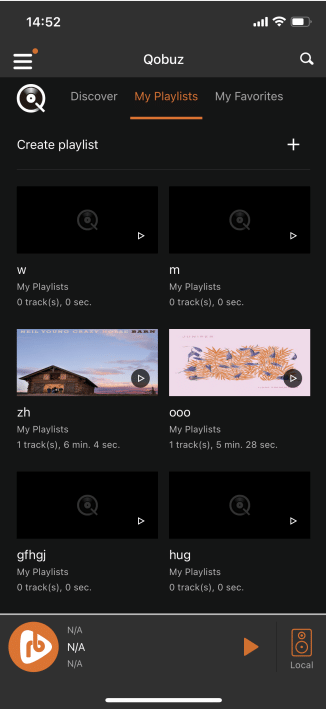
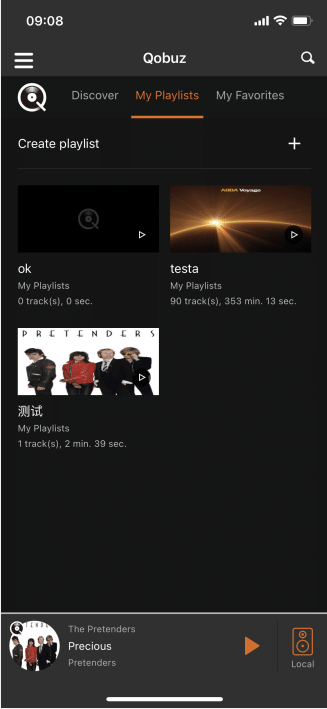
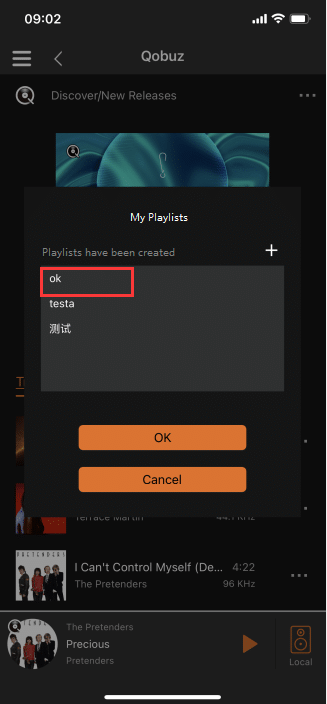
Click "My Playlists" in the upper menu to enter the "My Playlists" interface .
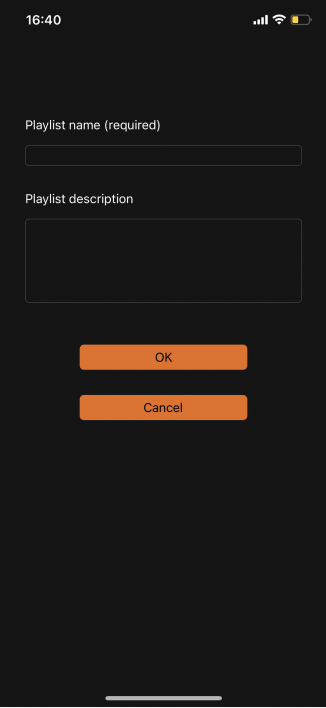
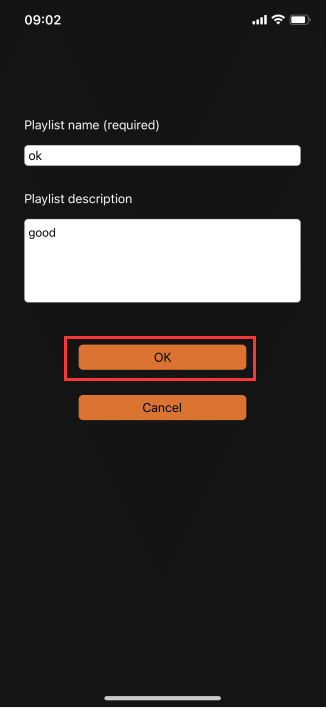
3.5.1.3.1. Create Playlists
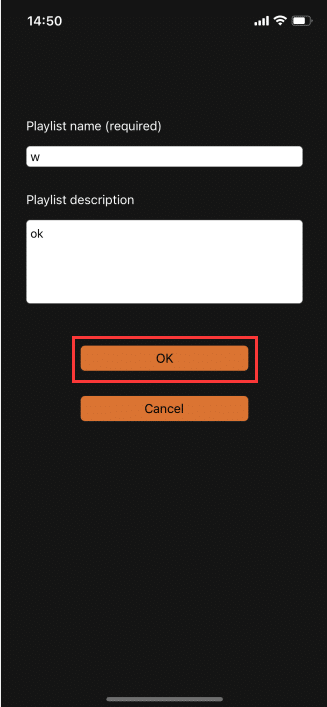
Click the "+" on the right side of the playlist to enter the "Create Playlists" interface.
After filling in the "List Name", click "OK", and you can see the "Newly Created Playlists" on the "My Playlists" interface .
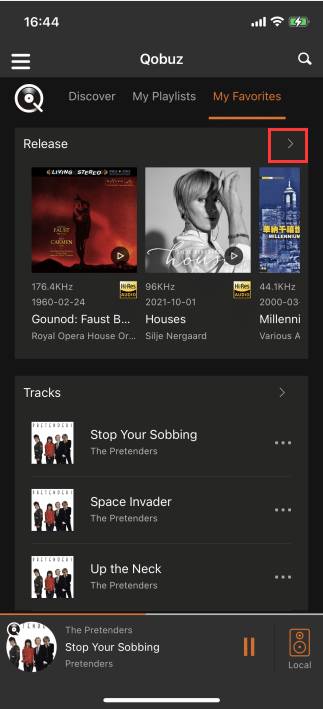
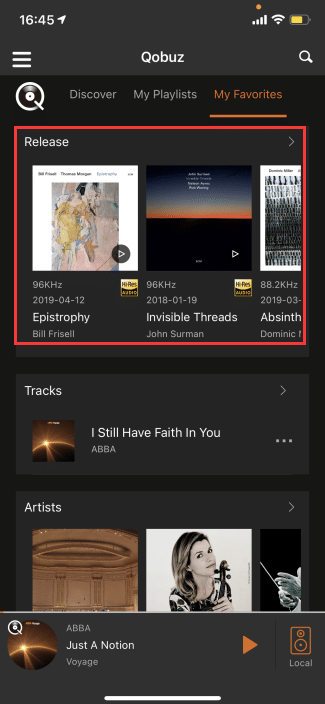
3.5.1.4. My Favorites
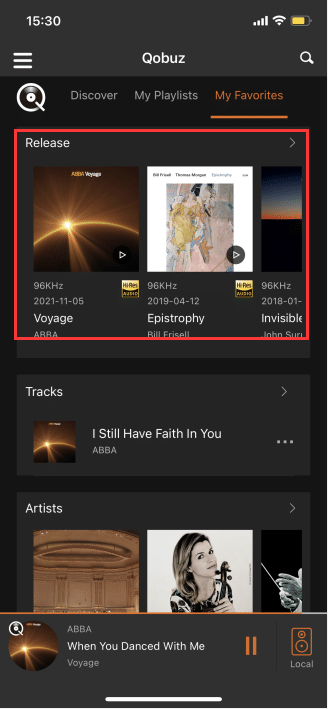
Click "My Favorites" in the upper menu to enter the "My Favorites" interface .
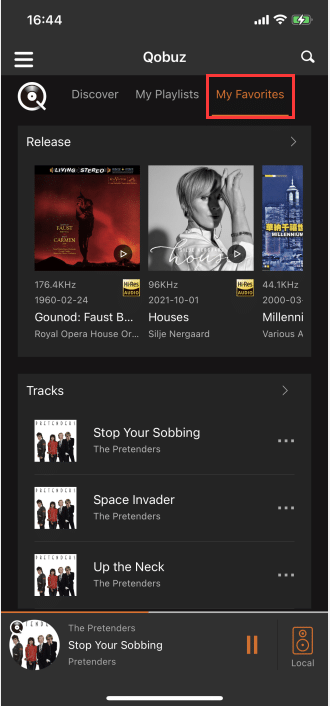
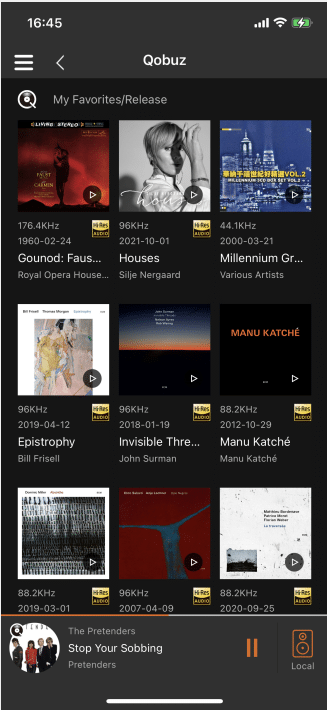
3.5.1.4.1. Release
Click ">" on the right side of "Release " to enter the "All Release" interface of your favorites .
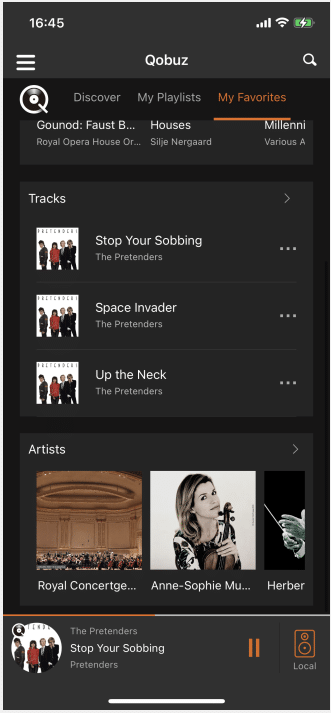
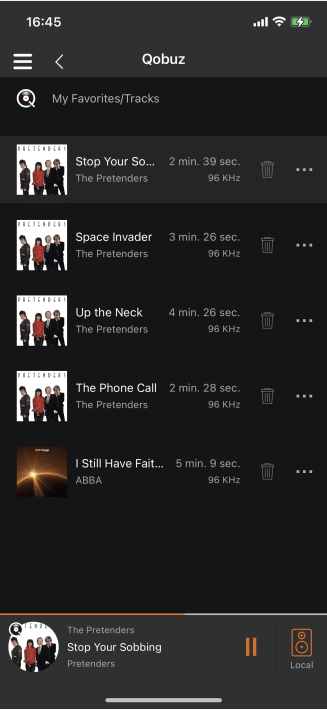
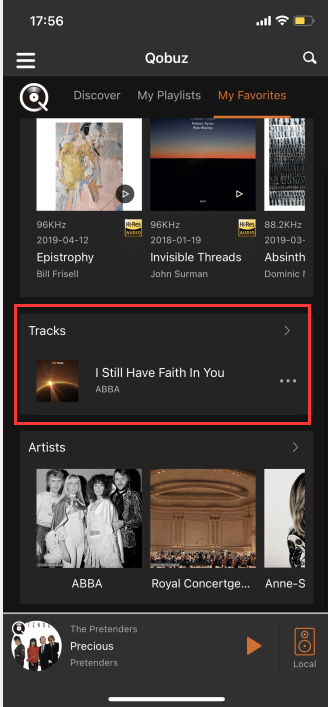
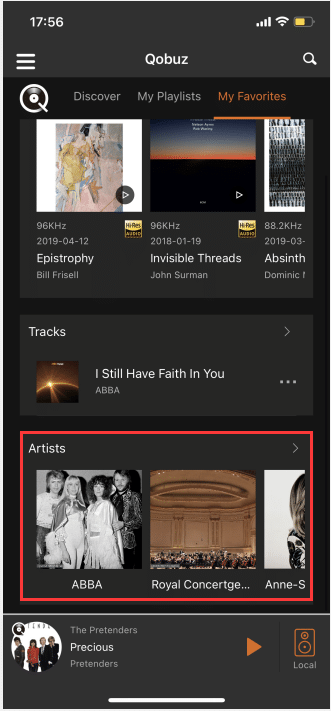
3.5.1.4.2. Tracks
Click ">" on the right side of "Tracks " to enter the "All Tracks" interface of the track .
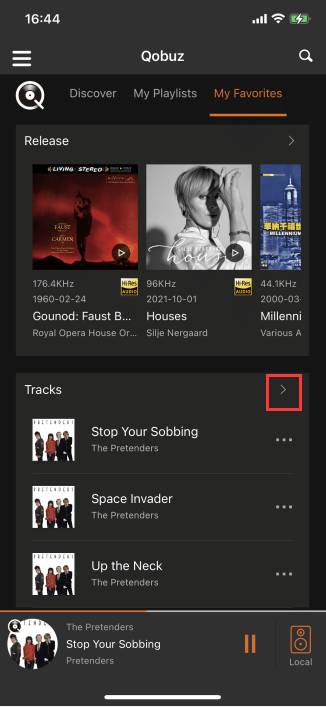
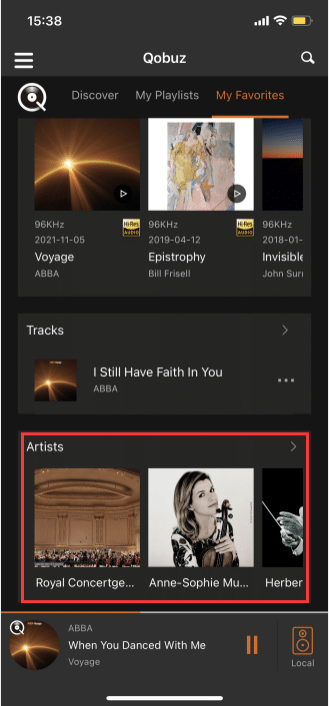
3.5.1.4.3. Artists
Click the ">" on the right side of "Artists " to enter the "All Artists" interface of the collection .
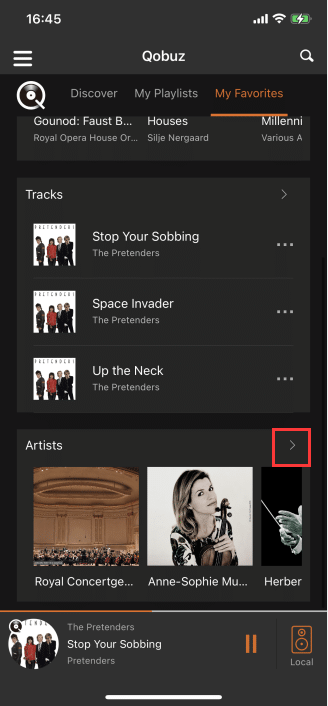
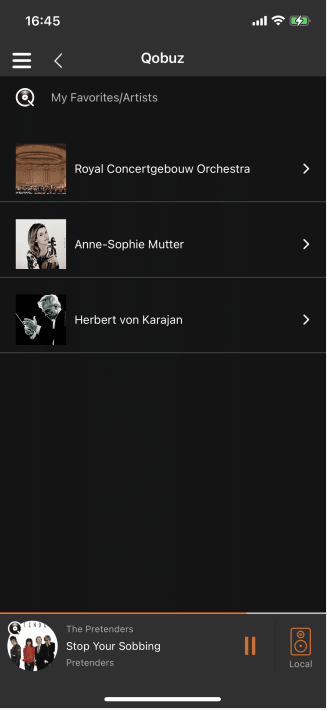
On the "All Artists" interface, click any "Artists" to enter the "Artist's Release" interface .

3.5.1.5. Play Operation
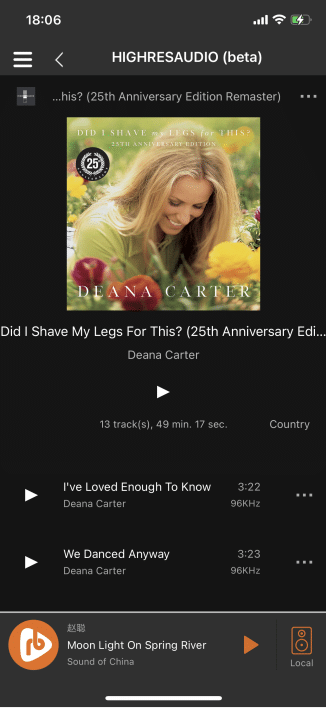
In the "Qobuz Online Music " interface, click any "Album" or "Playlist " ,Enter the corresponding "Album Track " or "Playlist" interface .
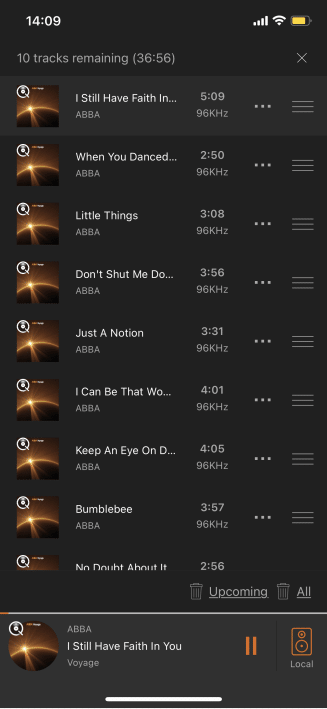
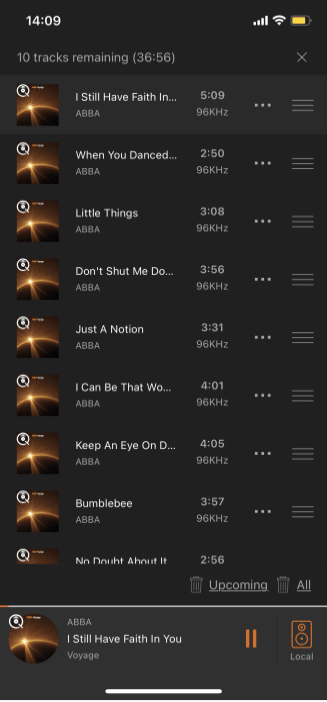
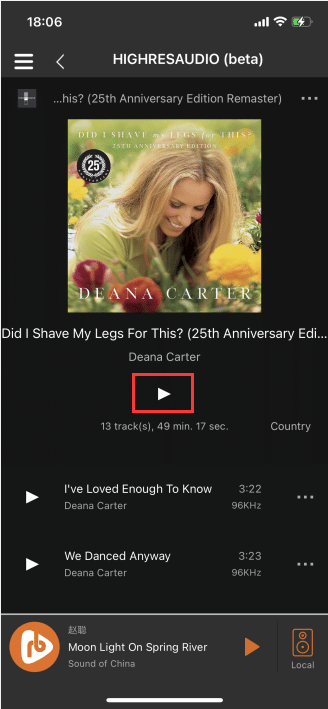
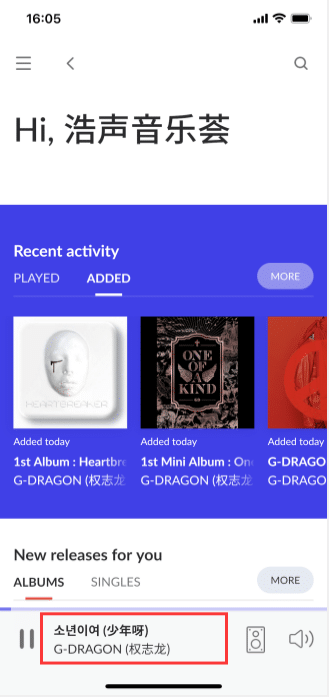
![]() On the "Album Track" or "Playlist" interface, click the " " button to add the current "Album" or "Playlist" All songs in the "Play Queue" will be played in the current "Album" or "Playlist" in sequence by default.(Note: "Play Queue" is displayed in Step 3.6.2.6)
On the "Album Track" or "Playlist" interface, click the " " button to add the current "Album" or "Playlist" All songs in the "Play Queue" will be played in the current "Album" or "Playlist" in sequence by default.(Note: "Play Queue" is displayed in Step 3.6.2.6)
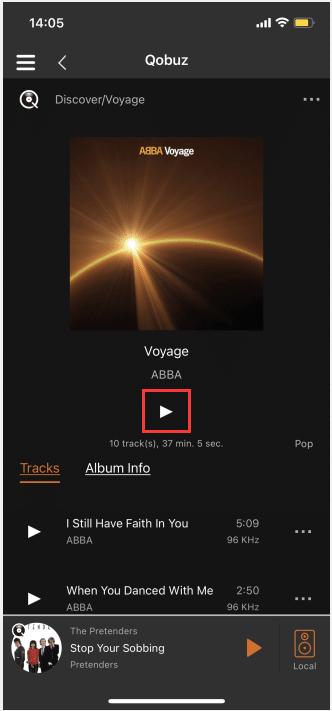

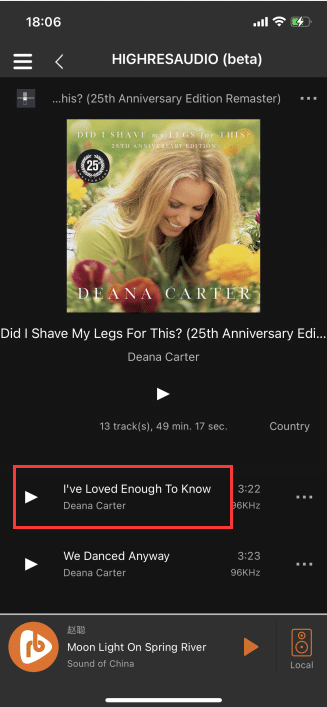
On the "Album Track" or "Playlist" interface, click "Song" to play the corresponding song.
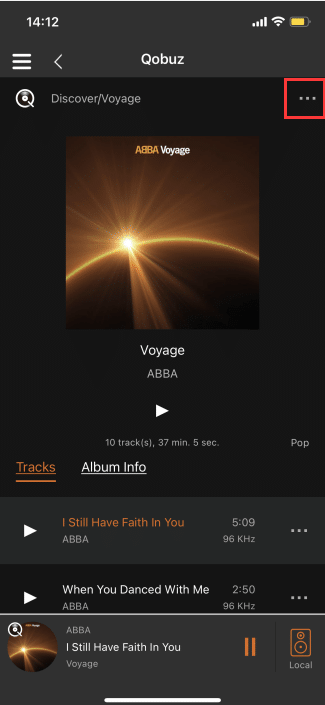
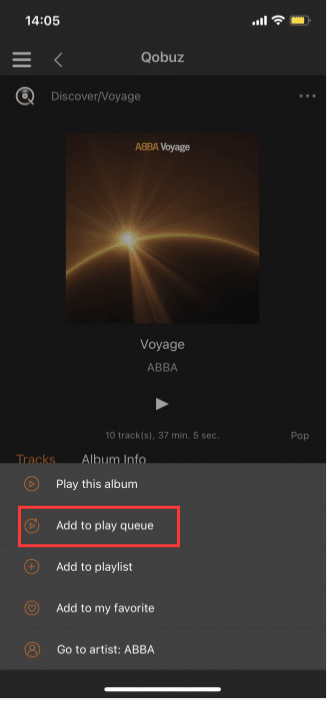
3.5.1.5.1. Album Operation
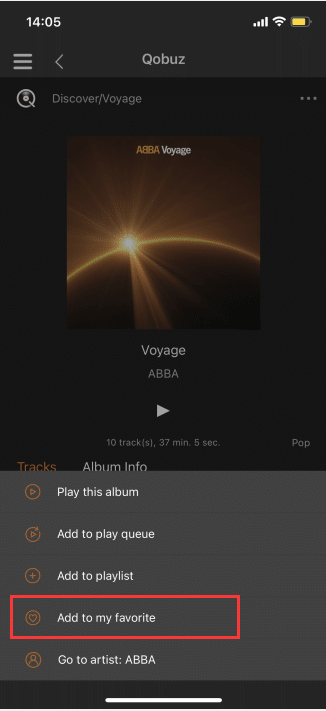
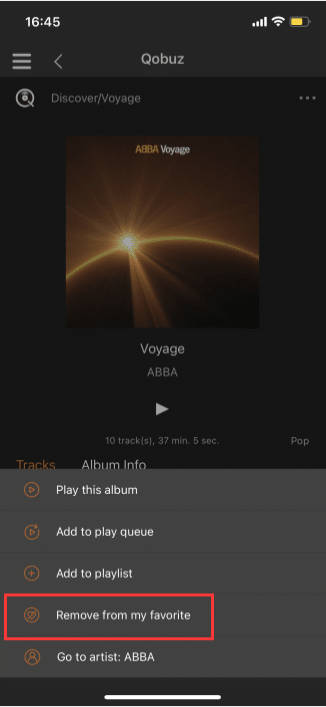
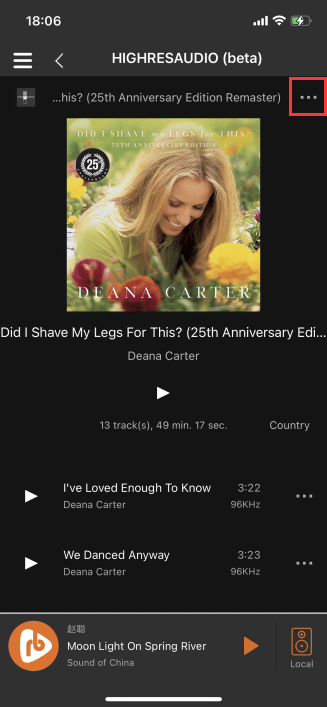
Click "..." on the upper right of the album, and perform corresponding operations on the album according to the pop-up content.
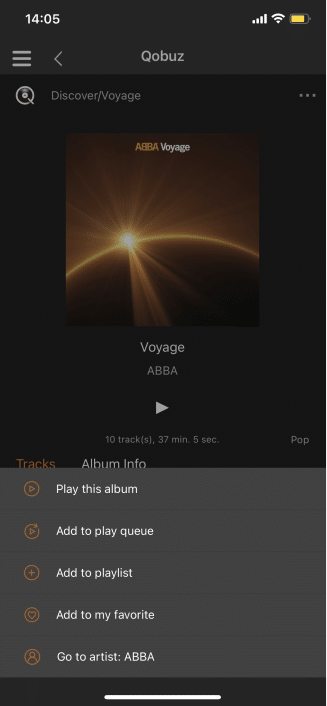
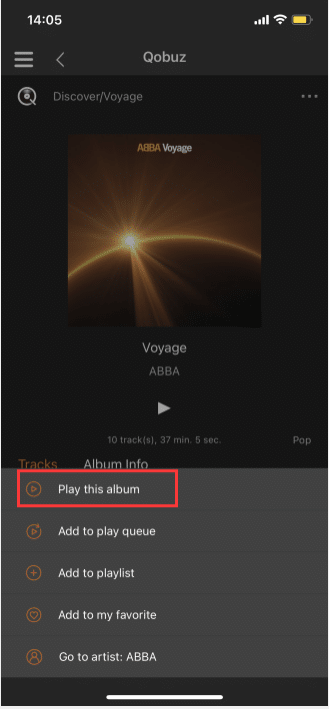
3.5.1.5.1.1. Play This Album
Click "Play this album" to add all the songs in the current album to the "Play Queue", the default starts in order Play all songs in the current "album". (Note: "Play Queue" is displayed in Step 3.6.2.6)
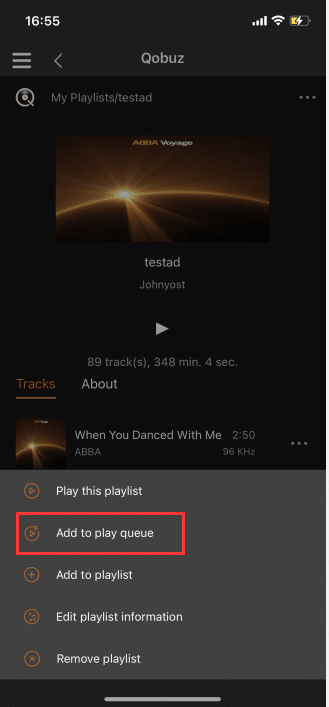
3.5.1.5.1.2. Add To Play Queue
Click "Add to Play Queue" to add all the songs in the current album to the "Play Queue".(Note: "Play Queue" is displayed in Step 3.6.2.6)
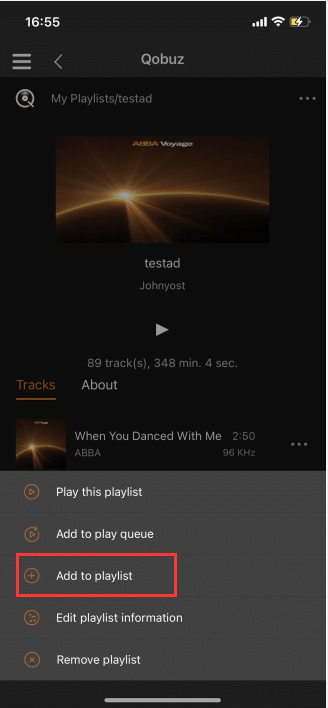
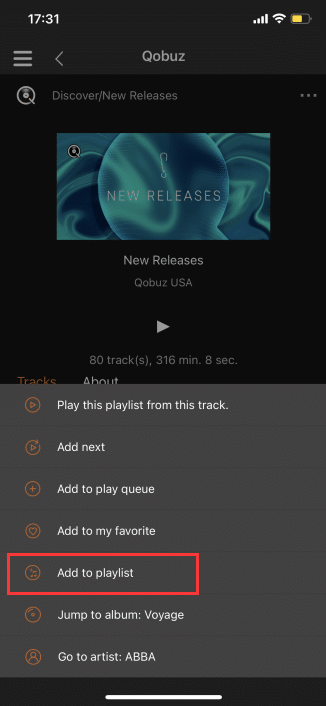
3.5.1.5.1.3. Add To Playlist
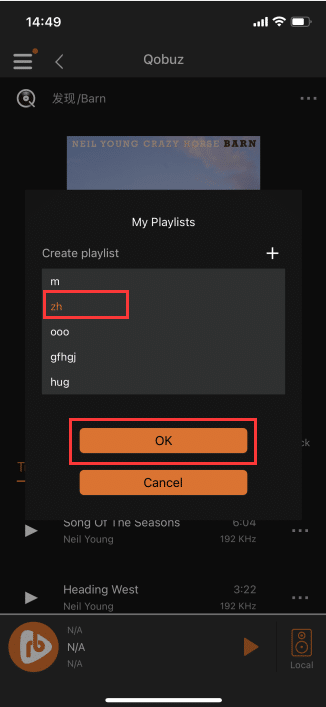
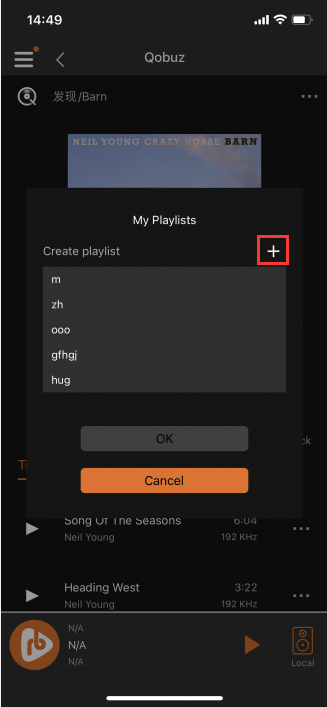
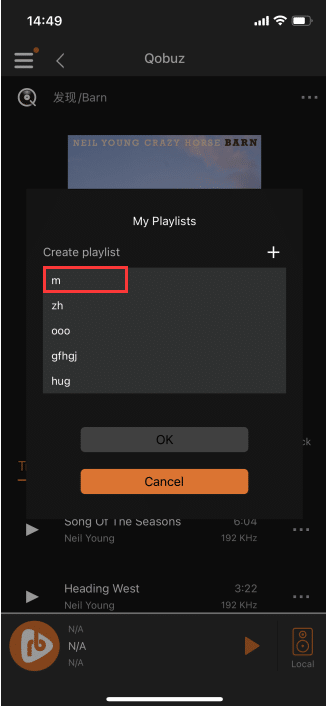
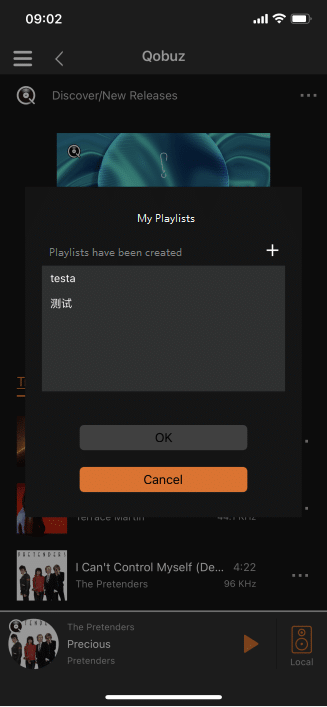
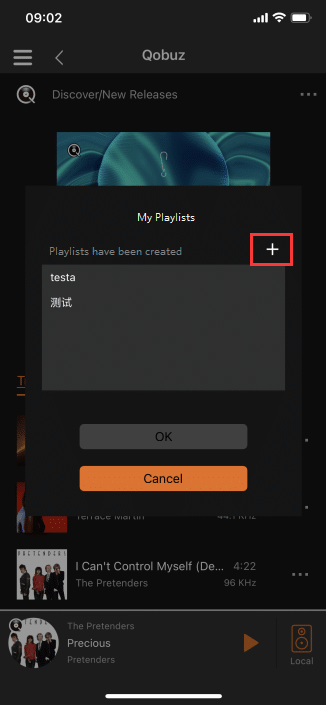
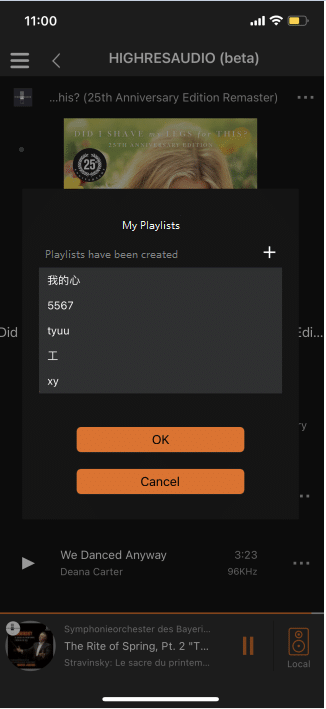
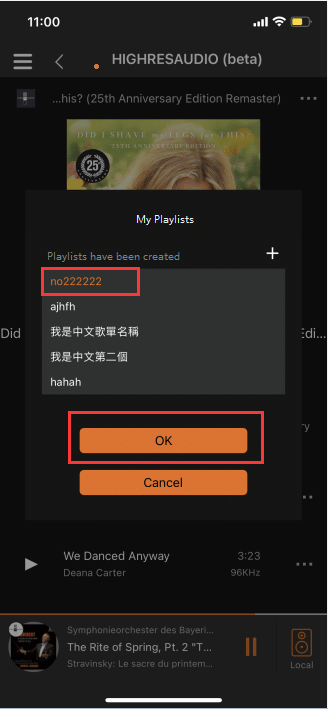
Click "Add to Playlist" to pop up the "My Playlists" list.
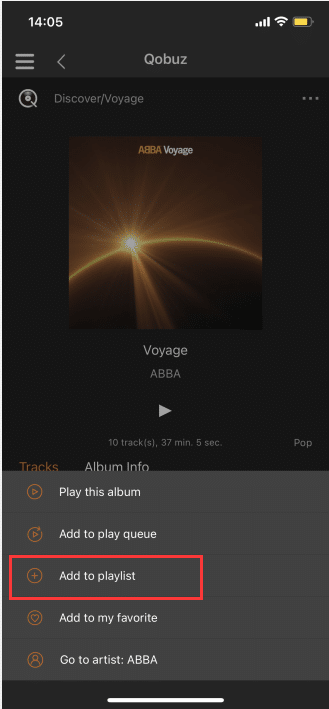
In the "My Playlists" list, select any playlist, click "OK", and add all songs in the album to the selected "playlist",In "My Playlists", you can see the newly added song in the selected "Playlist".(Note: "My Playlists" is displayed in Step 3.5.1.3)

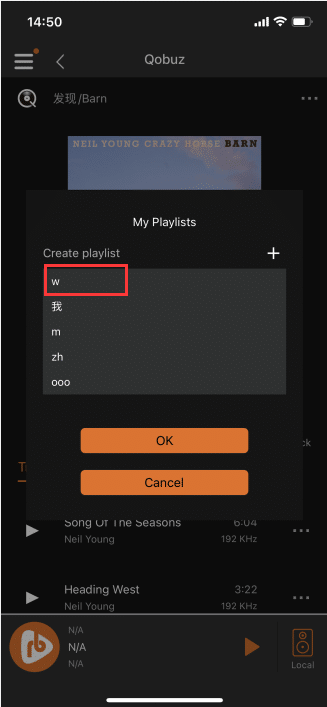
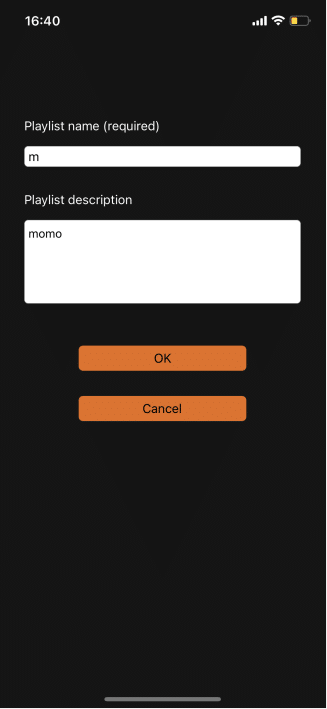
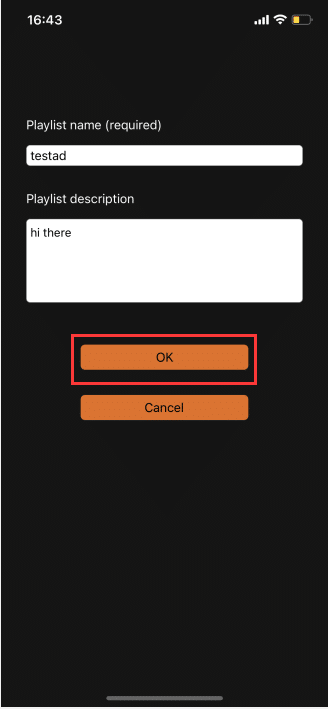
3.5.1.5.1.3.1. Create Playlists
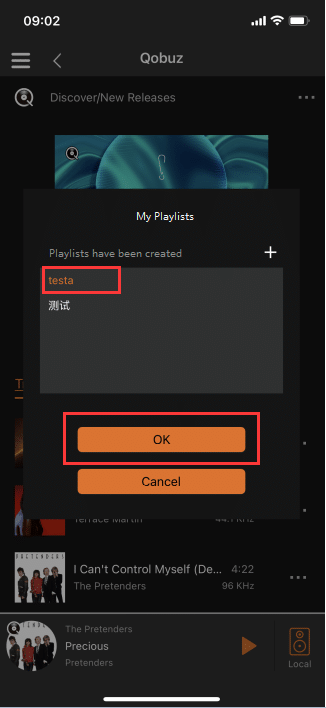
In the "My Playlists" list, click the "+" button in the upper right corner to create a playlist.

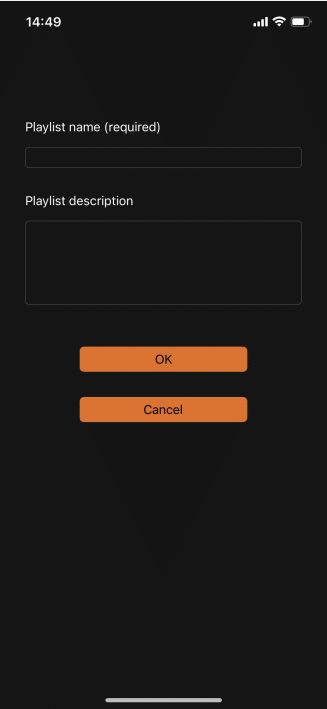
After filling in the "list name", click the "OK" button to switch to the "My Playlists" list.
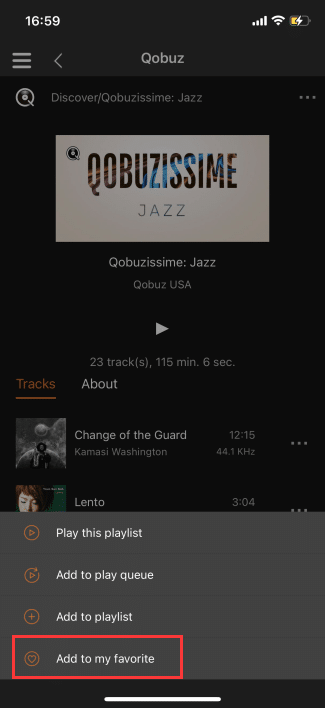
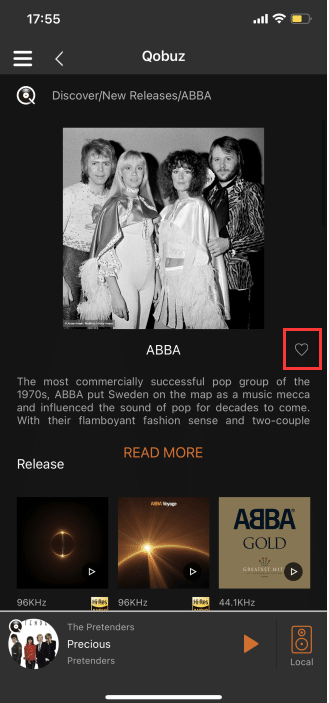
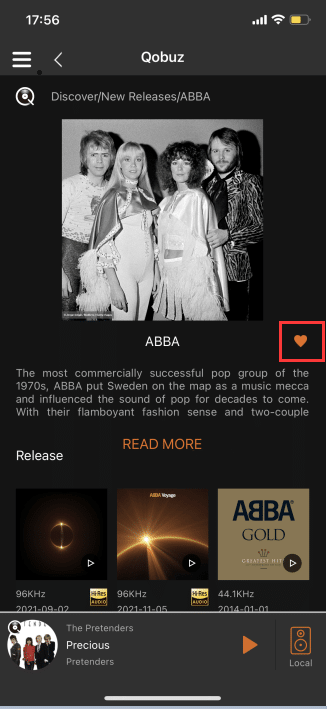
3.5.1.5.1.4. Add To My Favorite
Click "Add to My Favorite" to add the current album to "Release" in "My Favorites".
(Note: "Release" is displayed in Step 3.5.1.4.1)
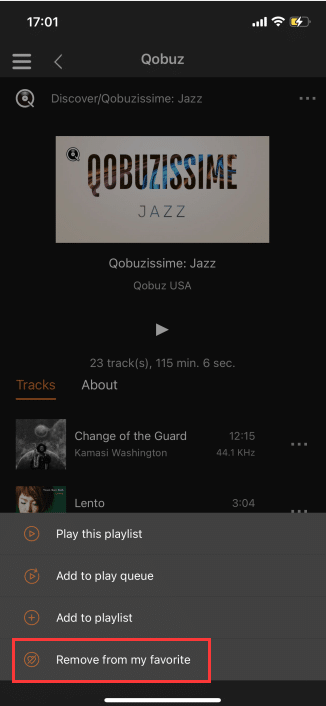
3.5.1.5.1.5. Remove From My Favorite
Click "Remove from My Favorite" to remove the current album from "Release" in "My Collection".
(Note: "Release" is displayed in Step 3.5.1.4.1)
3.5.1.5.1.6. Jump To Artist
Click "Add to Artist" to add the artist of the current album to "Artists" in "My Collection".(Note: "Artists" is displayed in Step 3.5.1.4.3)
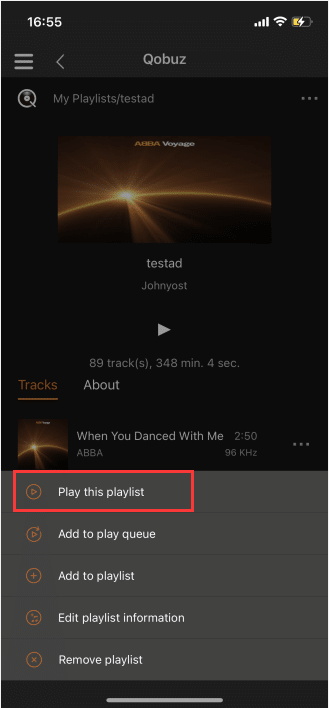
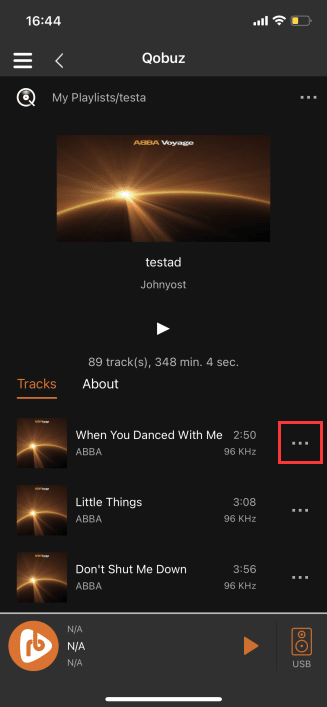
3.5.1.5.2. Playlist Operations
Click "..." at the top right of the playlist, and perform corresponding operations on the playlist according to the pop-up content.
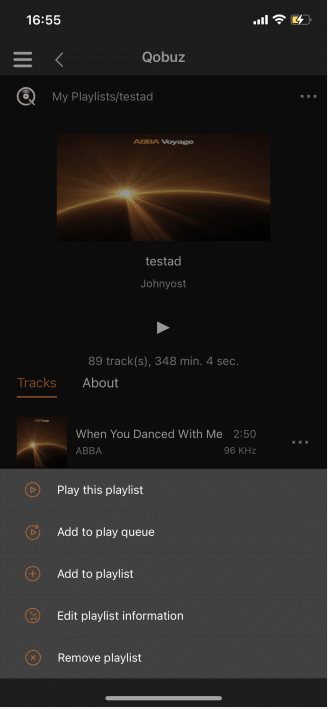
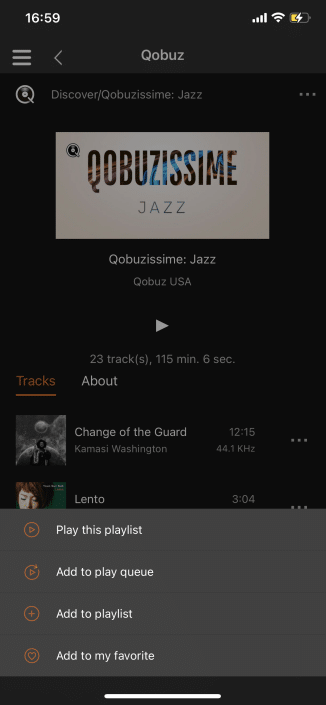
3.5.1.5.2.1. Play This Playlist
Click "Play this playlist" to add all the songs in the current playlist to the "Play Queue", By default, all songs in the current Playlist start playing in sequence. (Note: "Play Queue" is displayed in Step 3.6.2.6)
3.5.1.5.2.2. Add To Play Queue
Click "Add to Play Queue" to add all the songs in the current playlist to the "Play Queue".(Note: "Play Queue" is displayed in Step 3.6.2.6)

3.5.1.5.2.3. Add To Playlist
Click "Add to Playlist" to pop up the "My Playlists" list.

In the "My Playlists" list, select any playlist, click "OK", and add all songs in the album to the selected "playlist",In "My Playlists", you can see the newly added song in the selected "Playlist".(Note: "My Playlists" is displayed in Step 3.5.1.3)

3.5.1.5.2.3.1. Create Playlists
In the "My Playlists" list, click the "+" button in the upper right corner to create a playlist.

After filling in the "list name", click the "OK" button to switch to the "My Playlists" list.
3.5.1.5.2.4. Add To My Favorite
Click "Add to Favorite" to add the current playlist to "My Playlists".(Note: "My Playlists" is displayed in Step 3.5.1.3)
3.5.1.5.2.5. Remove From My Favorite
Click "Remove from My Favorite" to remove the current playlist from "My Playlists".(Note: "My Playlists" is displayed in Step 3.5.1.3)
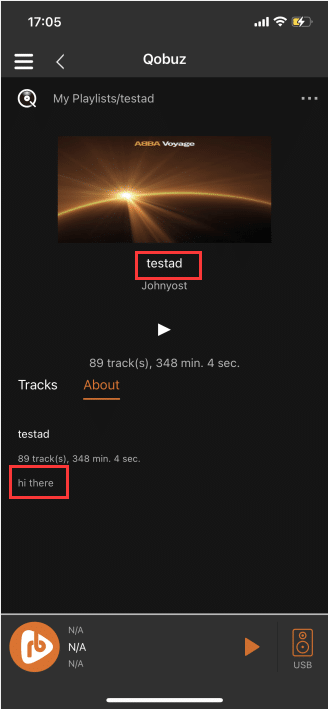
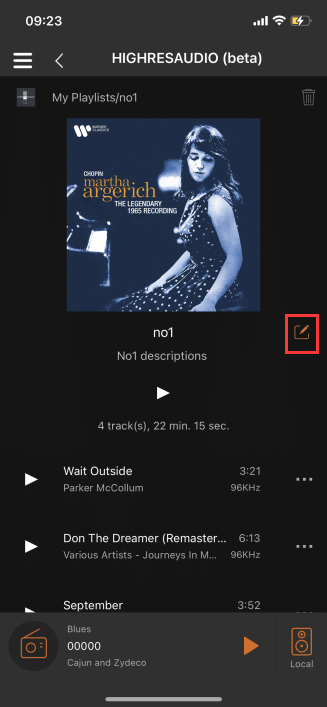
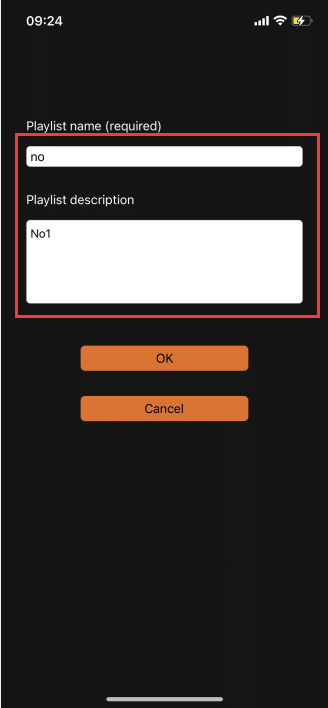
3.5.1.5.2.6. Edit Playlist Information
Click "Edit Playlist Information " to enter the "Edit Playlist " interface .
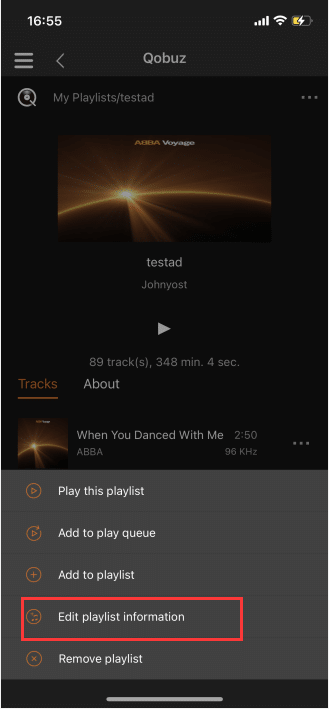
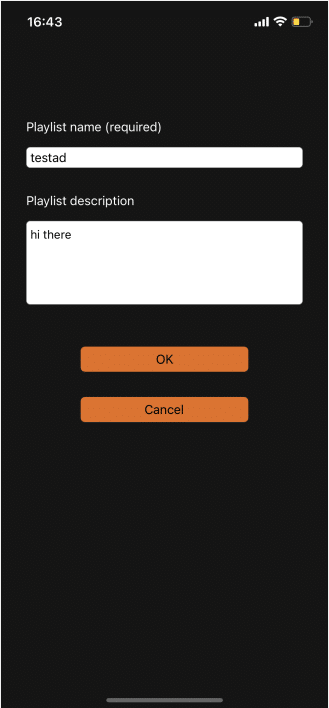
After refilling the " Playlist Information ", click "OK" to switch to the "Playlist" interface, and you can see the edited "List Name" and "List Description".
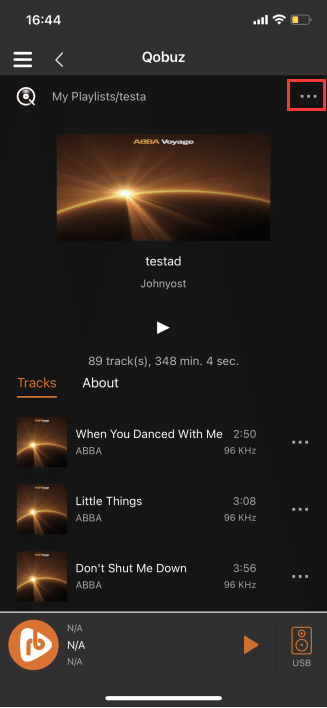
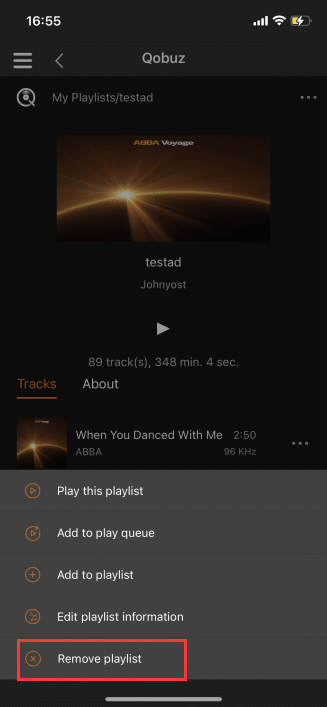
3.5.1.5.2.7. Remove Playlist
Click "Remove Playlist" , switch to " My Playlists ", and delete the current playlist in "My Playlist".
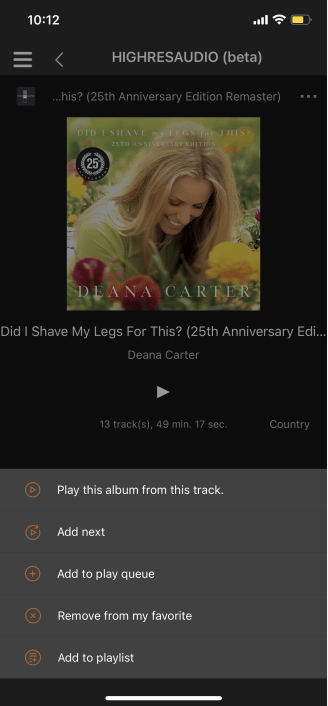
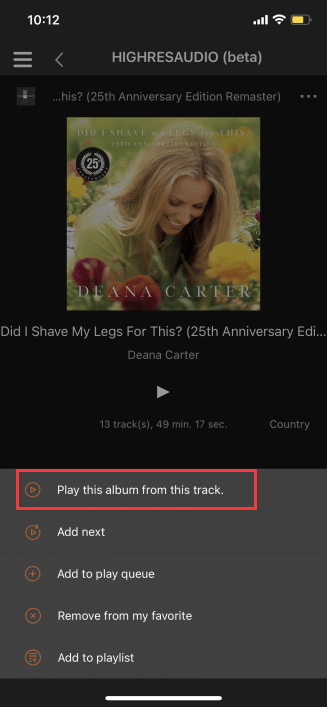
3.5.1.5.3. Song Operation
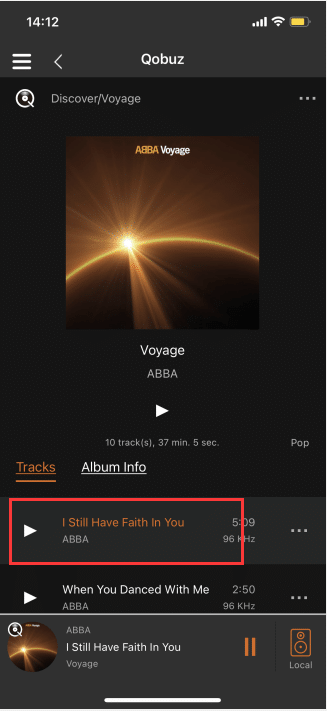
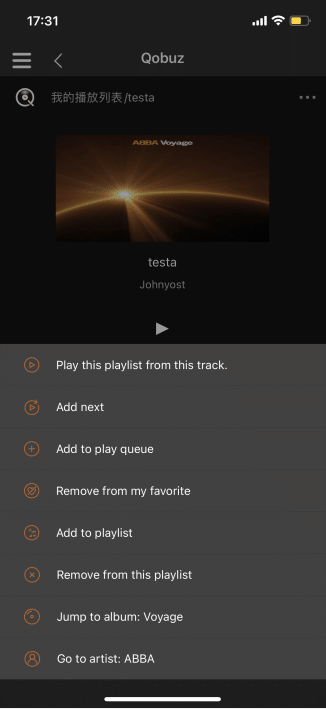
On the "Album Tracks" or "Playlist" interface, click "..." to the right of the song, and perform corresponding operations on the current song according to the pop-up content.

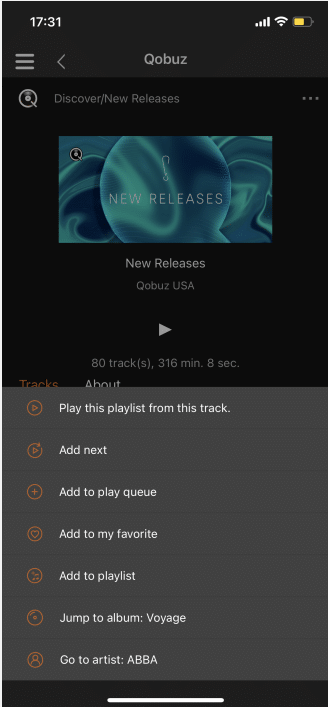
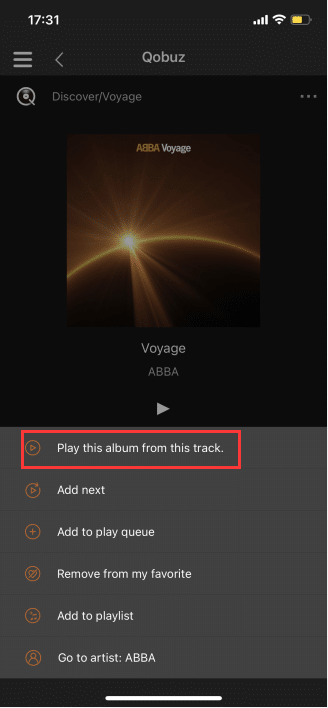
3.5.1.5.3.1. Play This Album From This Track
Click "Play this album from this track" to add all songs in order from the current song to the "Play Queue" Plays all songs of the "album" in order, starting with the current song. (Note: "Play Queue" is displayed in Step 3.6.2.6)
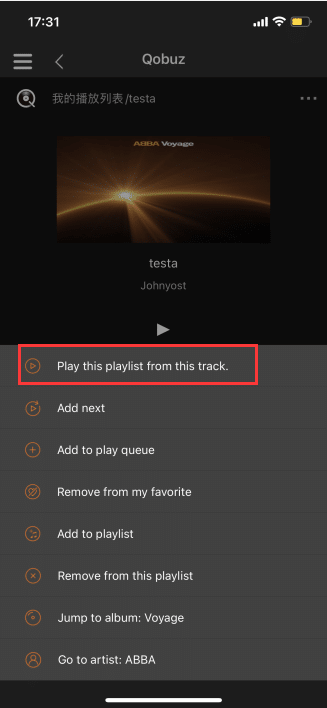
3.5.1.5.3.2. Play This Playlist From This Track
Click "Play this playlist from this track" to add all songs in order from the current song to the "Play Queue" Playlist in order, starting with the current song. (Note: "Play Queue" is displayed in Step 3.6.2.6)

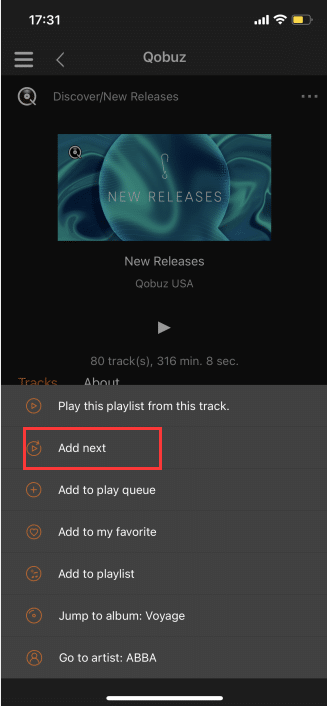
3.5.1.5.3.3. Add Next
Click "Add Next" to add the selected song to the play queue. After the "Song Now Playing" finishes playing, the selected song will be played.(Note: "Play Queue" is displayed in Step 3.6.2.6)

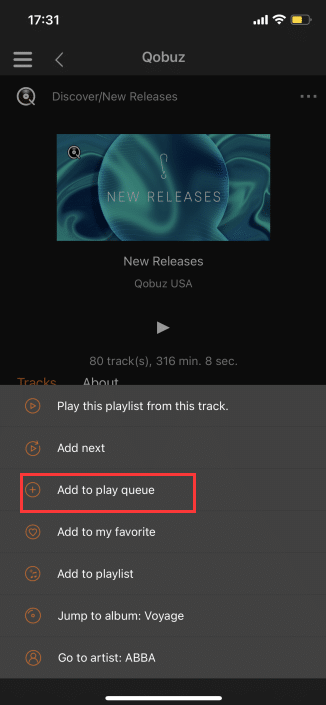
3.5.1.5.3.4. Add To Play Queue
Click "Add to Play Queue" to add the selected songs to the "Play Queue".(Note: "Play Queue" is displayed in Step 3.6.2.6)

3.5.1.5.3.5. Add To My Favorite
Click "Add to My Favorites" to add the selected songs to "Tracks" of "My Favorites".(Note: "Tracks" is displayed in Step 3.5.1.4.2)

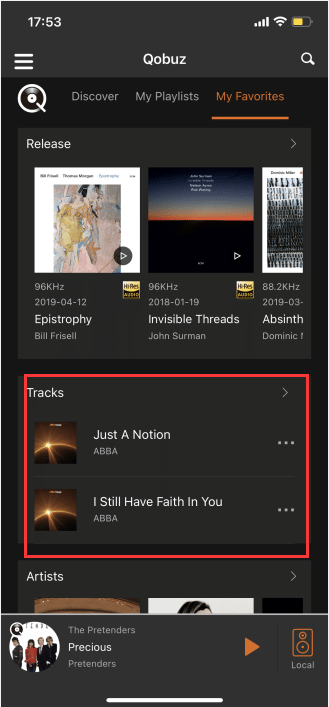
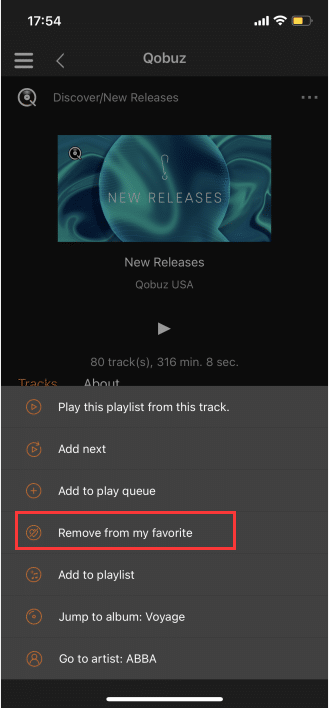
3.5.1.5.3.6. Remove From My Favorite
Click "Remove from My Favorite" to remove the selected song from the "Tracks" in "My Favorites".
(Note: "Tracks" is displayed in Step 3.5.1.4.2)
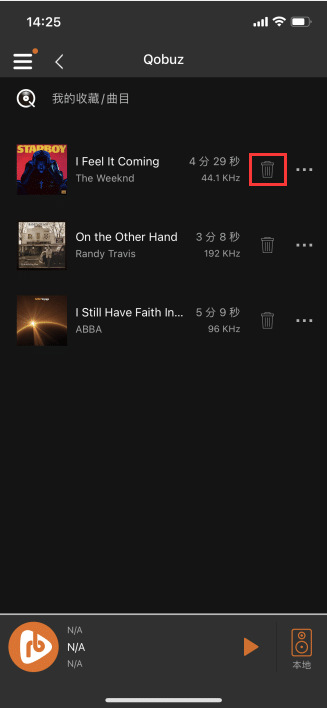
In the "Tracks" interface of "My Favorites", click the "Remove" button on the right side of the song to remove the "Tracks" from the "My Favorites" Remove the selected song from . (Note: "Tracks" is displayed in Step 3.5.1.4.2)
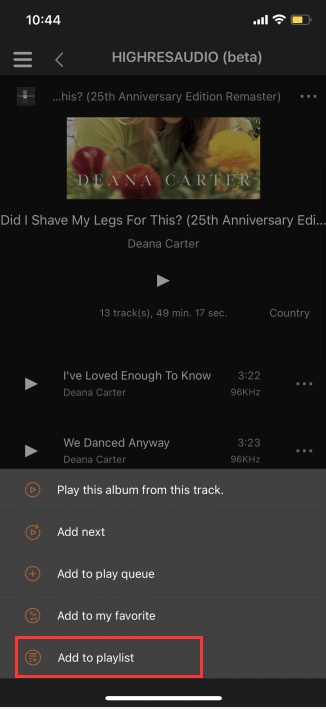
3.5.1.5.3.7. Add To Playlist
Click "Add to Playlist" to pop up the "My Playlists" list.
In the "My Playlist" list, select any playlist, click "OK", and add all songs in the album to the selected "playlist",In "My Playlists", you can see the newly added song in the selected "Playlist".(Note: "My Playlists" is displayed in Step 3.5.1.3)
3.5.1.5.3.7.1. Create Playlists
In the "My Playlists" list, click the "+" button in the upper right corner to create a playlist.
After filling in the "list name", click the "OK" button to switch to the "My Playlists" list.
3.5.1.5.3.8. Remove From This Playlist
Click "Remove from this playlist" to remove the current song from "My Playlists".(Note: "My Playlists" is displayed in Step 3.5.1.3)
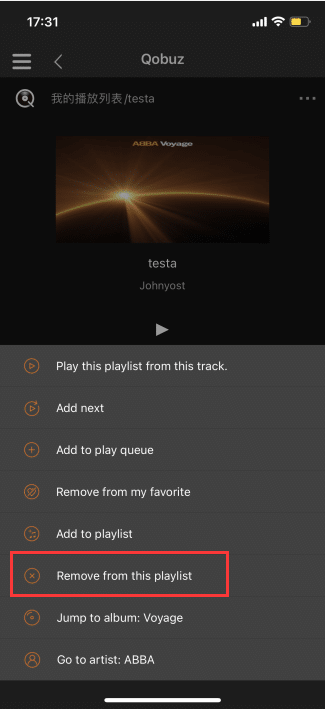
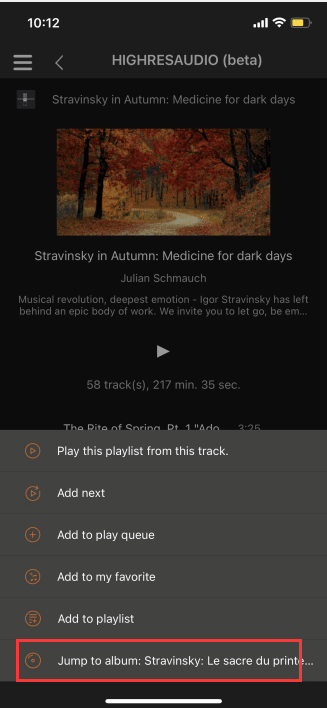
3.5.1.5.3.9. Jump To Album
Click "Jump to album: ****" to enter the "Album" interface of the selected song.
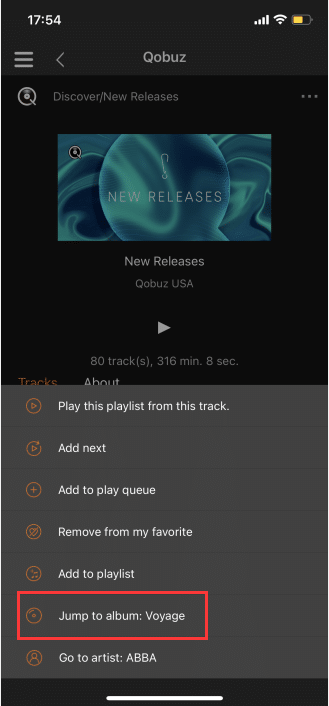
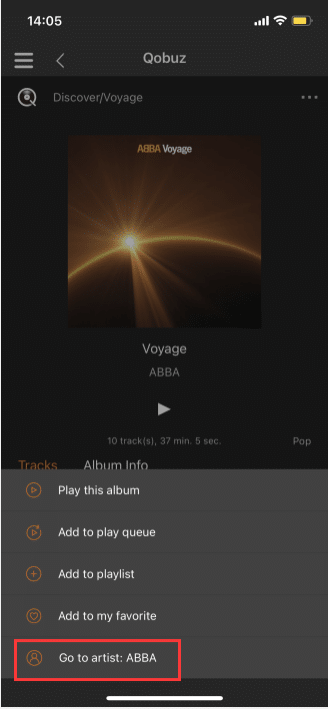
3.5.1.5.3.10. Go To Artist
Click "Go to Artist: ****" to enter the "Artist Release" interface of the selected song.
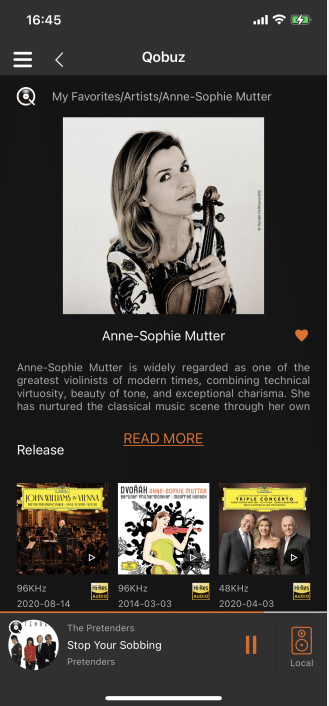
3.5.1.5.3.10.1. Collection Artist
![]()
![]() Highlight " " in the upper right corner of the album, add the current artist to "Artists" in "My Favorites", click " " again,Then the current artist will be deleted from "Artists" in "My Collection". (Note: "Artists" is displayed in Step 3.5.1.4.3)
Highlight " " in the upper right corner of the album, add the current artist to "Artists" in "My Favorites", click " " again,Then the current artist will be deleted from "Artists" in "My Collection". (Note: "Artists" is displayed in Step 3.5.1.4.3)
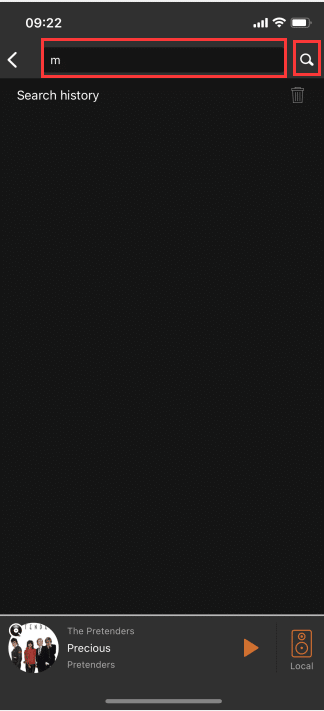
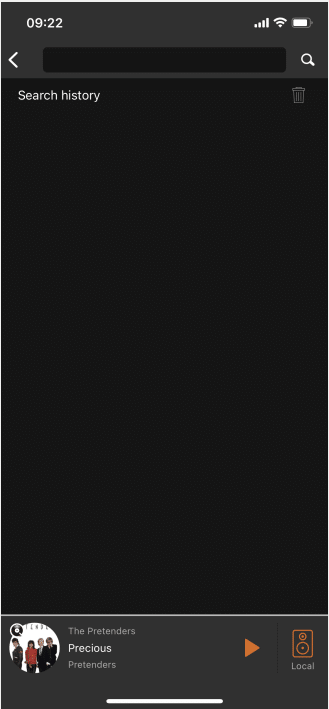
3.5.1.6. Search
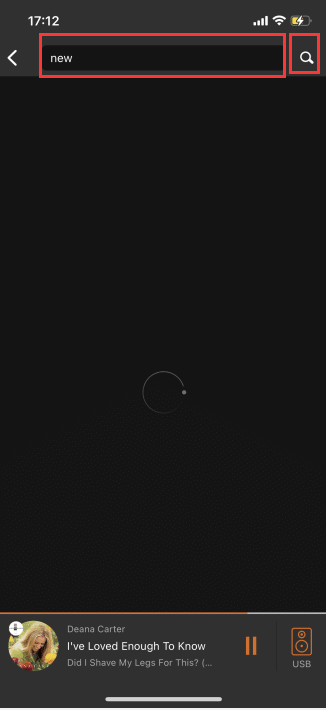
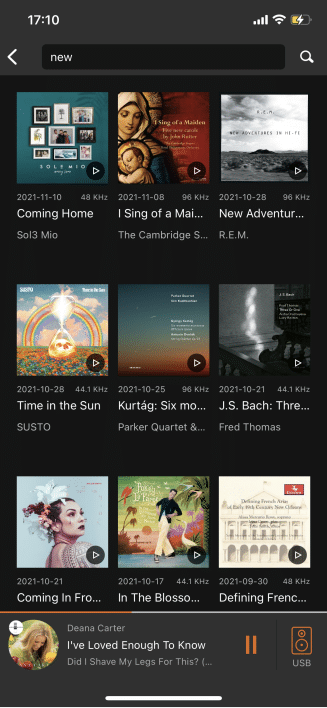
Click the "Search" button in the upper right corner to enter the "Search" interface .

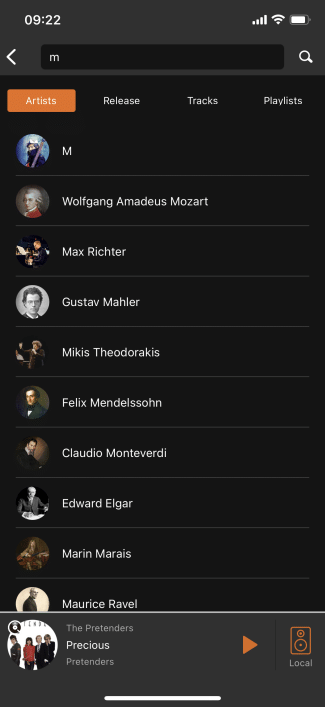
In the "Search" interface, enter the content to be searched, and click the "Start Search" button to view and search the content.Matching artists, releases, tracks, playlists .

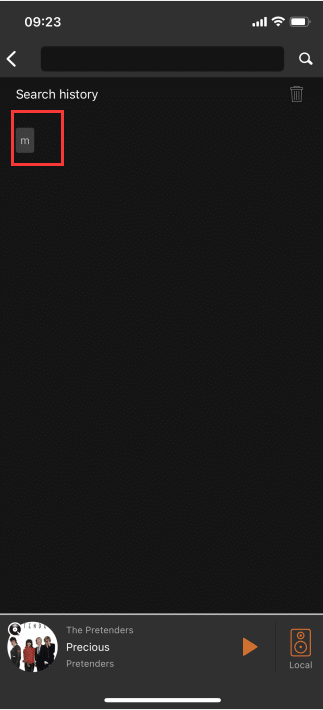
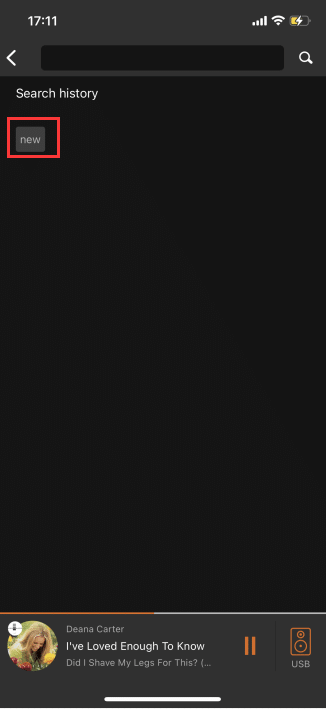
After searching, you can see "Search History" on the "Search" interface. Click any search content to start the search again based on the search content .
3.5.2. HIGHRESAUDIO
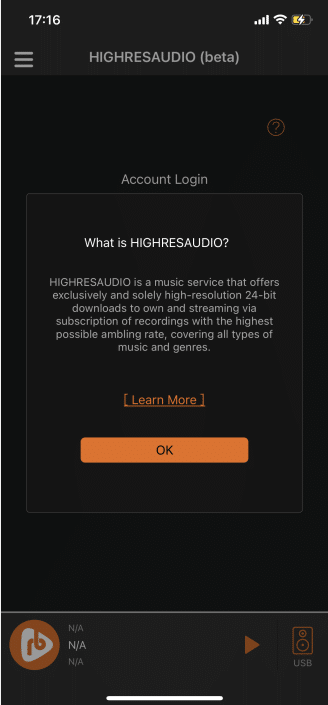
Click "HIGHRESAUDIO" to enter the "HIGHRESAUDIO login" interface .
Click the "?" button in the upper right corner to pop up the "What is HIGHRESAUDIO? " interface.

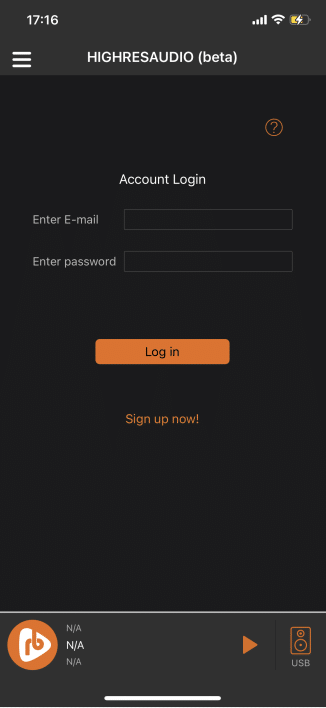
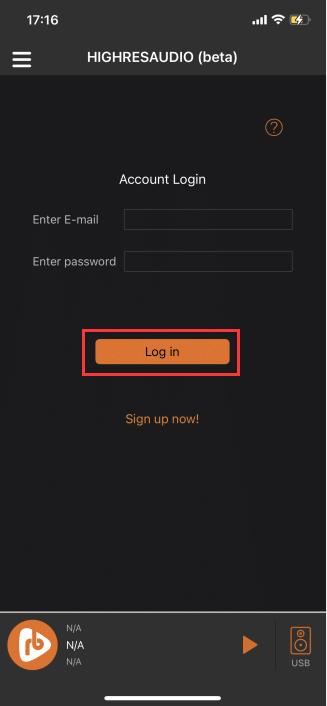
3.5.2.1. HIGHRESAUDIO Login
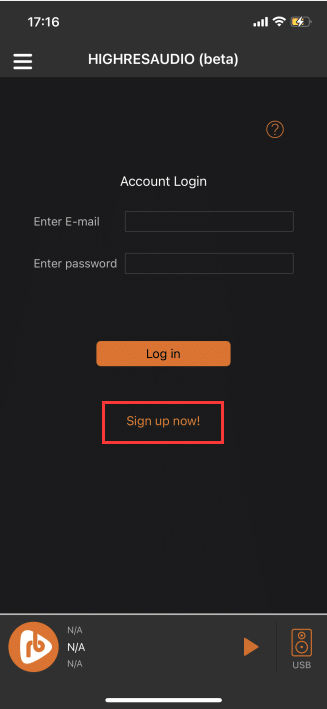
If you do not have a "HIGHRESAUDIO account", click the "Sign up now!" button to jump to the " HIGHRESAUDIO official website " to register.
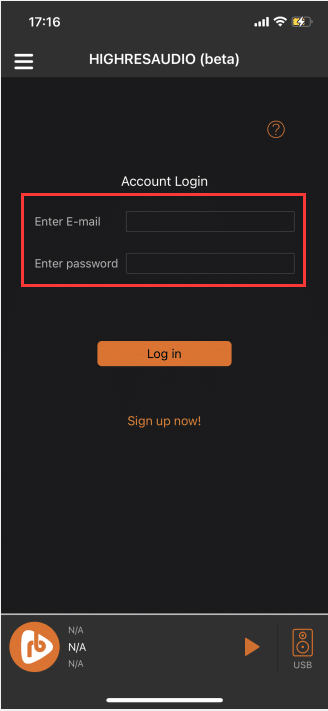
On the "HIGHRESAUDIO Login" interface, fill in the "Account" and "Password" of HIGHRESAUDIO .
After filling in the "Account" and "Password", click the "Log in" button, after successful login, you will enter the " Qobuz " online music interface .
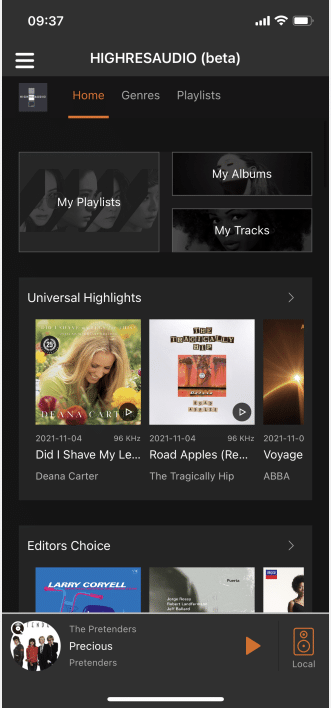
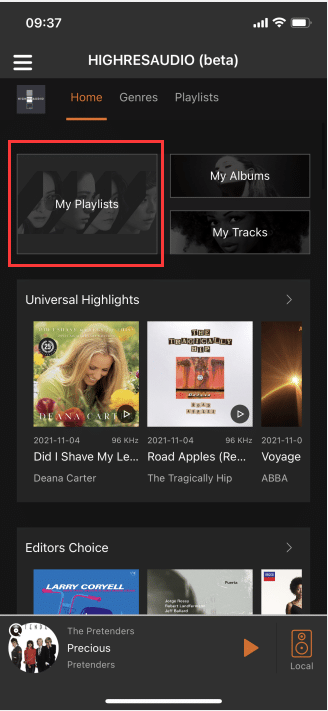
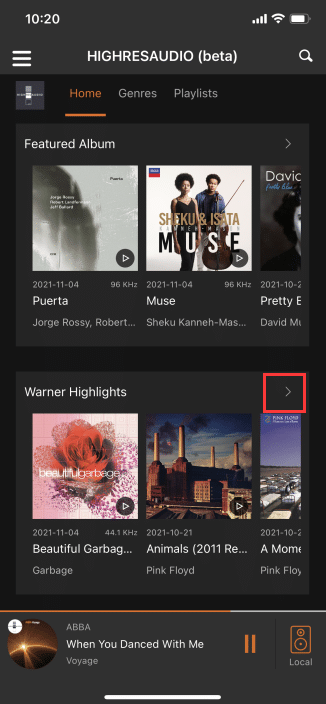
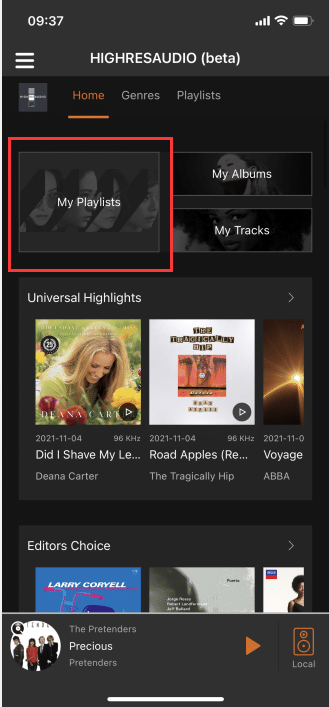
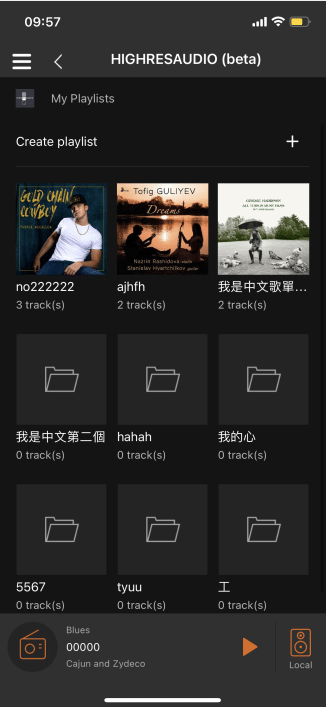
3.5.2.2. Home
After successful login , enter the "Home" interface, or click "Home" in the upper menu to enter this interface .


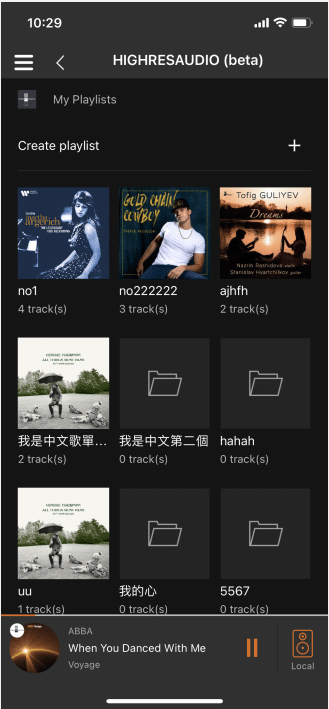
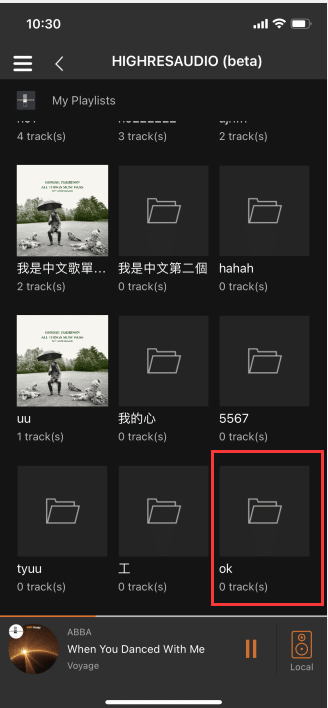
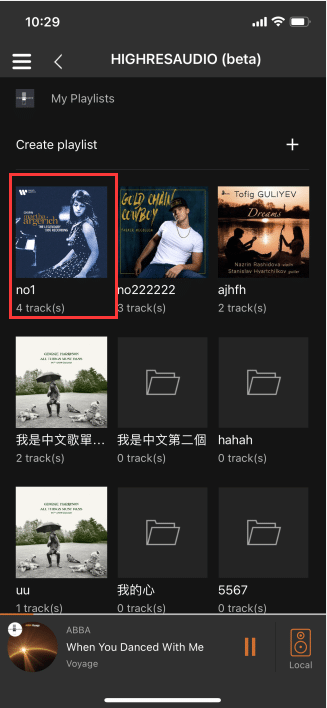
3.5.2.2.1. My Playlists
Click "My Playlists" to enter the "My Playlists" interface .
3.5.2.2.1.1. Create Playlist
Click the "+" on the right side of the playlist to enter the "Create Playlist" interface.
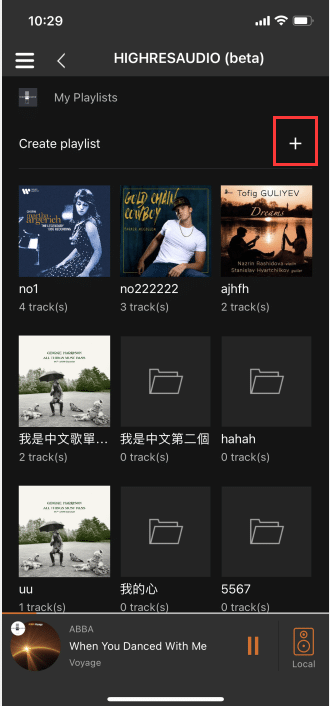
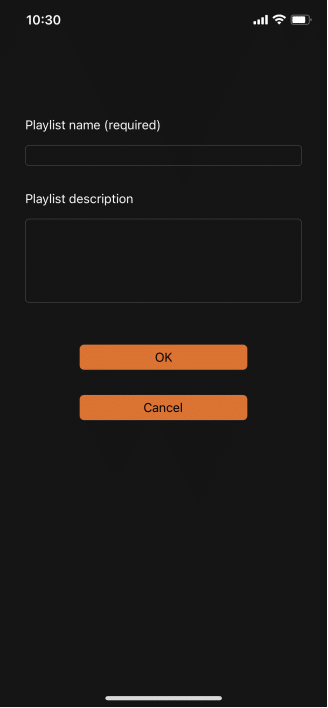
After filling in the "List Name", click "OK", and you can see the "Newly Created Playlist" on the "My Playlist" interface .
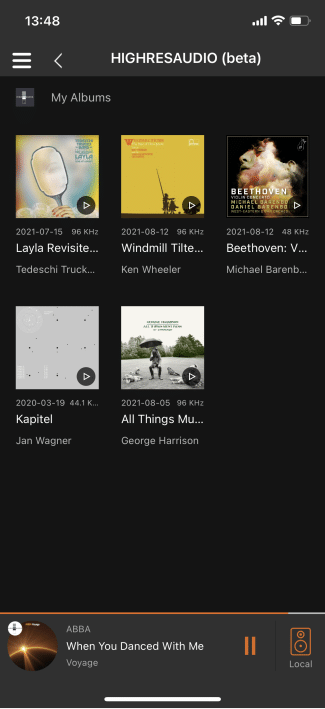
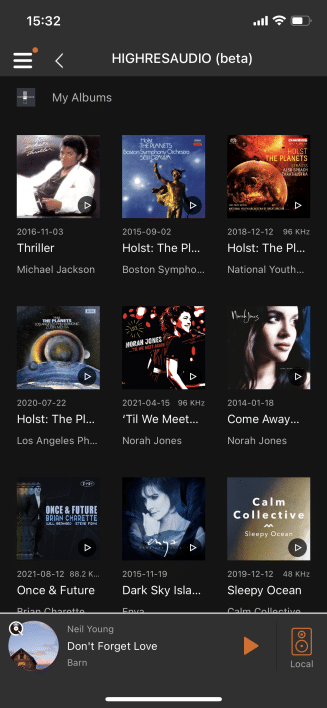
3.5.2.2.2. My Albums
Click "My Albums" to enter the "My Albums" interface .

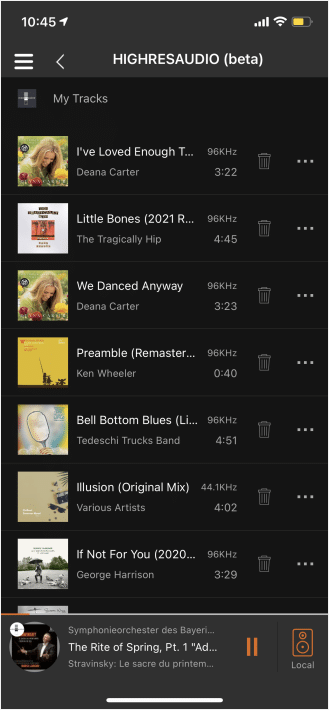
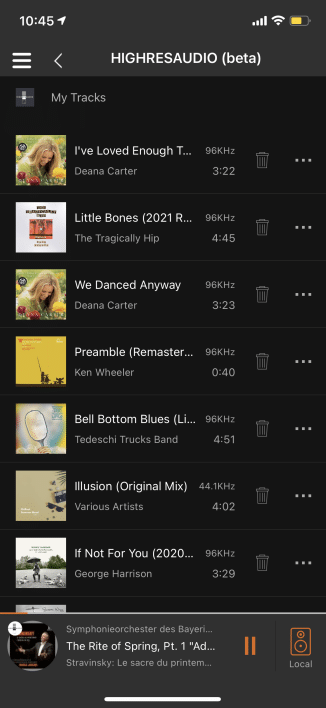
3.5.2.2.3. My Tracks
Click "My Tracks" to enter the "My Tracks" interface .

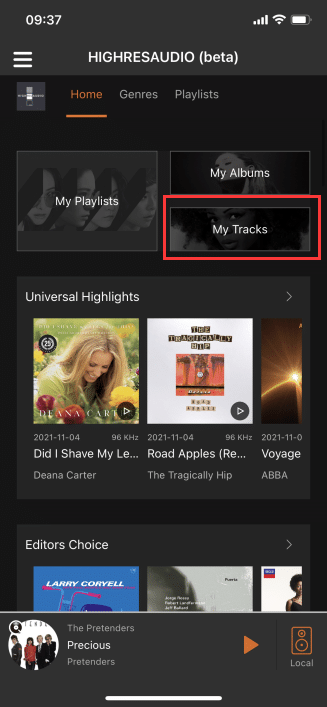
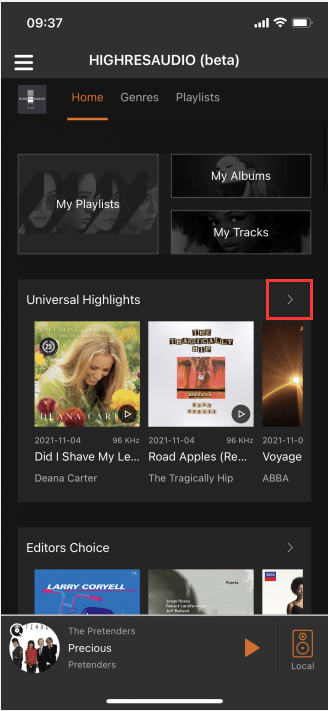
3.5.2.2.4. Universal Highlights
Click ">" on the right side of "Universal Highlights" to enter the "All Universal Highlights" interface .
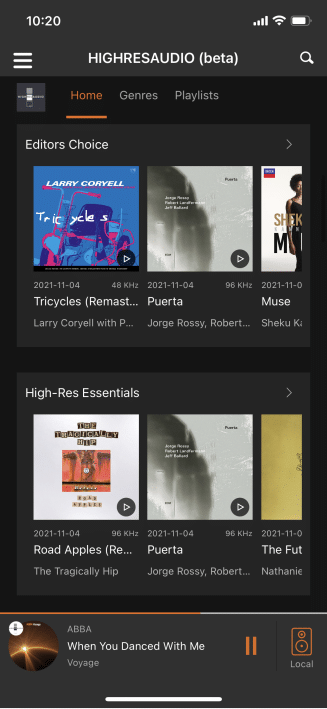
3.5.2.2.5. Editors Choice
Click ">" to the right of "Editors Choice" to enter the "All Editors Choice" interface .

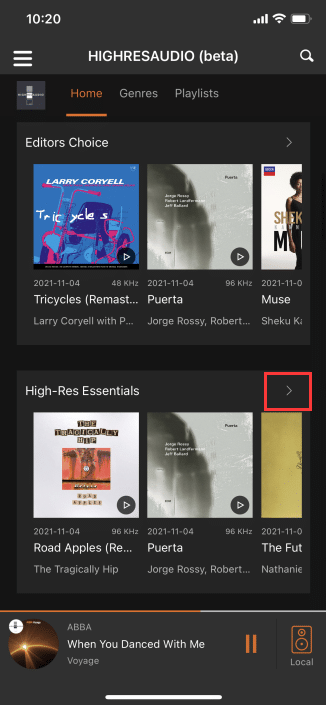
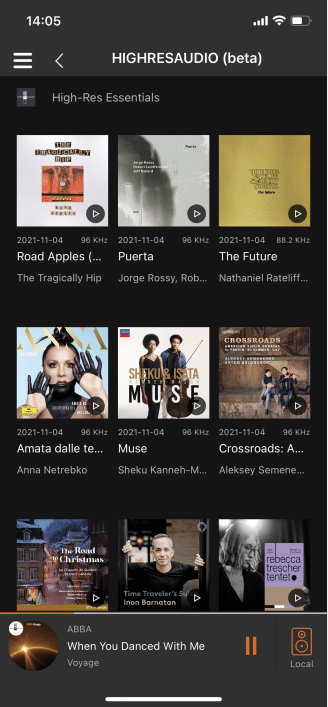
3.5.2.2.6. High-Res Essentials
Click ">" on the right side of "High-Res Essentials" to enter the "All High-Res Essentials" interface .
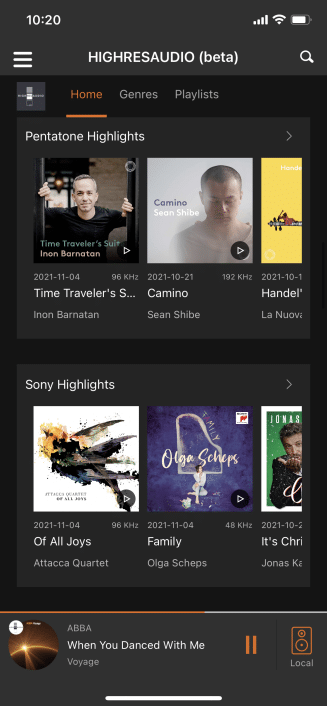
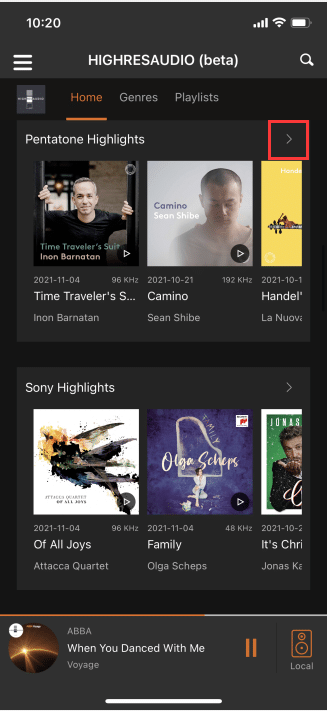
3.5.2.2.7. PentaTone Highlights
Click ">" on the right side of "PentaTone Highlights" to enter the "All PentaTone Highlights" interface .

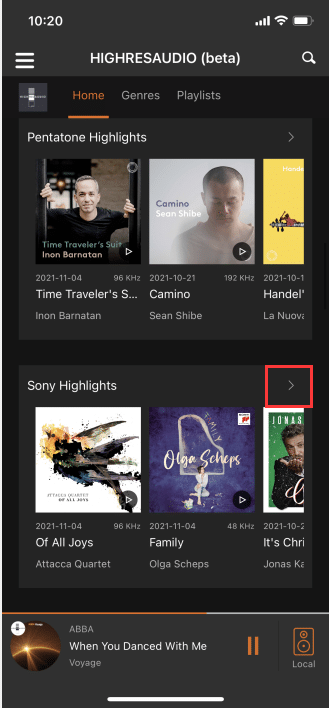
3.5.2.2.8. Sony Highlights
Click ">" on the right side of "Sony Highlights" to enter the "All Sony Highlights" interface .

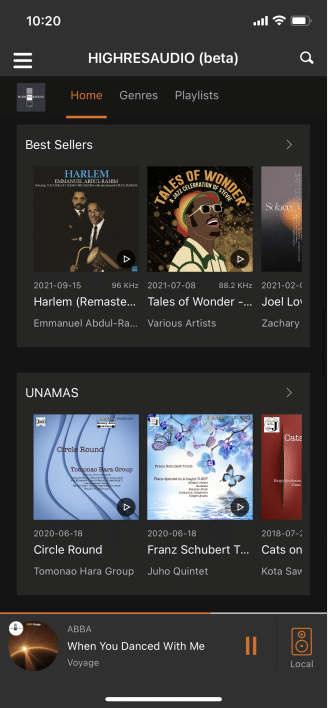
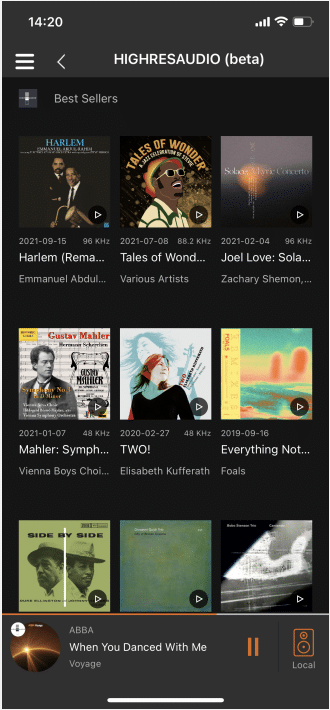
3.5.2.2.9. Best Sellers
Click ">" to the right of "Best Sellers" to enter the "All Best Sellers" interface .
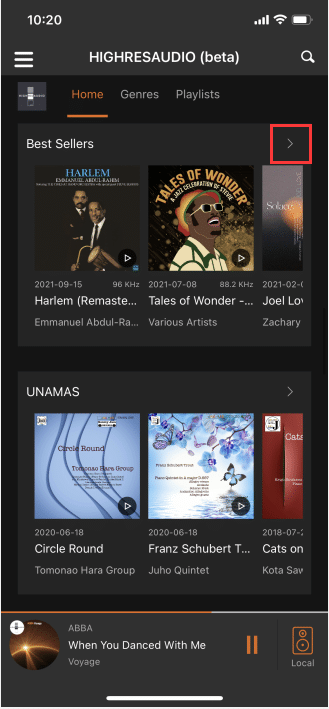
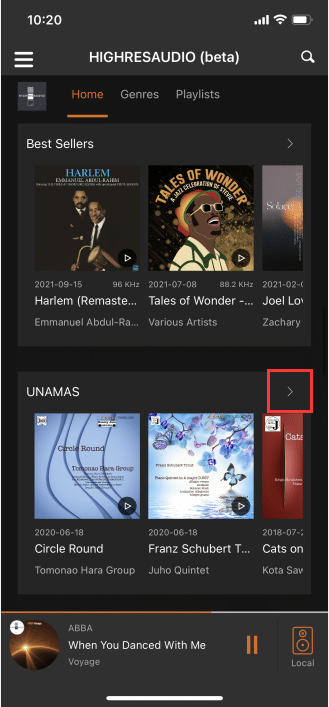
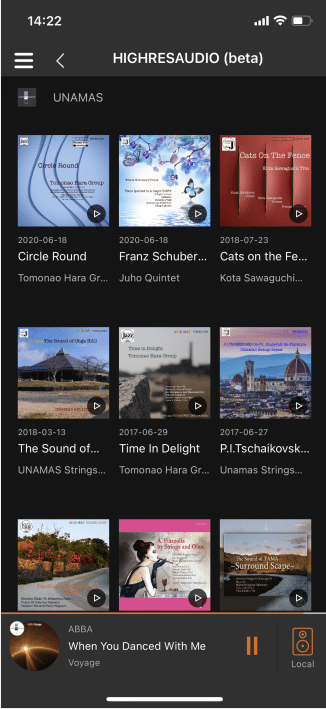
3.5.2.2.10. UNAMAS
Click the ">" on the right side of "UNAMAS" to enter the "All UNAMAS" interface .
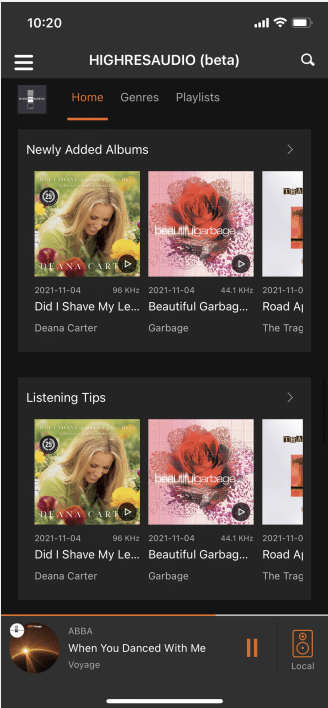
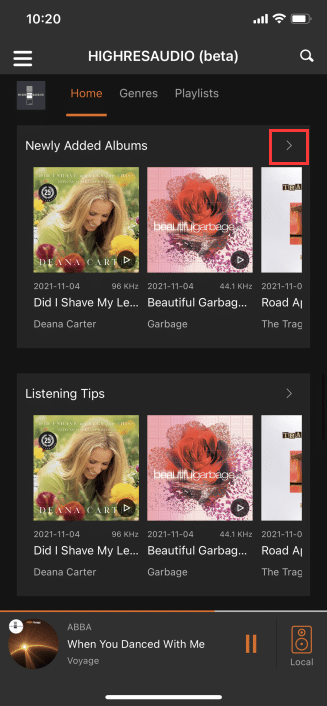
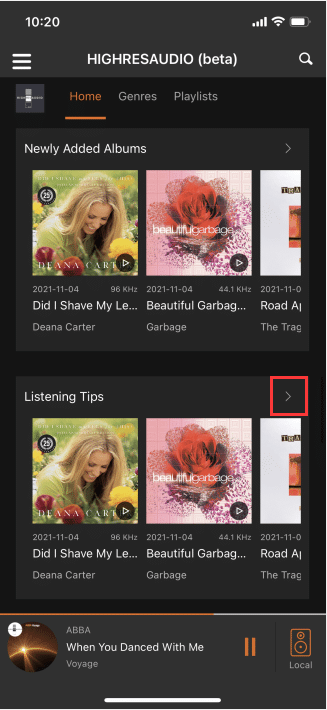
3.5.2.2.11. Newly Added Albums
Click ">" to the right of "Newly Added Albums" to enter the "All Newly Added Albums" interface .

3.5.2.2.12. Listening Tips
Click the ">" to the right of "Listening Tips" to enter the "All Listening Tips" interface .
3.5.2.2.13. Top Albums
Click the ">" on the right side of "Top Albums" to enter the "All Top Albums" interface .
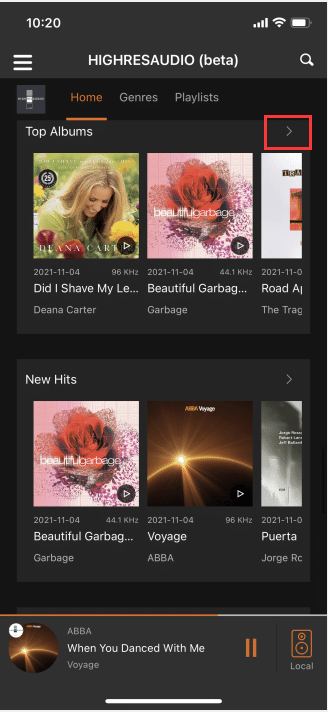
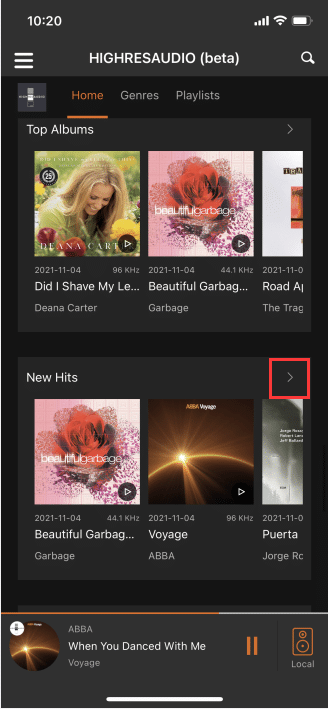
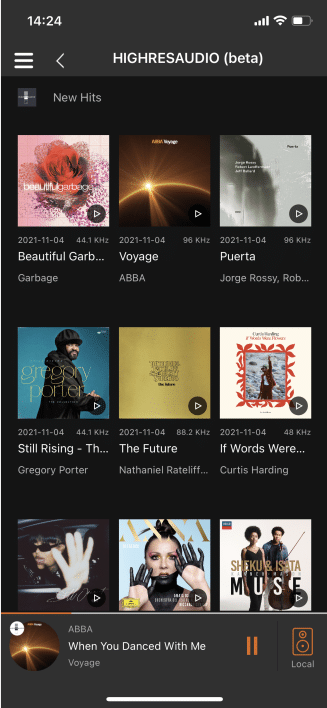
3.5.2.2.14. New Hits
Click ">" to the right of "New Hits" to enter the "New Hits" interface .
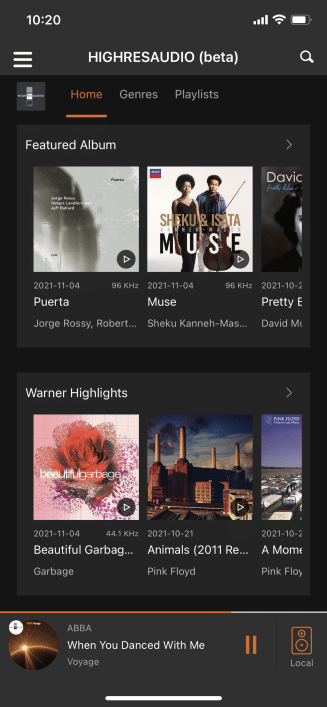
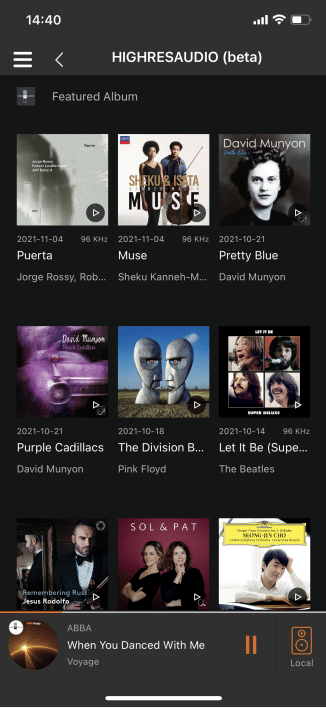
3.5.2.2.15. Featured Albums
Click ">" on the right side of "Featured Featured Albums" to enter the "All Featured Albums" interface .
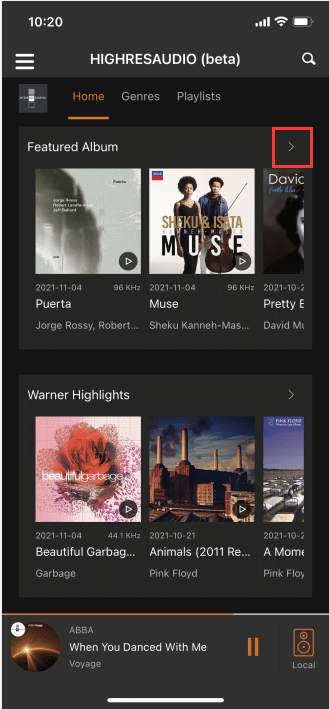
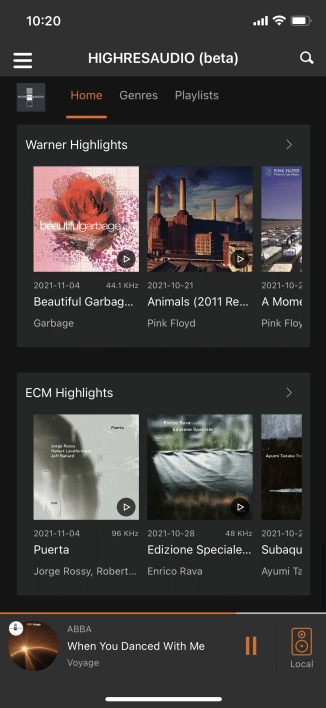
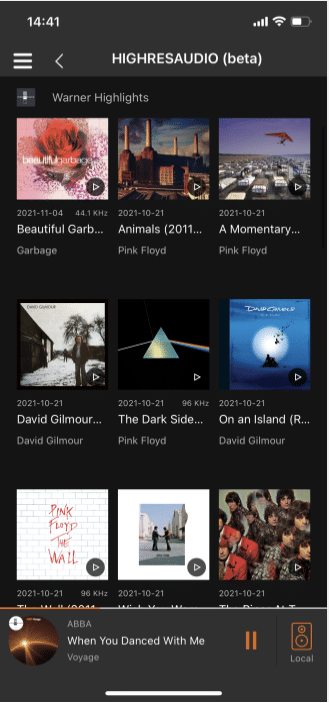
3.5.2.2.16. Warner Highlights
Click ">" on the right side of "Warner Highlights" to enter the "All Warner Highlights" interface .
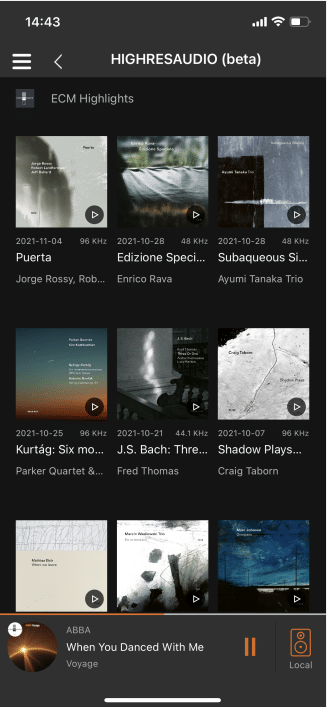
3.5.2.2.17. ECM Highlights
Click the ">" on the right side of "ECM Highlights" to enter the "All ECM Highlights" interface .

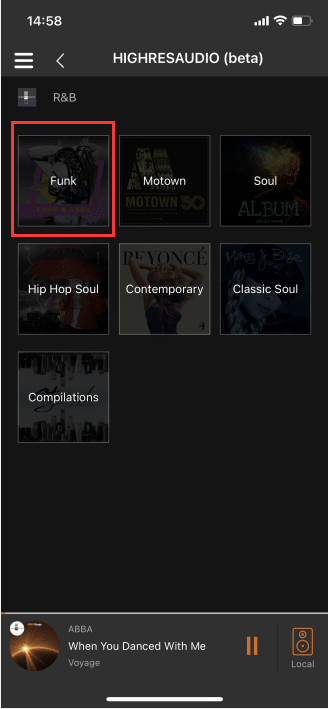
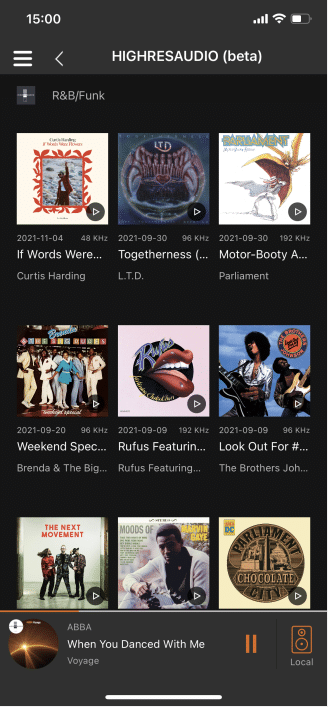
3.5.2.3. Genres
Click "Genres" in the upper menu to enter the "All genres" interface .
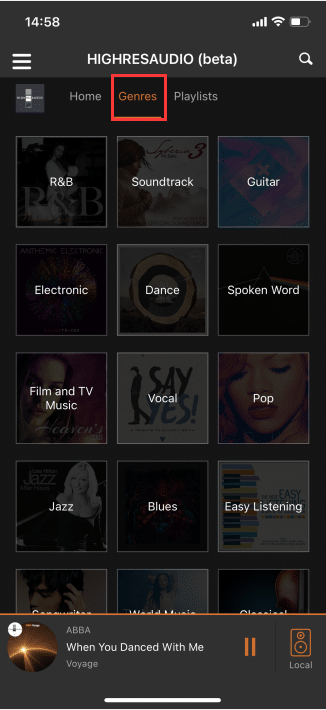
In the "Genres" interface, click any "Genres" to enter the "All Music Types" interface of that genre.
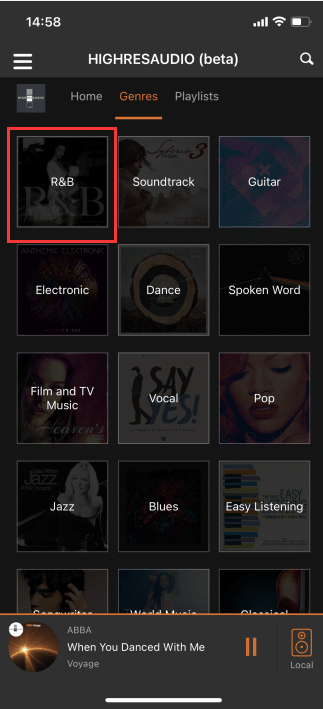
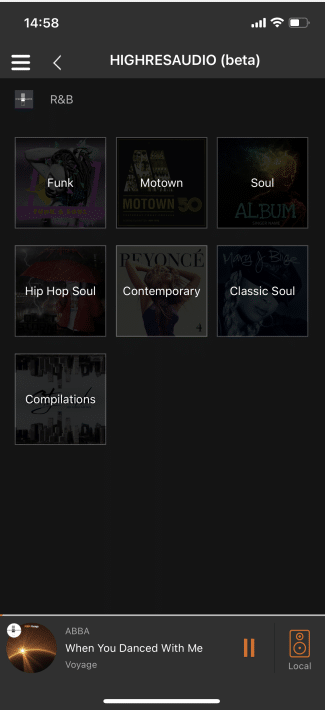
In the "Music Category" interface, click any " Music Category " to enter the "All Albums" interface under the music category.
3.5.2.4. Playlists
Click "Playlists" in the upper menu to enter the "All Playlists" interface .
3.5.2.5. Play Operation
In the " HIGHRESAUDIO Online Music " interface, click any "Album" or "Playlist " ,
Enter the corresponding "Album Track " or "Playlist" interface .

![]() On the "Album Track" or "Playlist" interface, click the " " button to add the current "Album" or "Playlist" All songs in the "Play Queue" will be played in the current "Album" or "Playlist" in sequence by default.(Note: "Play Queue" is displayed in Step 3.6.2.6)
On the "Album Track" or "Playlist" interface, click the " " button to add the current "Album" or "Playlist" All songs in the "Play Queue" will be played in the current "Album" or "Playlist" in sequence by default.(Note: "Play Queue" is displayed in Step 3.6.2.6)

On the "Album Track" or "Playlist" interface, click "Song" to play the corresponding song.
3.5.2.5.1. Album Operation
Click "..." on the upper right of the album, and perform corresponding operations on the album according to the pop-up content.
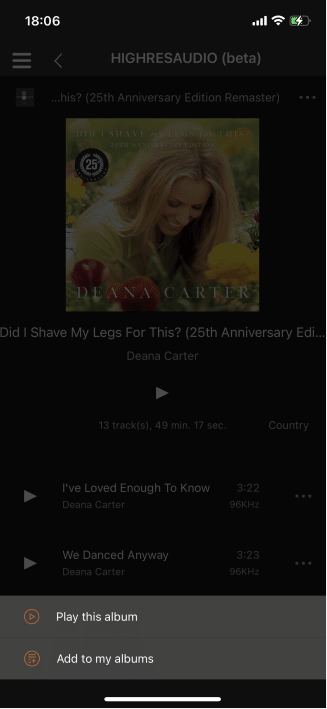
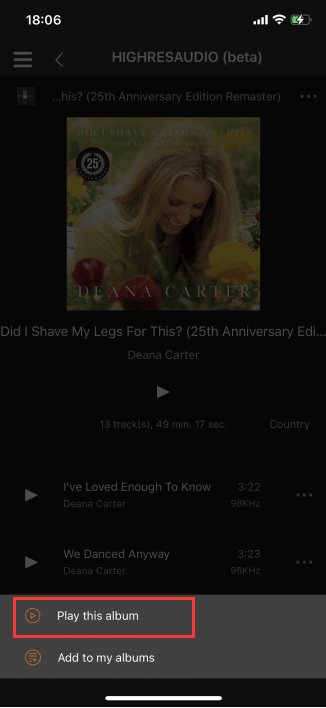
3.5.2.5.1.1. Play This Album
Click "Play this album" to add all the songs in the current album to the "Play Queue",Starts playing all songs in the current "album" in sequence. (Note: "Play Queue" is displayed in Step 3.6.2.6)

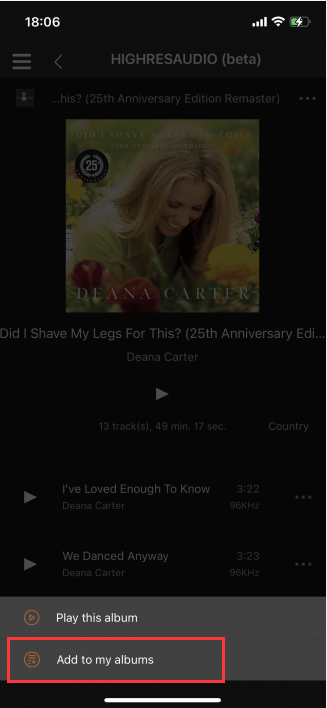
3.5.2.5.1.2. Add To My Albums
Click "Add to My Albums" to add the current album to "My Albums" on the "Home".
(Note: "My Albums" is is displayed in Step 3.5.1.2.2)
3.5.2.5.2. My Playlists
On the "Home" interface, click "My Playlists" to enter the "My Playlists" interface.
Click any playlist to enter the "Playlist interface " .
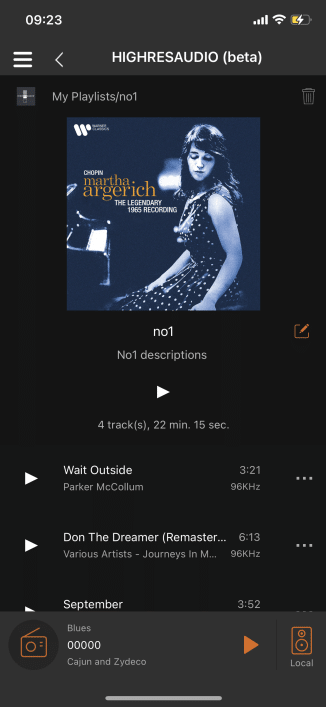
3.5.2.5.2.1. Edit My Playlist
Click the "Edit" button to the right of "List Name" to enter the "Edit Playlist" interface.
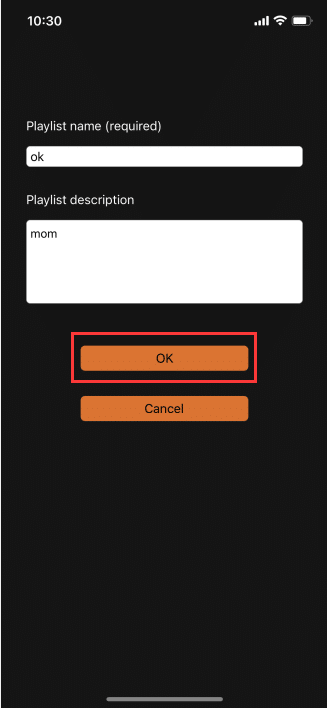
In the "Edit Playlist" interface, you can edit the "List Name" and "List Description".
After editing, click "OK" to switch to the "Playlist" interface.


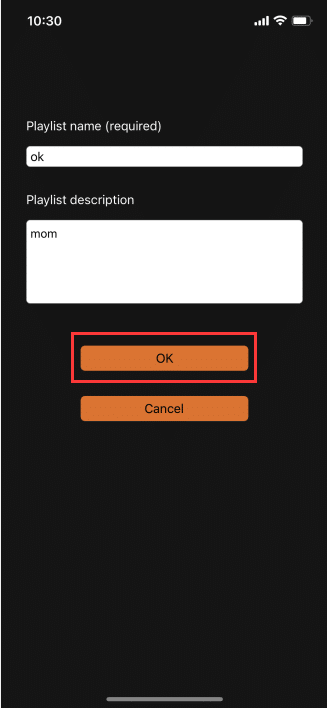
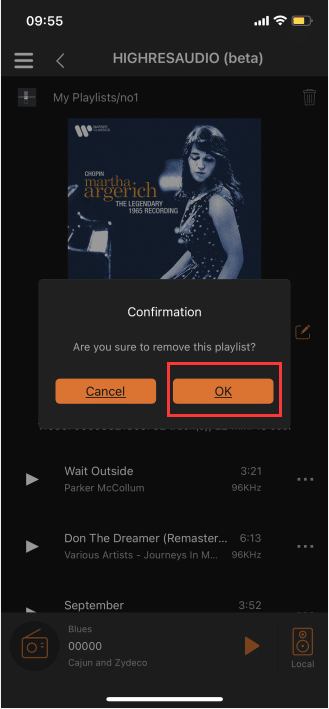
3.5.2.5.2.2. Remove My Playlist
Click the "Remove" button at the top right of the "Playlist", and "Confirm to remove the playlist" will pop up.
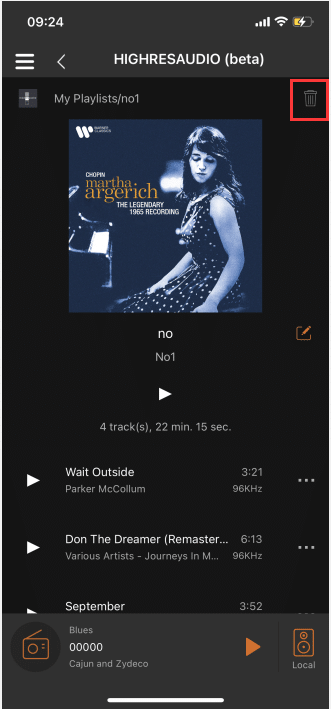
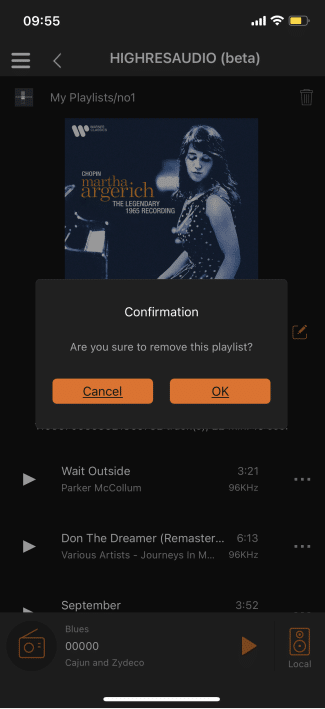
Click "OK" to delete the "Playlist" from the "My Playlists" interface.
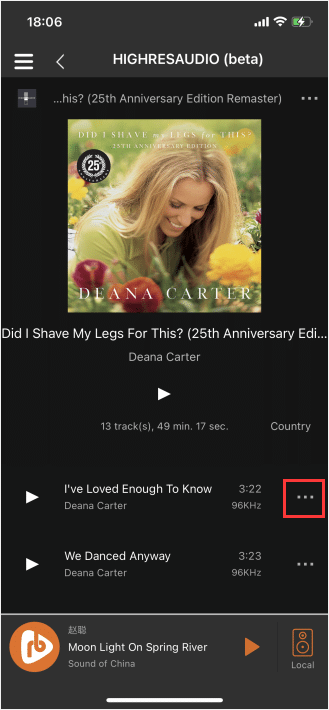
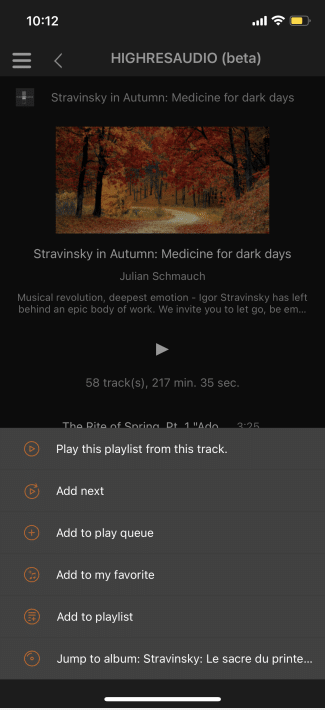
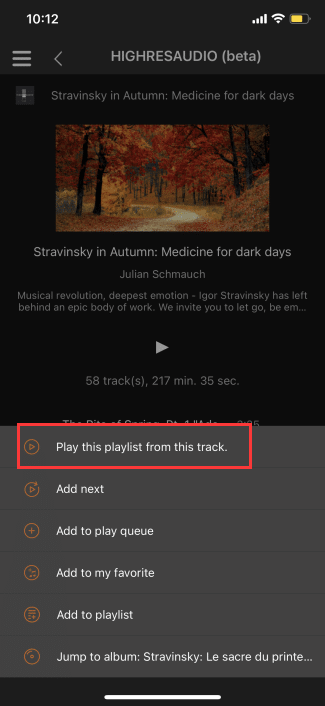
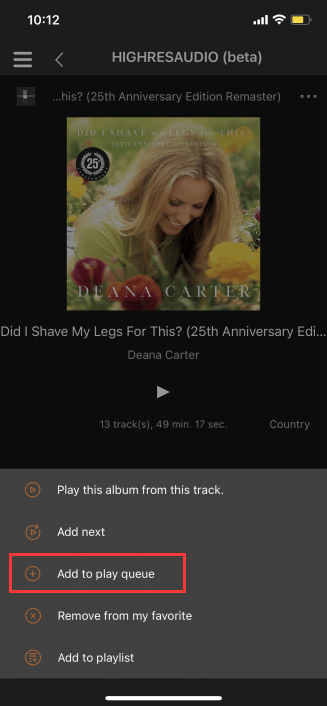
3.5.2.5.3. Song Operation
Click "..." to the right of the song, and make corresponding operations to the song according to the pop-up content.
3.5.2.5.3.1. Play This Album From This Track
Click "Play this album from this track" to , Add all songs to the "play queue" in order from the current song, and play all songs of the "album" in order from the current song. (Note: "Play Queue" is displayed in Step 3.6.2.6)

3.5.2.5.3.2. Play This Playlist From This Track
Click "Play this playlist from this track" to , add all songs from the current song to the "play queue" in order, and play all songs from the "Playlist" in order from the current song. (Note: "Play Queue" is displayed in Step 3.6.2.6)
3.5.2.5.3.3. Add Next
Click "Add Next" to add the selected song to the play queue. After the "Song Now Playing" finishes playing, the selected song will be played.(Note: "Play Queue" is displayed in Step 3.6.2.6)
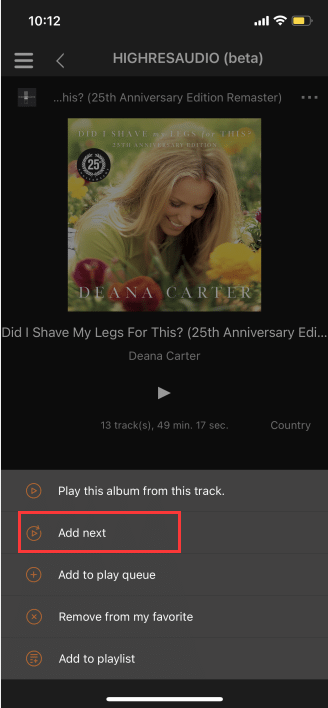
3.5.2.5.3.4. Add To Play Queue
Click "Add to Play Queue" to add the selected songs to the "Play Queue".(Note: "Play Queue" is displayed in Step 3.6.2.6)

3.5.2.5.3.5. Add To My Favorite
Click "Add to My Favorite" to add the selected songs to "My Tracks" on the "Home".(Note: "My Tracks" is displayed in Step 3.5.2.2.3)

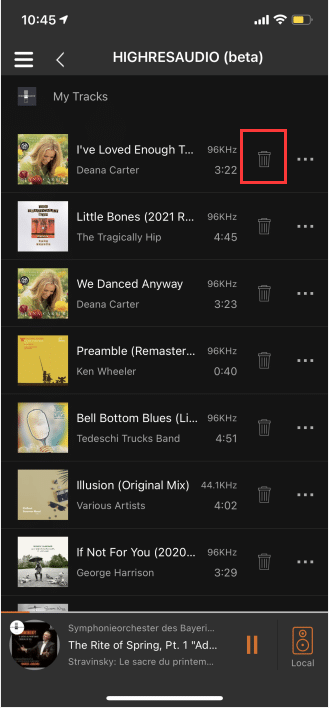
3.5.2.5.3.6. Remove From My Favorite
Click "Remove from my Favorites" to clear the selected songs from "Favorites" on the "Home" page.(Note: "My Tracks" is displayed in Step 3.5.2.2.3)
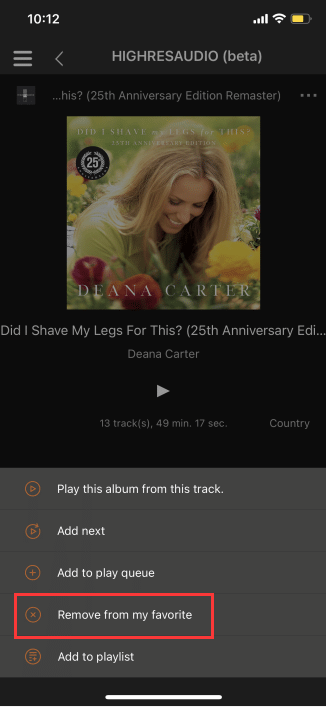
In the "My Tracks" interface of the "Home", click the "Remove" button on the right side of the song, from the "Home" Remove the selected song from My Favorites. (Note: "My Tracks" is displayed in Step 3.5.2.2.3)
3.5.2.5.3.7. Add To Playlist
Click "Add to Playlist" to pop up the "My Playlists" list.
In the "My Playlists" list, select any playlist, click "OK", and add all songs in the album to the selected "playlist",In the "My Playlist" of the "Home", you can see the newly added songs in the selected "Playlist".(Note: "My Playlists" is displayed in Step 3.5.2.2.1)
3.5.2.5.3.7.1. Create Playlists
In the "My Playlists" list, click the "+" button in the upper right corner to create a playlist.

After filling in the "list name", click the "confirm" button to switch to the "created playlist" list.
3.5.2.5.3.8. Jump To Album
Click "Jump to album: ****" to enter the "Album" interface of the selected song.


3.5.2.6. Search
Click the "Search" button in the upper right corner to enter the "Search" interface .
In the "Search" interface, enter the content to be searched, and click the "Start Search" button to view and search the content.matching playlists .
After searching, you can see "Search History" on the "Search" interface. Click any search content to start the search again based on the search content .

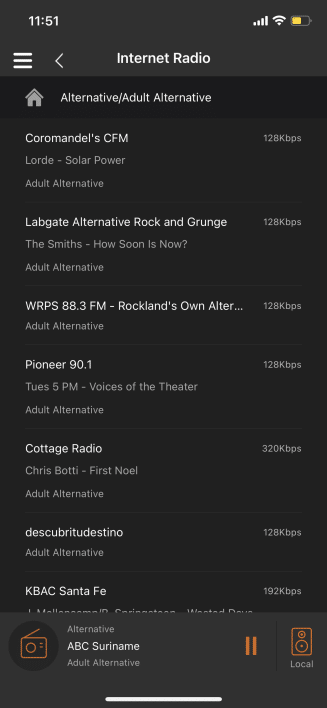
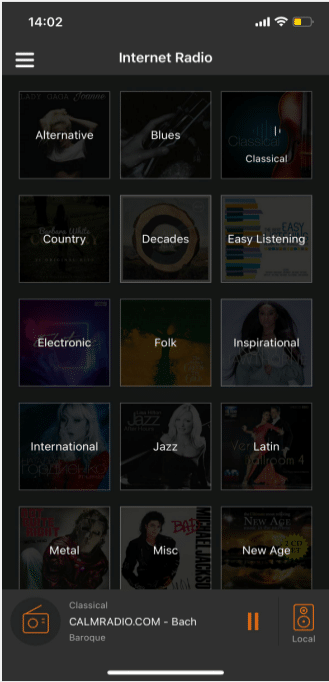
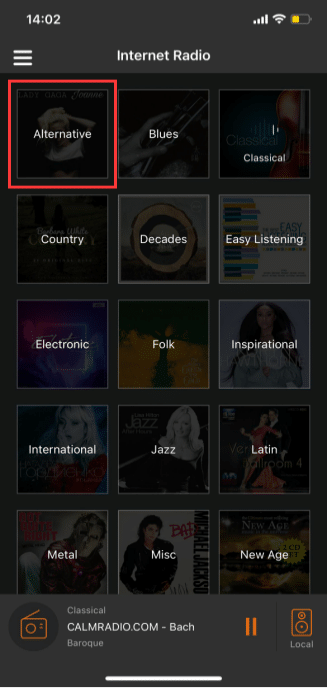
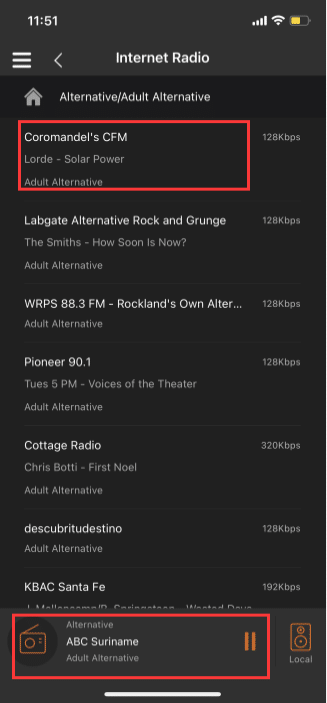
3.5.3. Internet Radio
3.5.3.1. Music Type
Click "Internet Radio" to enter the "Music Type " interface of Internet Radio .
3.5.3.2. Music Style
In the "Music Type " interface, click any " Music Type " to enter the "Music Style" interface of that type .
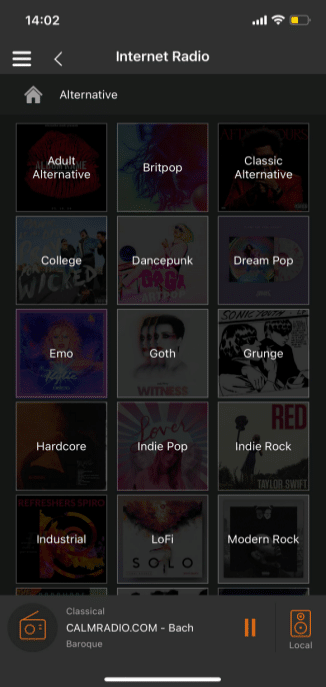
3.5.3.3. Radio List
On the "Music Style" interface, click any "Music Style" to enter the "Radio List" interface of that style .
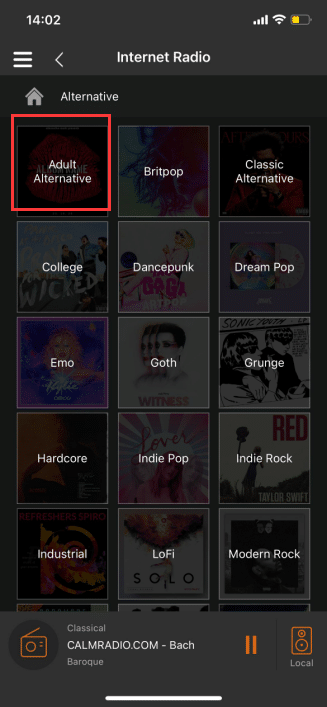

3.5.3.3.1. Radio Play
In the "Radio List" interface, click any "Radio" to start playing the station .
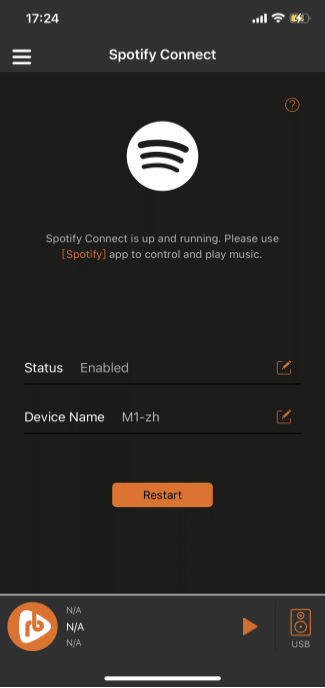
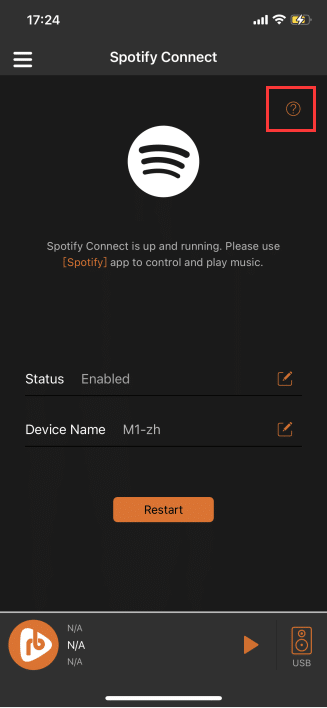
3.5.4. Spotify Connect
" Use your phone, tablet or computer as a Spotify remote, go to spotify.com/connect to learn how".Click "Spotify Connect" to enter the "Spotify Connect Enable " interface .
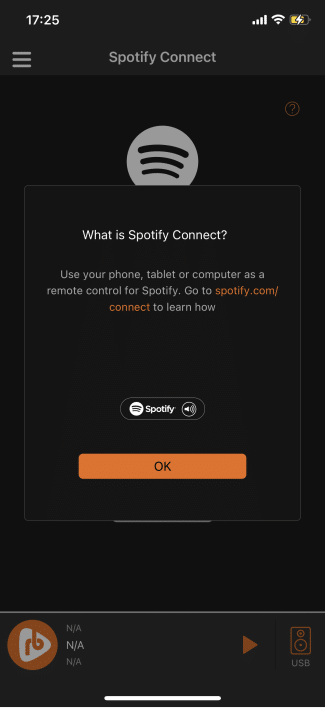
Click the "?" button in the upper right corner to pop up the "What is Spotify Connect? " interface.
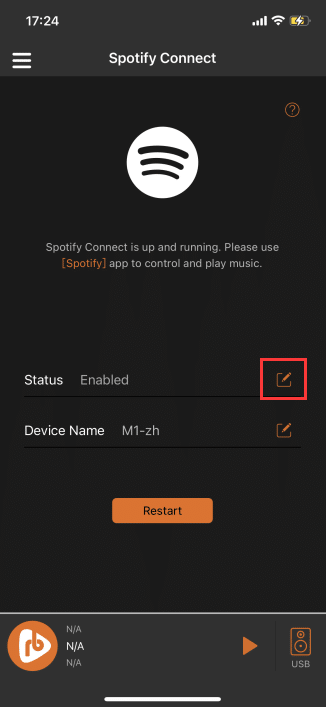
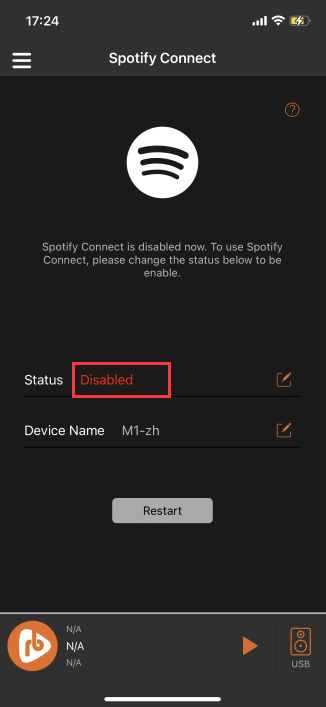
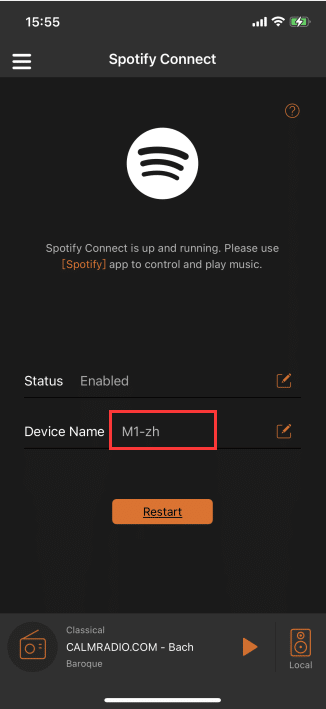
3.5.4.1. Set Spotify Connect Status
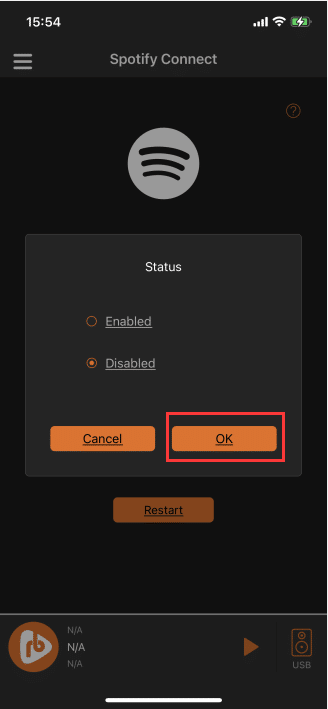
Click the "Edit" button to the right of "Status", and the interface for selecting "Status" will pop up .
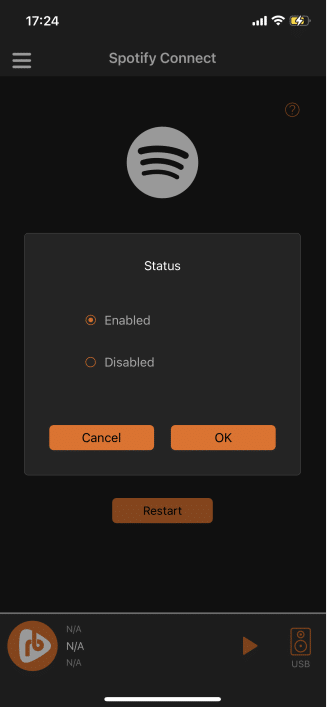
can "Enable" or "Disable" the Spotify Connect function in the " Status " interface .

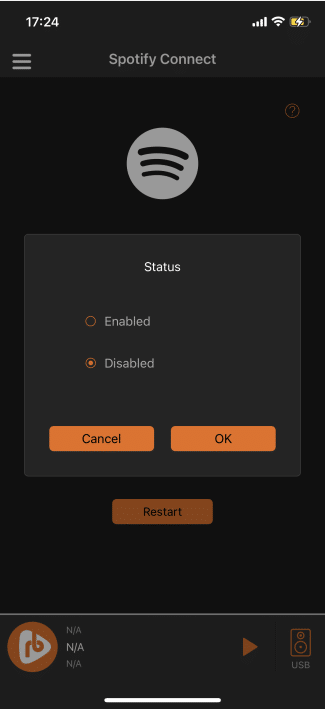
After selecting the status, click "OK", and the "Status" will be updated to the last selected status .
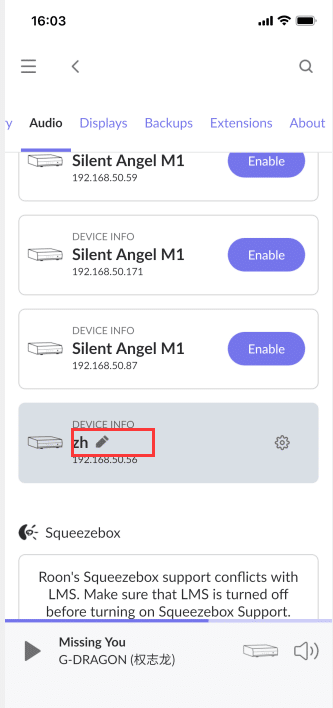
3.5.4.2. Set Spotify Connect Device Name
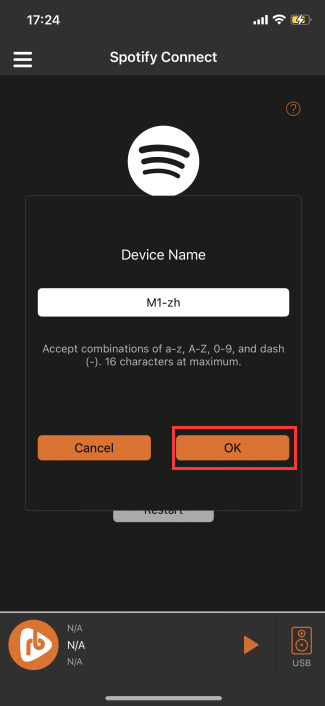
Click the "Edit" button to the right of "Device Name " to pop up the "Edit Device Name" interface .
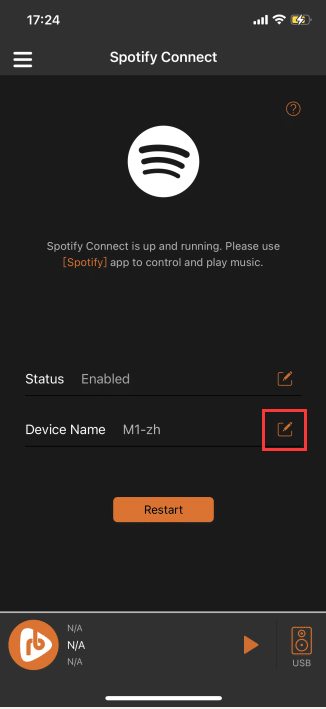
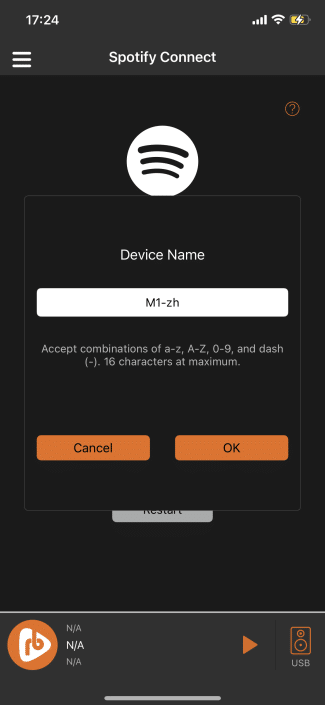
After editing, click "OK" and the spotify connect device name will be modified successfully. When connecting, select "new device name".

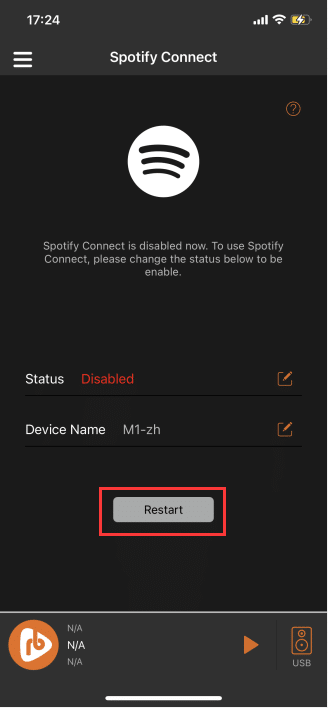
3.5.4.3. Restart Spotify Connect
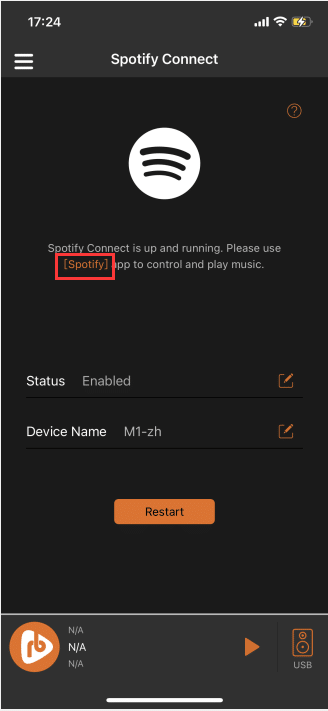
When the current Spotify Connect status is "Enable", you can click the "Restart" button below to re-enable the Spotify Connect function .

When the current Spotify Connect status is "Disabled", the "Restart" button below cannot be clicked.
3.5.4.4. Download The Spotify App
Before using Spotify Connect, make sure that the current mobile phone has installed the "Spotify " App. If it has not been installed, you can enable it in "Spotify Connect" Click "[Spotify] " in the description on the interface to jump to the mobile application market for download, or go to the mobile application market to download.
3.5.4.5. Connect Spotify
After Spotify is enabled, make sure that the "Mobile Device" is connected to the same WiFi network as the M1 or M1T device.Then open the "Spotify" App to connect the M1 or M1T device to play music .

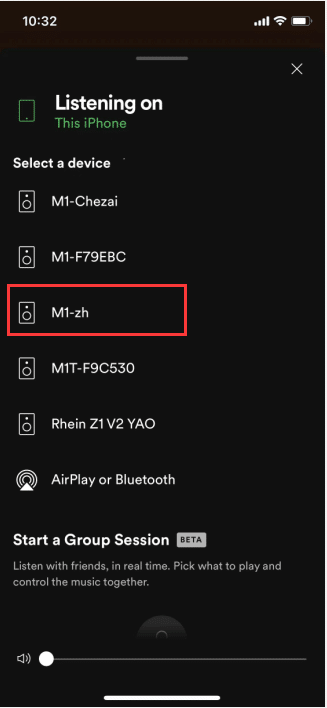
3.5.4.5.1. Select Device
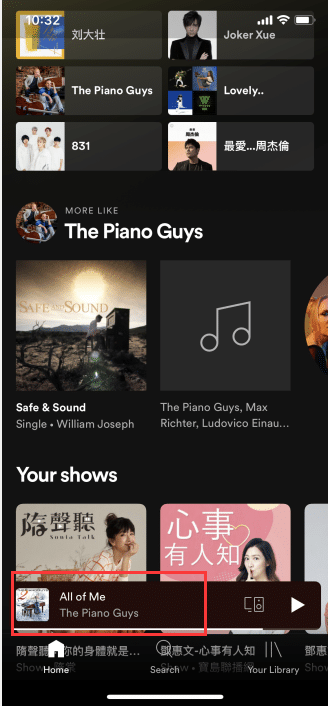
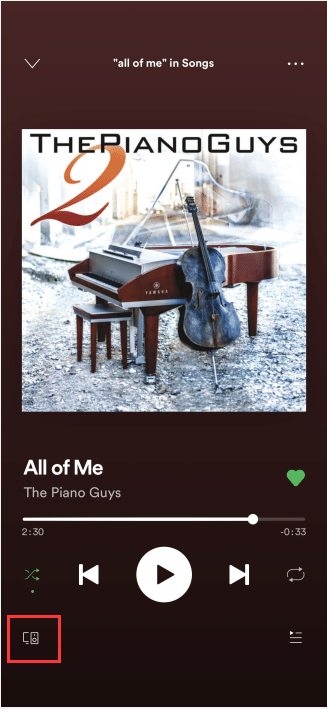
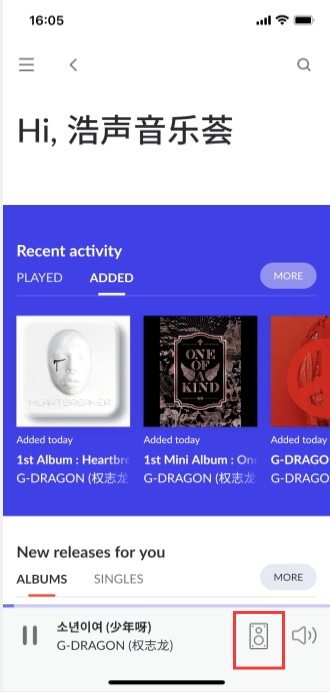
Click the "small player" to play the song to enter the "big player" interface.

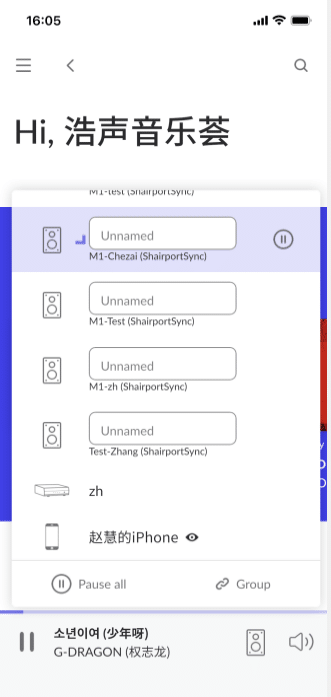
On the "Big Player" interface, click the "Select Device" button at the bottom left to enter the "Connect Device" interface Connectable "devices" are automatically found.

3.5.4.5.2. Connect the device to start playback
Check out "Spotify Connect" in "VitOS Orbiter App" "Enable" interface setting "Device Name",
in the " Spotify App " .
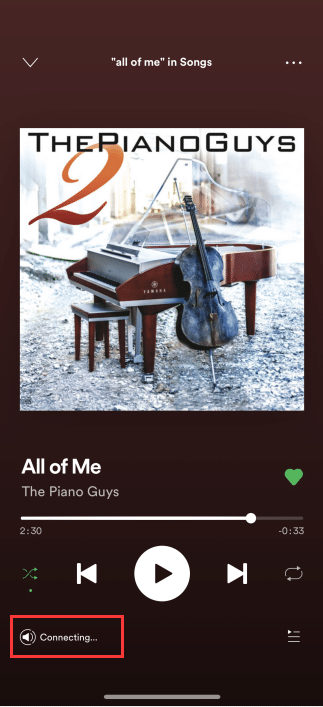
After clicking the connected "Device", "Connecting" will be displayed on the lower left of the "Big Player" interface.
After the device is successfully connected, the "Device Name" will be displayed on the lower left of the "Big Player" interface.
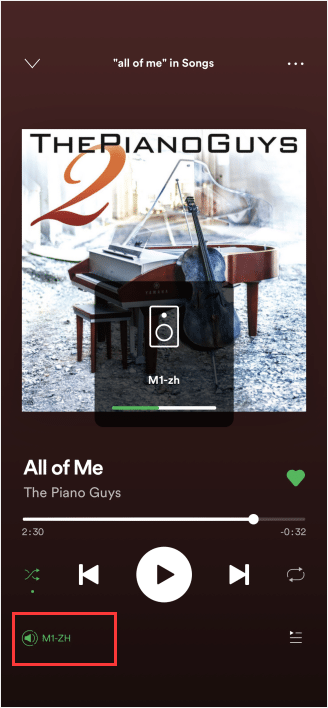
After the "Spotify App" is successfully connected to the device, the music played on the "Spotify App" can be played through the VitOS device.on connected headphones or connected playback device.

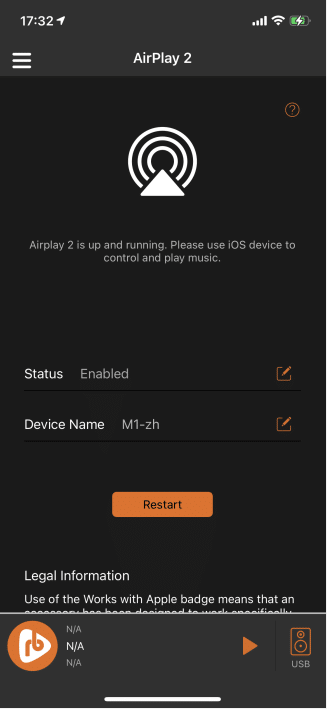
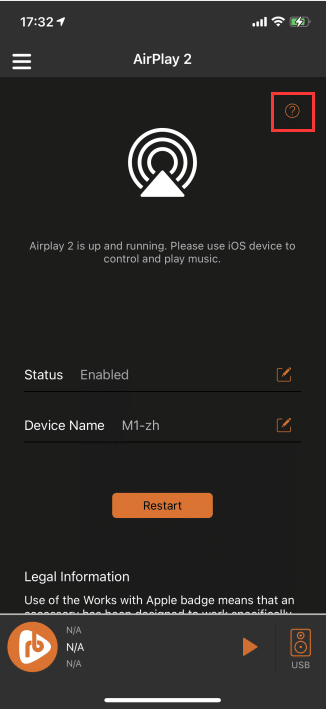
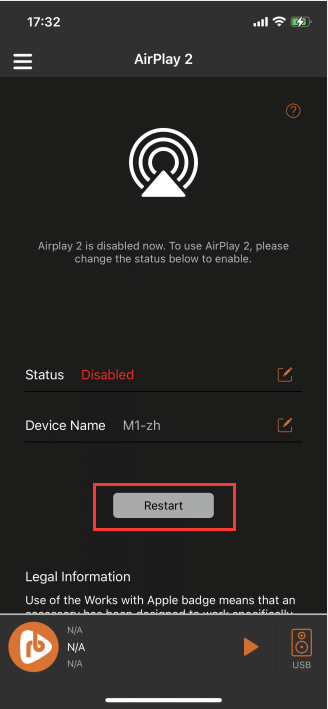
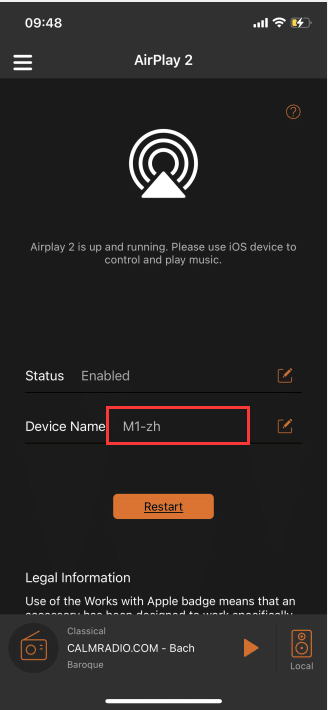
3.5.5. AirPlay 2
Click "AirPlay 2" to enter the "AirPlay 2 Enable " interface .
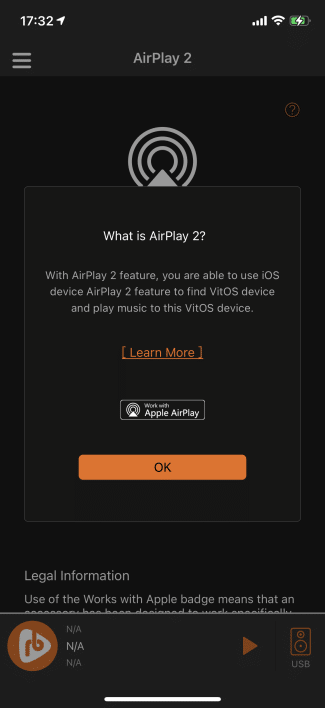
Click the "?" button in the upper right corner to pop up the "What is AirPlay 2? " interface.
3.5.5.1. Set Airplay 2 Status
Click the "Edit" button to the right of "Status", and the interface for selecting "Status" will pop up .
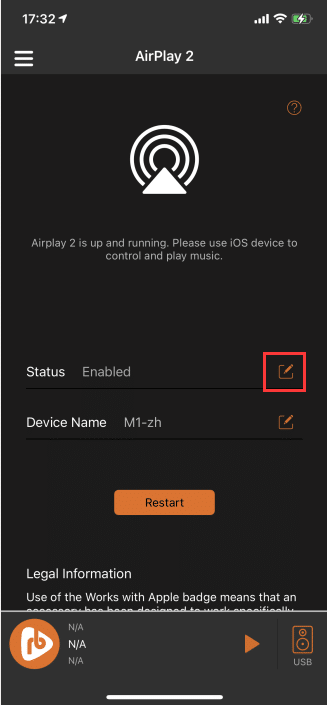

Click "Enable" to enable AirPlay 2 function, click "Disable" to disable AirPlay 2 function .
After selecting the status, click "Confirm", and the "Status" will be updated to the last selected status .
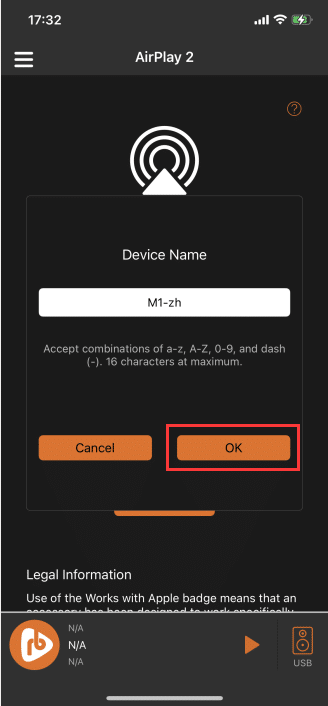
3.5.5.2. Set Airplay 2 Device Name
Click the "Edit" button to the right of "Device Name " to pop up the "Edit Device Name" interface .
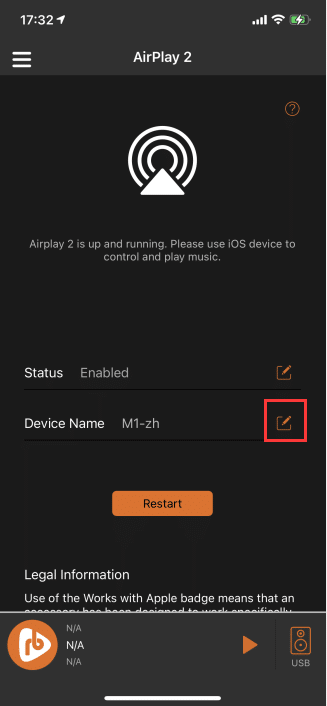
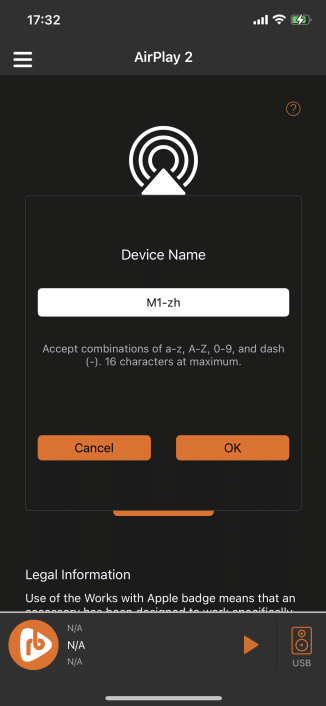
After editing, click "OK" and the Airplay 2 connect device name will be modified successfully. When connecting, select "new device name".

3.5.5.3. Restart AirPlay 2
When the current AirPlay 2 status is "Enable", you can click the "Restart" button below to re-enable the AirPlay 2 function .
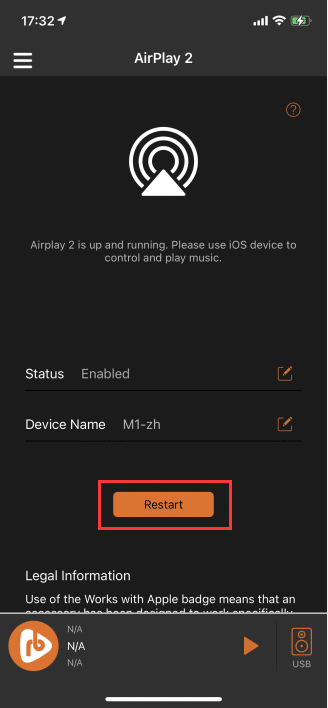
When the current AirPlay 2 status is "Disabled", the "Restart" button below cannot be clicked.
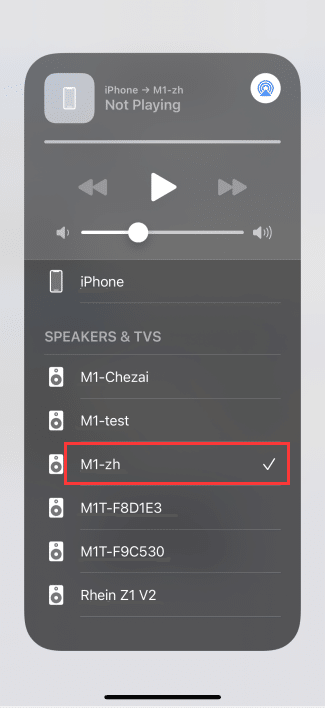
3.5.5.4. Connect AirPlay 2
After AirPlay 2 is enabled, make sure the "iOS device" is connected to the same WiFi network as the M1 or M1T device.Then open the "Control Bar" of "iOS Device" to connect the M1 or M1T device to play music .
Click the " AirPlay 2 " icon on the upper right to enter the "Connect Device" interface, and automatically find the "device" that can be connected.
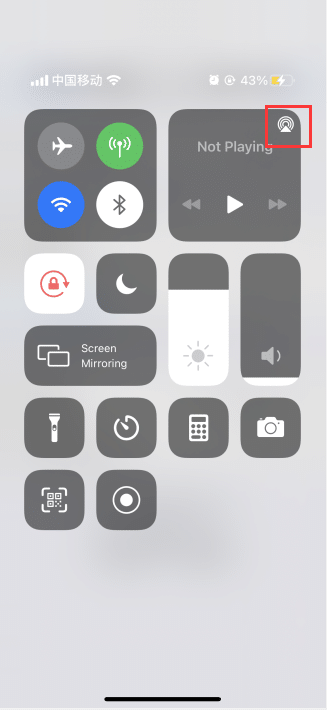
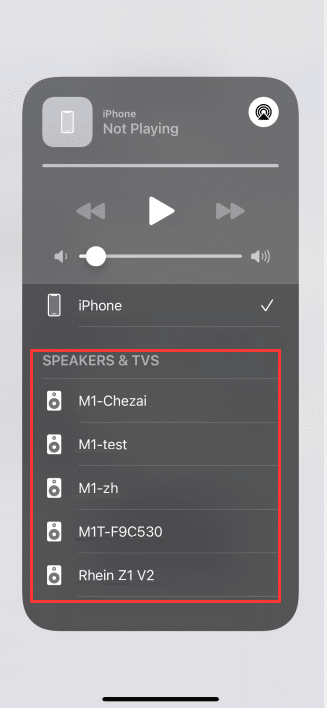
Check the "Device Name" set in the " AirPlay 2 Enable " interface in the "VitOS Orbiter" App ,
on the " iOS Device Connection Device" interface.
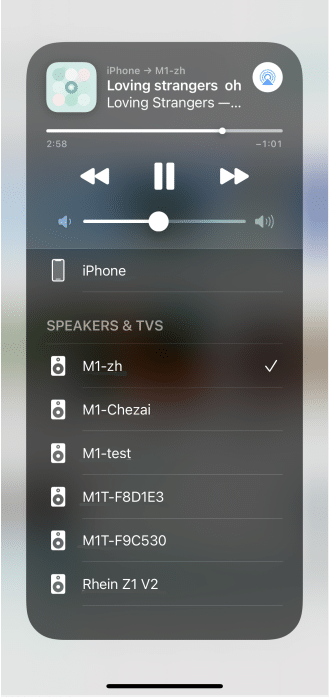
the "iOS device" shows that the device is connected successfully, the music or audio played on the "iOS device" can be played through the VitOS device.on connected headphones or connected playback device.
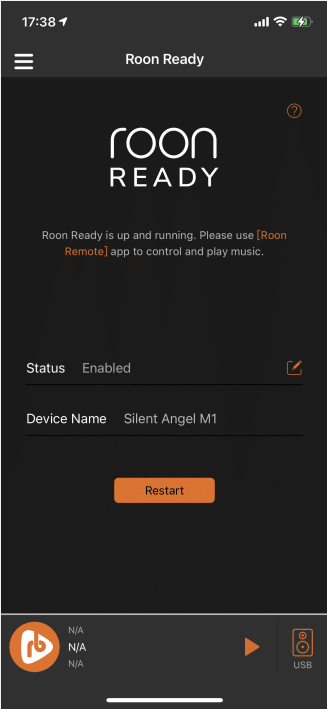
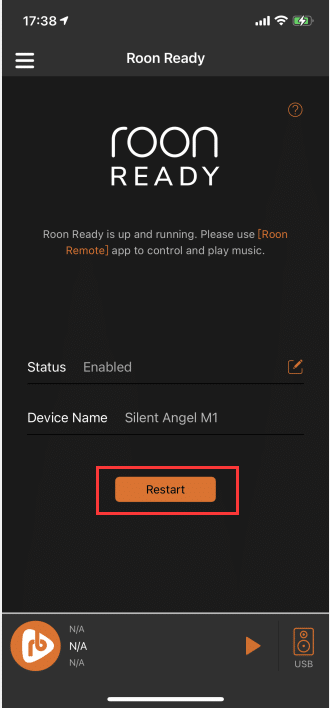
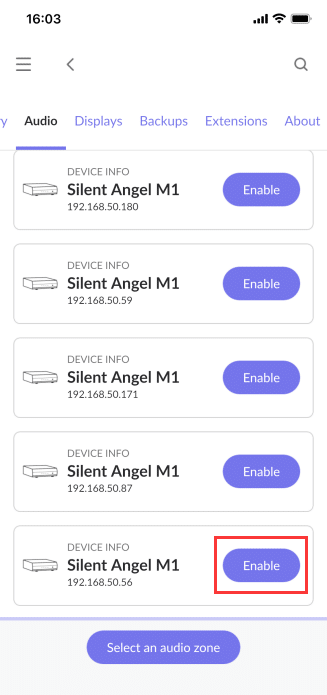
3.5.6. Roon Ready
Click "Roon Ready" to enter the "Roon Ready Enable " interface .
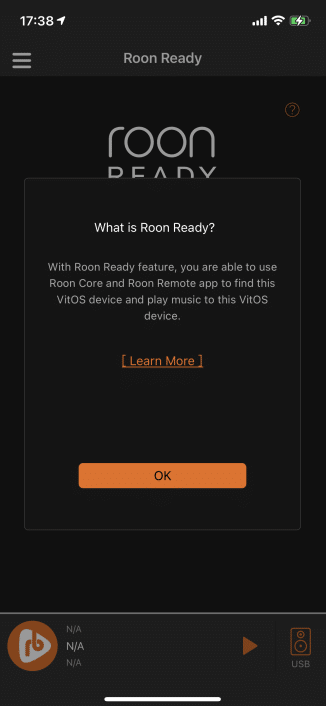
Click the "?" button in the upper right corner to pop up "What is Roon Ready? ".
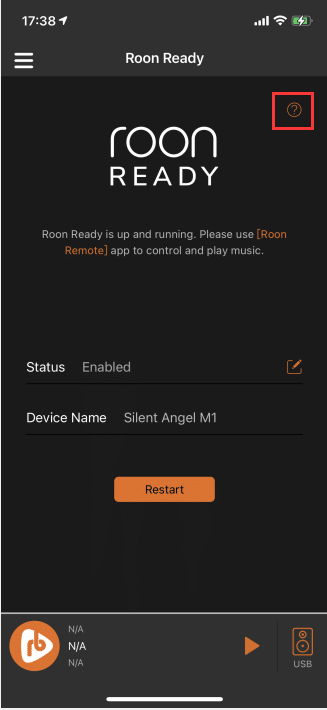
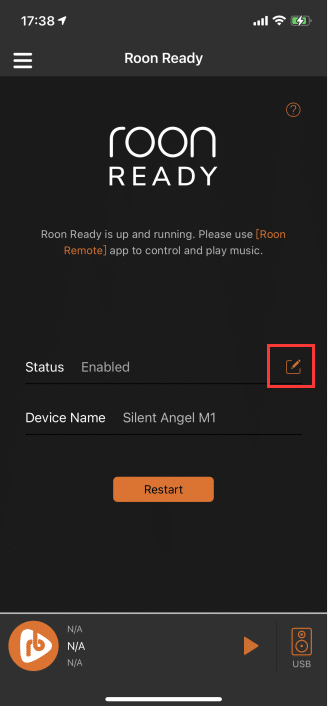
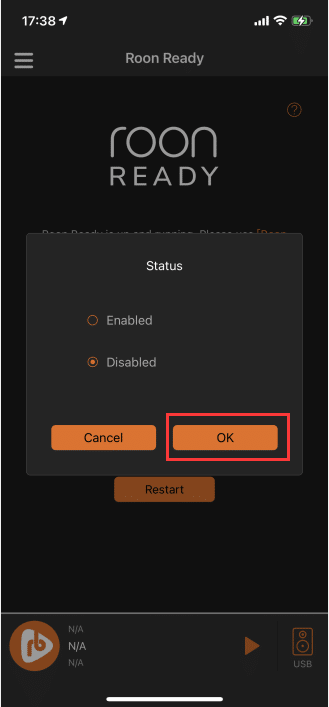
3.5.6.1. Set Roon Ready Status
Click the "Edit" button to the right of "Status", and the interface for selecting "Status" will pop up .

can "Enable" or "Disable" the Roon Ready function in the " Status " interface .
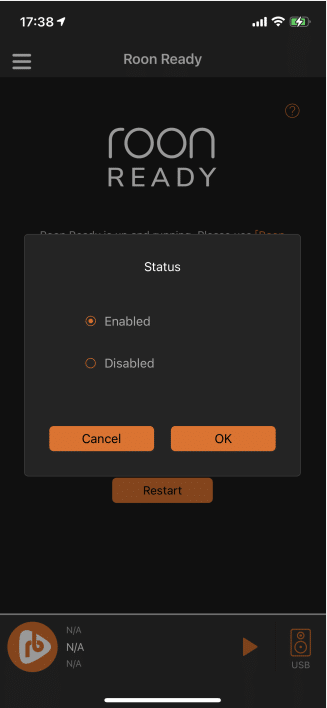
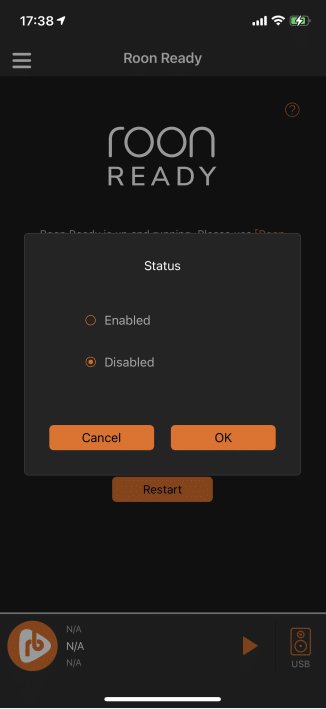
After selecting the status, click "OK", and the "Status" will be updated to the last selected status .
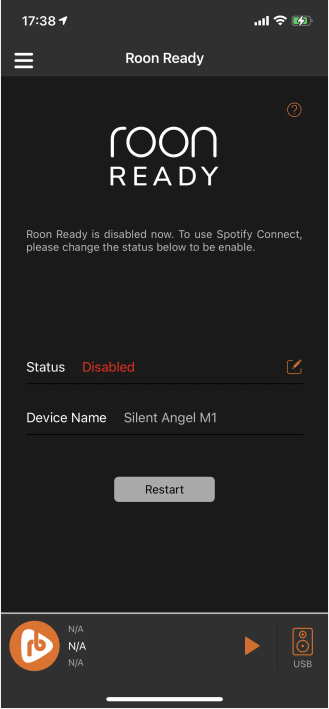
3.5.6.2. Restart Roon Ready
When the current Roon Ready status is "Enable", you can click the "Restart" button below to re-enable the Roon Ready function .
When the current Roon Ready status is "Disabled", the "Restart" button below cannot be clicked.

3.5.6.3. Download Roon Remote App
using Roon Ready , make sure the current phone has installed the Roon Remote App.
Go to Roon's official website to download the " Roon Remote " App.
3.5.6.4. Connect Roon Remote
After Roon Ready is enabled, make sure that the "Mobile Device" is connected to the same WiFi network as the M1 or M1T device.Then open the " Roon Remote " App to connect the M1 or M1T device to play music .
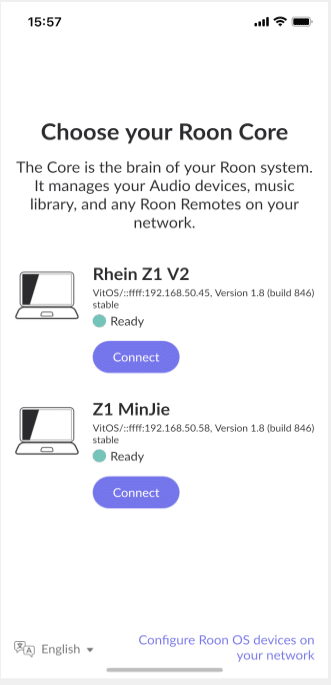
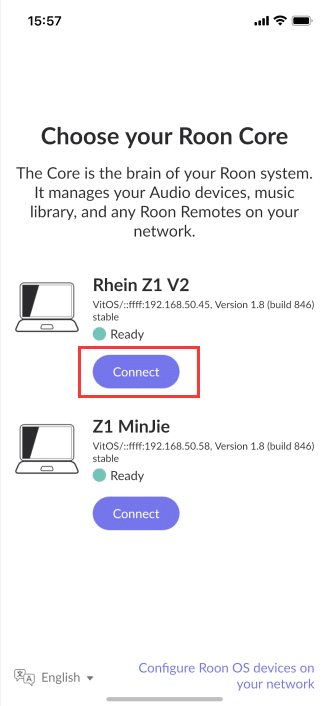
After clicking to connect "Roon Core", enter the home page of " Roon Remote " App .
3.5.6.4.1. Enable Audio Device
On the " Roon Remote App " home page, click the "Menu" button in the upper left corner to enter the "Menu Bar" .
In the "Menu Bar", click "Settings" to enter the "General Settings" interface .

In the "General Settings" interface, click "Audio" in the upper menu to enter the "Set Audio Device" interface .
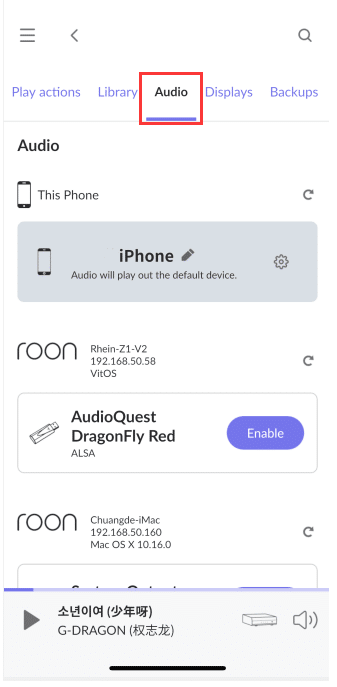
In the "Set Audio Device" interface, find the "Room Ready" list, and find the connected vitos device in the "Room Ready".
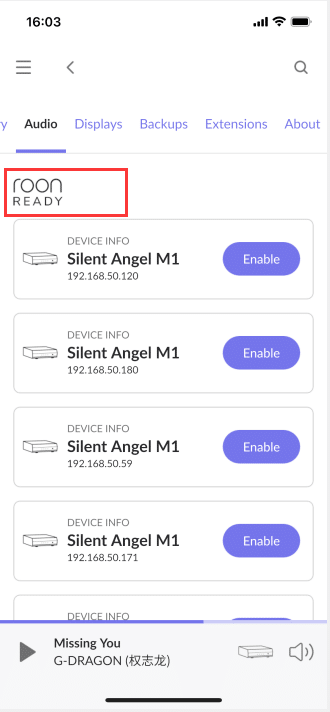
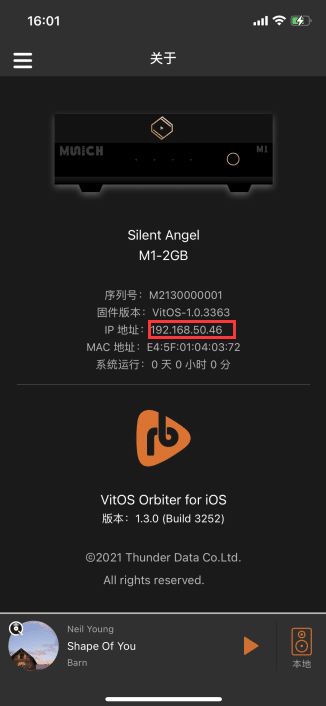
Check the IP address of the "About" interface in the " VitOS Orbiter App ", in the " Roon Remote App "Click on "VitOS Device" corresponding to the IP address on the " Set Audio Device" interface .
Click the "Enable" button on the right side of the corresponding "VitOS device" to rename the "Device Name" after enabling it.
3.5.6.4.2. Small Player Selection Device
Click the "Select Device" button on the right side of the "Mini Player" to enter the "Connect Device" interface, and automatically find the "device" that can be connected.
3.5.6.4.3. Large Player Selection Device
Click the "small player" to play the song to enter the "big player" interface.
On the "Big Player" interface, click the "Select Device" button at the bottom left to enter the "Connect Device" interface.Connectable "devices" are automatically found.
3.5.6.4.4. The Connected Device Starts To Play
the "Device Name" renamed in " Roon Ready " in the "Set Audio" interface , and under "Connect Device" Click the corresponding "Device" on the interface.

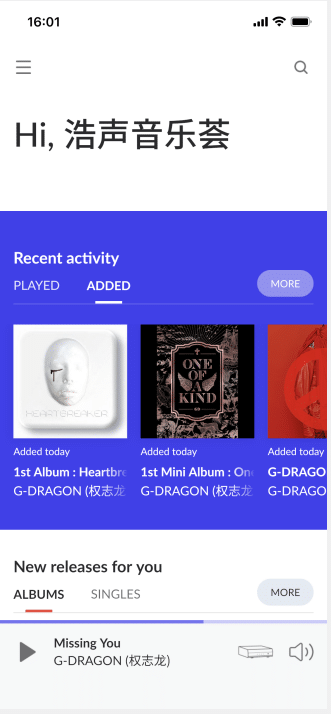
" Roon Remote App " shows that after the device is successfully connected, the music played on the " Roon Remote App " can be accessed through the VitOS device on connected headphones or connected playback device.
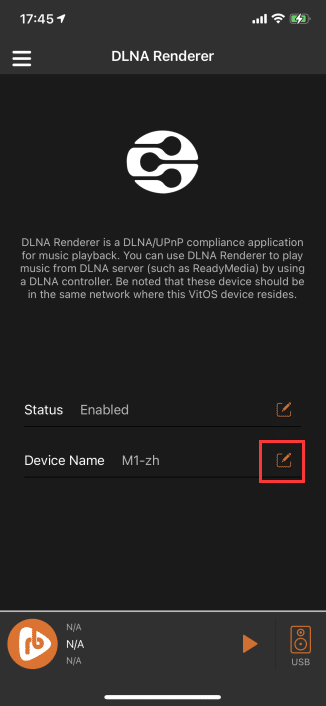
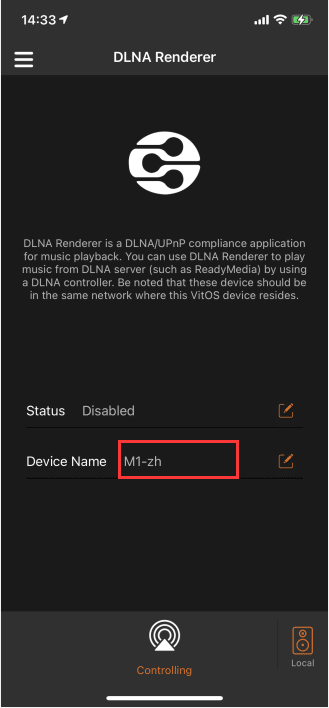
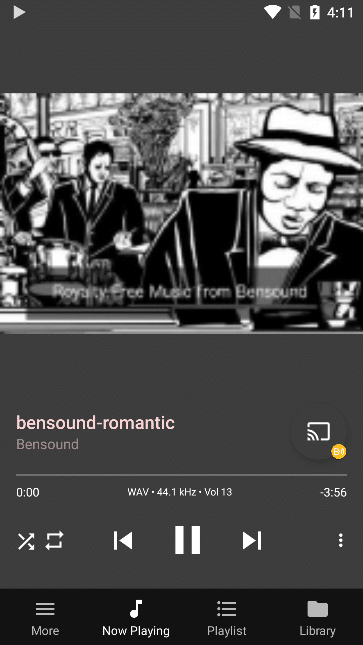
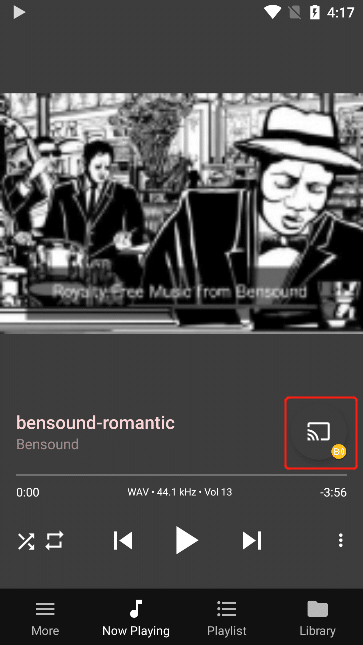
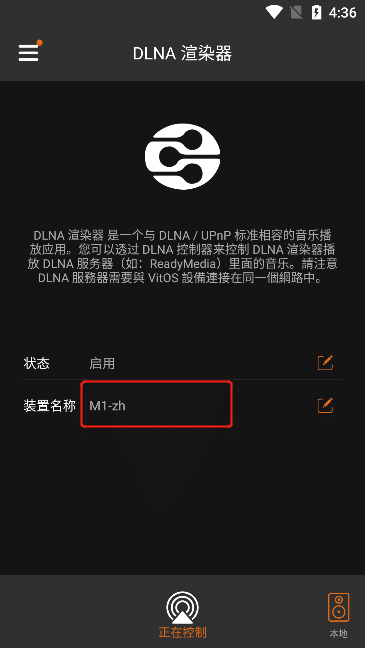
3.5.7. DLNA Rederder
Click "DLNA Rederder" to enter the "DLNA Rederder Enable" interface .
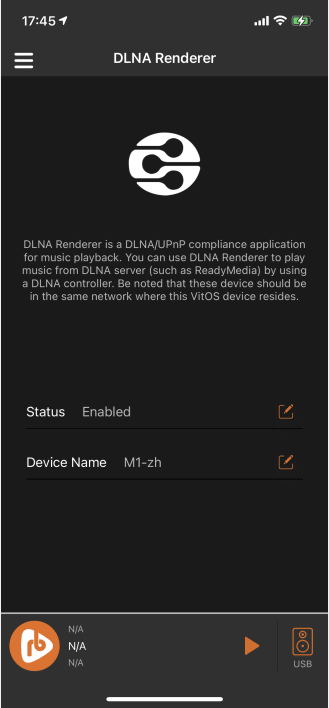
3.5.7.1. Set DLNA Rederder State
Click the "Edit" button to the right of "Status", and the interface for selecting "Status" will pop up .
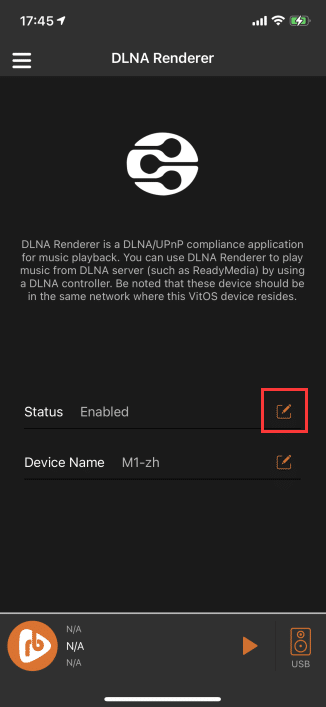

You can "Enable" or "Disable" the DLNA Rederder function in the " Status " interface .
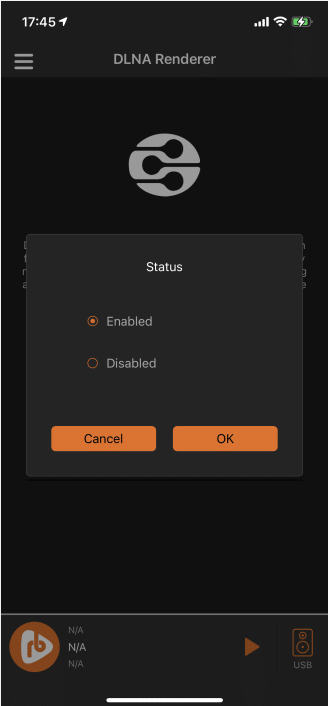
After selecting the status, click "OK", and the "Status" will be updated to the last selected status .

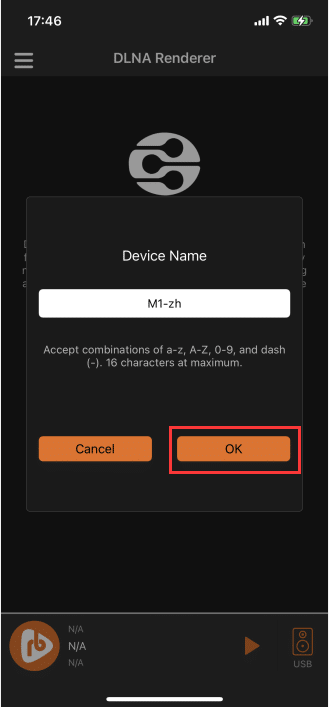
3.5.7.2. Set DLNA Rederder Device Name
Click the "Edit" button to the right of "Device Name " to pop up the "Edit Device Name" interface .
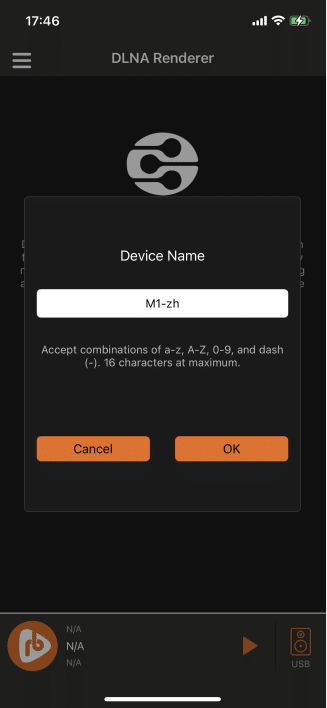
After editing, click "OK" and the DLNA Rederder connect device name will be modified successfully. When connecting, select "new device name".
3.5.7.3. Player App For iOS Devices
using DLNA Rederder , make sure that the "Mconnect" App is installed on the current phone. If it is not installed, go to the App Store to download it .
3.5.7.3.1. Connect Mconnect
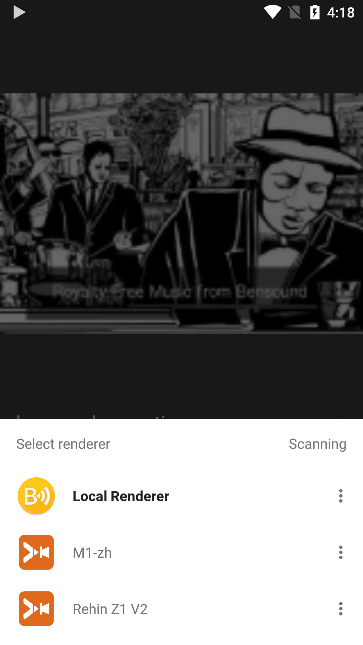
After the DLNA Rederder is enabled, make sure that the "Mobile Device" is connected to the same WiFi network as the M1 or M1T device.Then open the " mconnect " App to connect the M1 or M1T device to play music.
Click "Play to" to enter the "Select Play Device" interface, and automatically find the "device" that can be connected.
"DLNA Rederder Enable " interface in the "VitOS Orbiter " App ,Click the corresponding "Device" in the "Connect Device" interface in " mconnect App " .
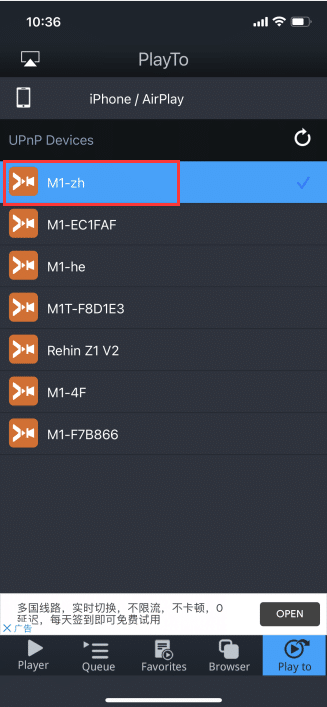
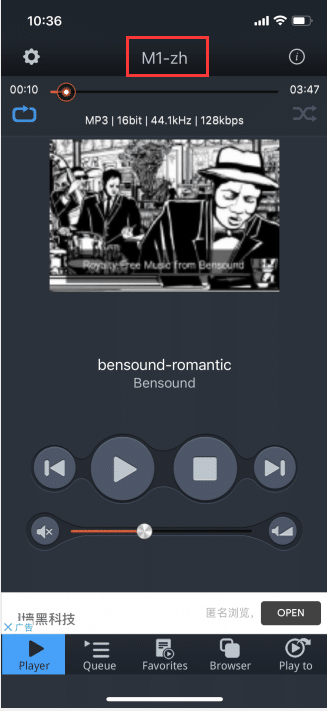
" mconnect " App is successfully connected to the device, the music played on the " mconnect " App can be accessed through the VitOS device on connected headphones or connected playback device.
3.5.7.4. Download BubbleUPnP for Android
Before using BubbleUPnP, make sure that the current phone has installed the BubbleUPnP App, if not, you can copy the link
"http://sec.thunder-data.cn/static/files/saos/com.bubblesoft.android.bubbleupnp_3.5.7.apk" Go to your browser to download .
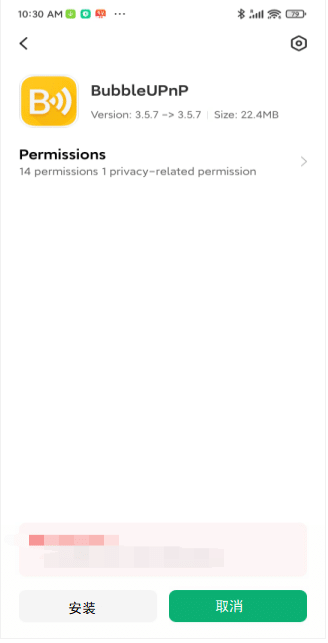
3.5.7.4.1. Connect BubbleUPnP
After the DLNA Rederder is enabled, make sure that the "Mobile Device" is connected to the same WiFi network as the M1 or M1T device.Open " BubbleUPnP " App connects M1 or M1T device to play music.
On the "Now Playing" interface, click the "Select Device" button to enter the "Select Device" interface, and automatically find the "Device" that can be connected
"DLNA Rederder Enable" interface in the "VitOS Orbiter" App ,In the " BubbleUPnP " App , click the corresponding "Device" on the "Connect Device" interface .
"BubbleUPnP " App is successfully connected to the device, the music played on the "BubbleUPnP" App can be played through the VitOS device on connected headphones or connected playback device.

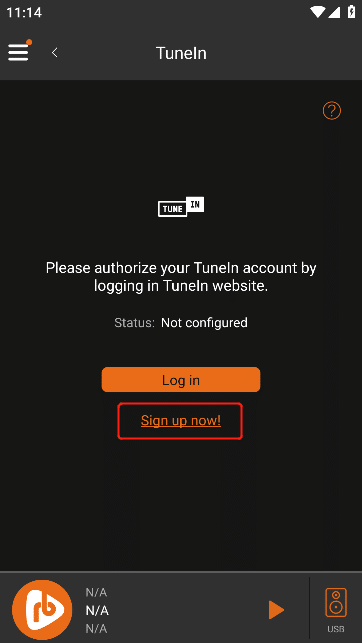
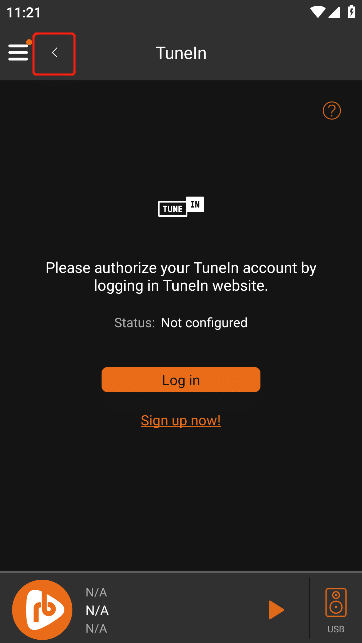
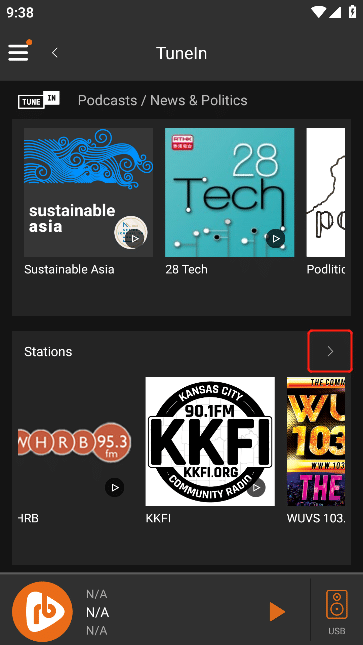
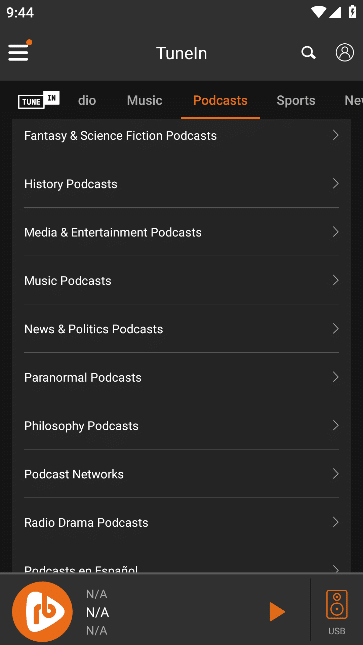
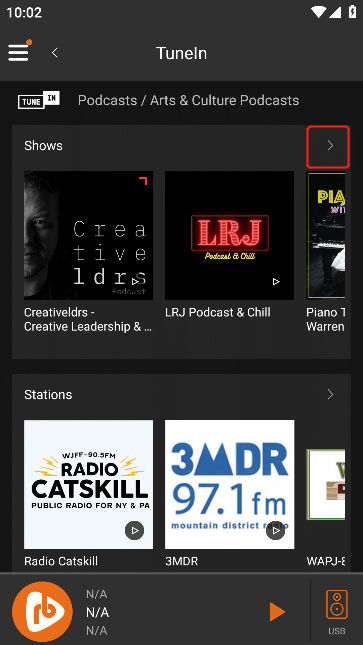
3.5.8. Tuneln
Click " Tuneln " to enter the " Tuneln " interface.
Click the " Avatar " button to enter the " Tuneln Login " interface
Click on the upper right corner " ? " button, pop up "What is Tuneln ?" interface.
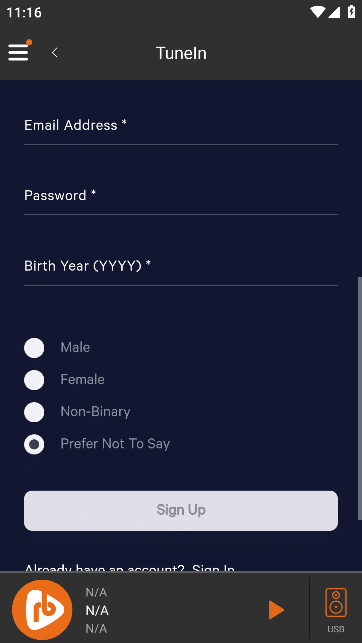
3.5.8.1. Tuneln Login
Click " Login " to enter the " Tuneln Login" interface.
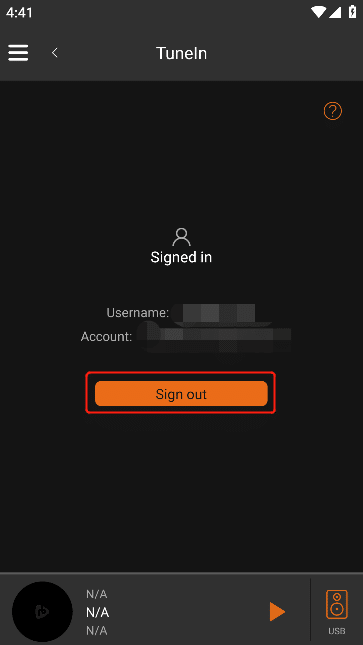
In the "Login" interface, after filling in the "Username" and "Password" , click the "Login" button, and " Signed in" will be displayed after successful login .
If you do not have a " Tuneln Account" , click the "Sign up now" button to jump to the " Tuneln " to register.
3.5.8.2. Tuneln Sign Out
Click the "avatar" button to enter the "Tuneln Account" interface, and click the "Sign Out" button to successfully log out of the current account.
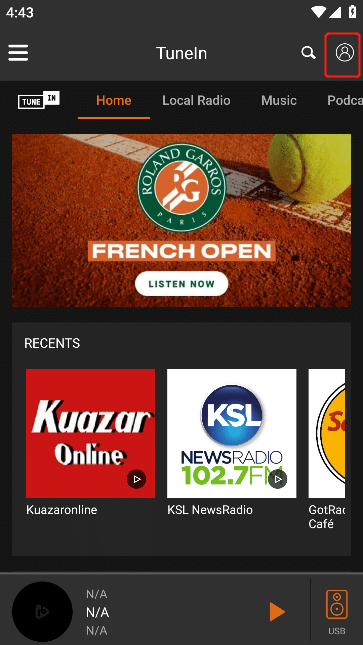
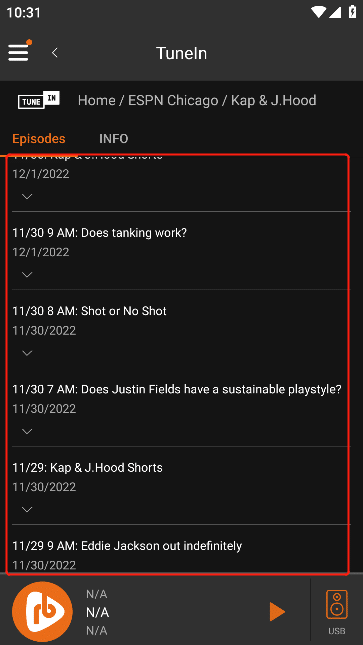
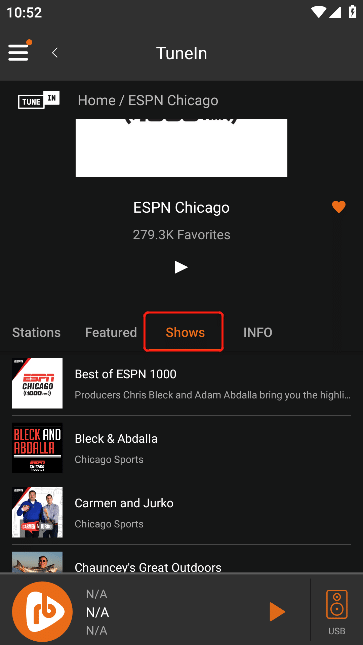
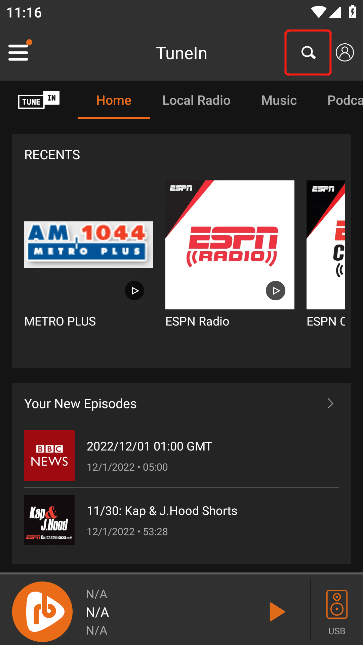
3.5.8.3. Home
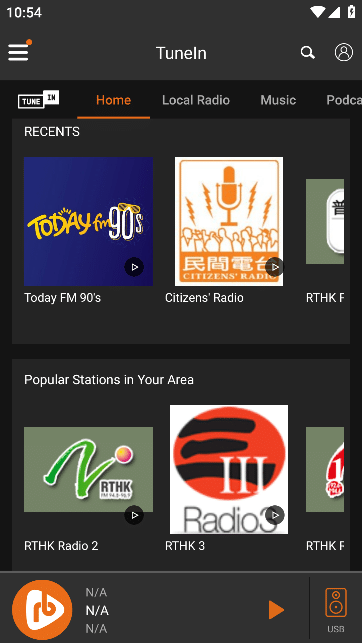
the Login is successful, click the " < " button to return to the " Tuneln Home" interface.
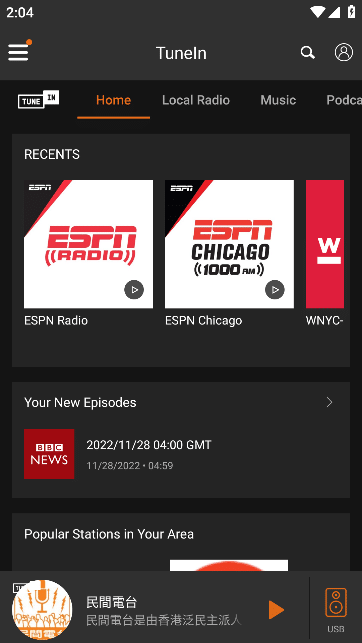

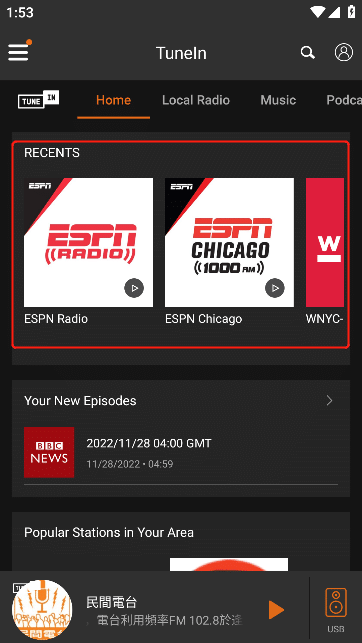
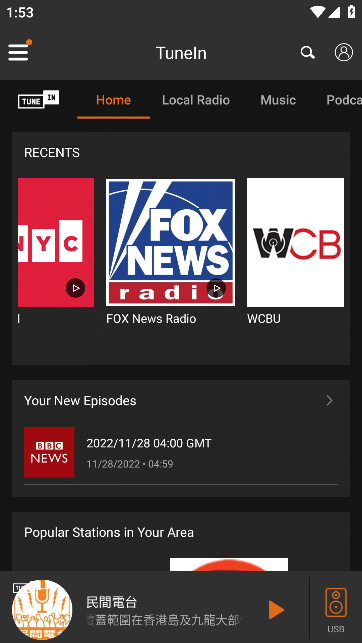
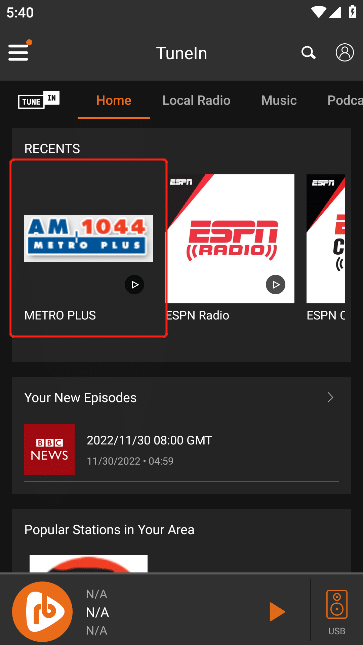
3.5.8.3.1. RECENTS
You can swipe "List" to the left,See more " RECENTS "
3.5.8.3.2. Your New Episodes
In " Your New Episodes " , view the list of new programs
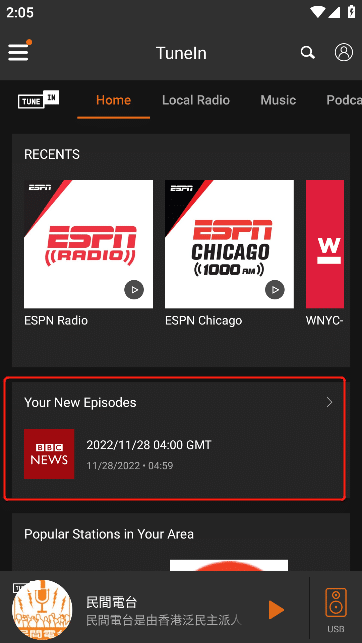
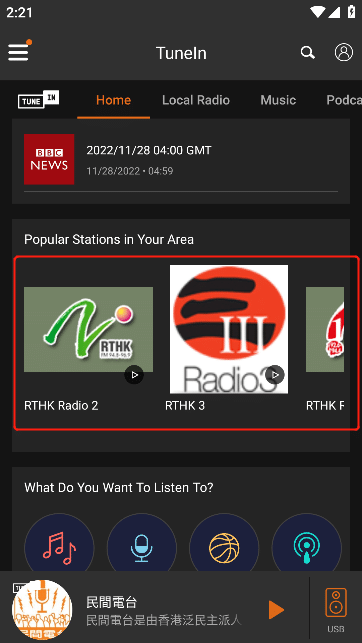
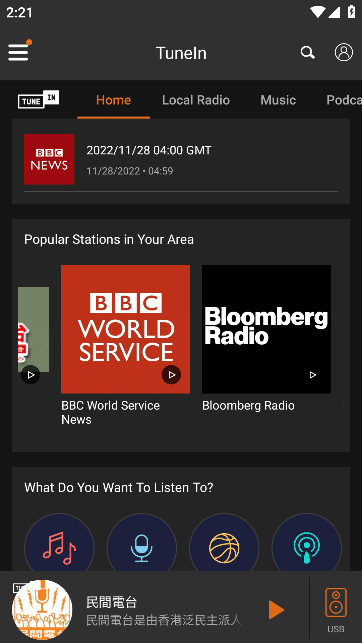
3.5.8.3.3. Popular Stations in Your Area
view more " Popular Stations in Your Area " by sliding the " list " to the left
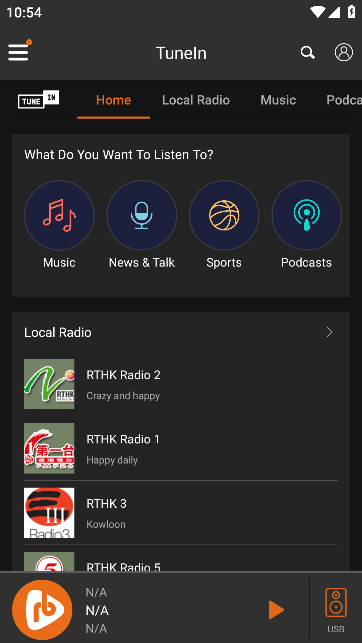
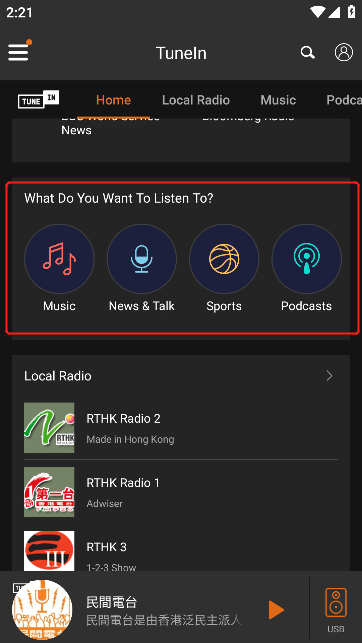
3.5.8.3.4. What Do You Want to Listen To?
see more " What Do You Want to Listen To ? " by sliding the " list " to the left
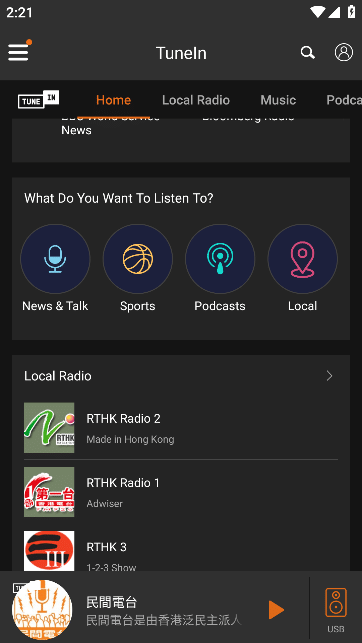
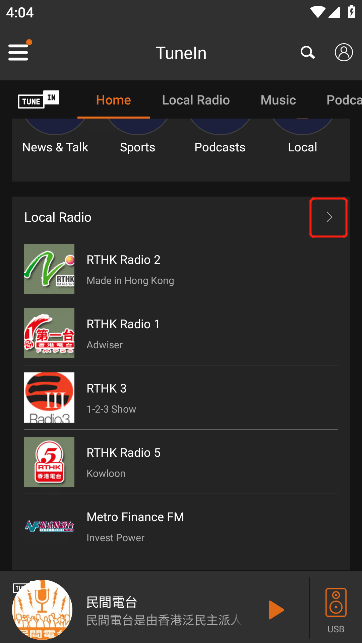
3.5.8.3.5. Local Radio
Click the ">" button on the right side of " Local Radio " to enter the "All Local Radio " interface.
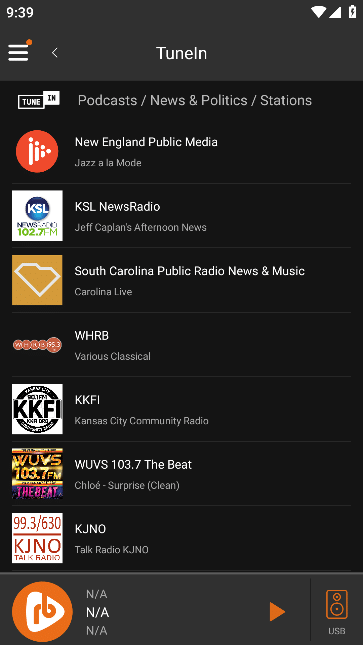
3.5.8.4. Local Radio
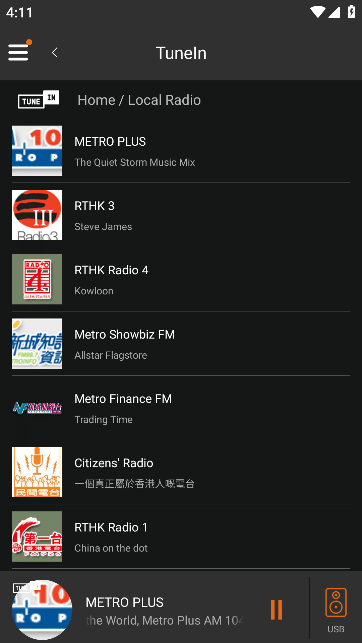
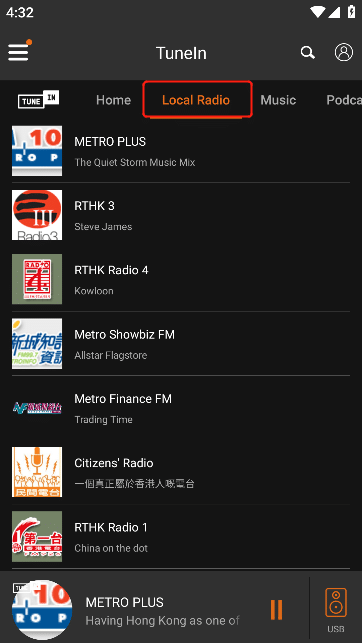
Click the upper menu "Local Radio" to enter the "All Local Radio" interface.

3.5.8.5. Music
Click the upper menu "Music" to enter the "Music Menu" interface.
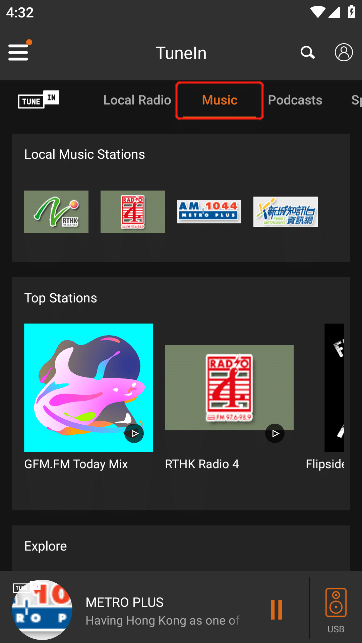

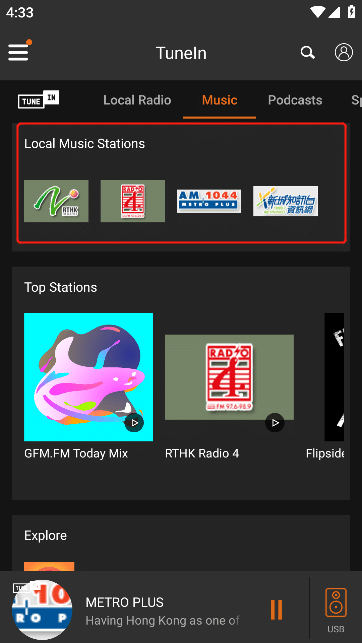
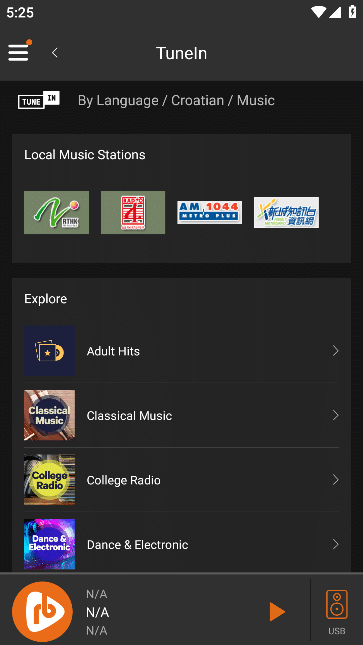
3.5.8.5.1. Local Music Stations
In " Local Music Stations " , view the list of local music stations
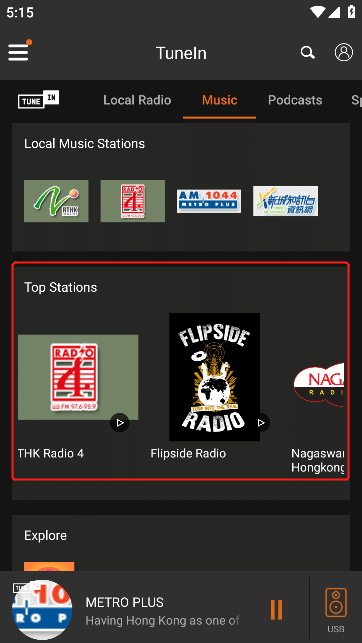
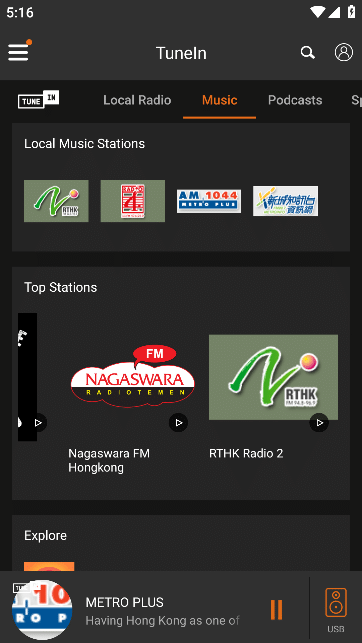
3.5.8.5.2. Top Stations
Swipe left on " Top Stations " to see more Top Stations
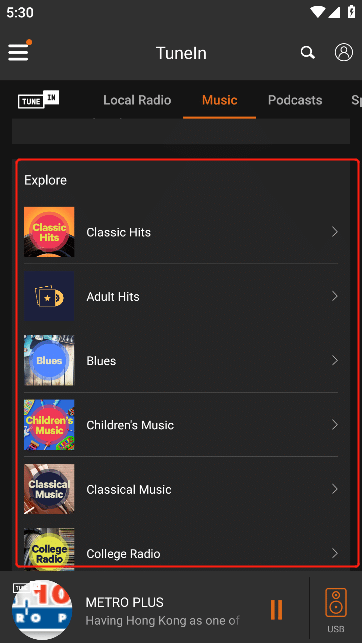
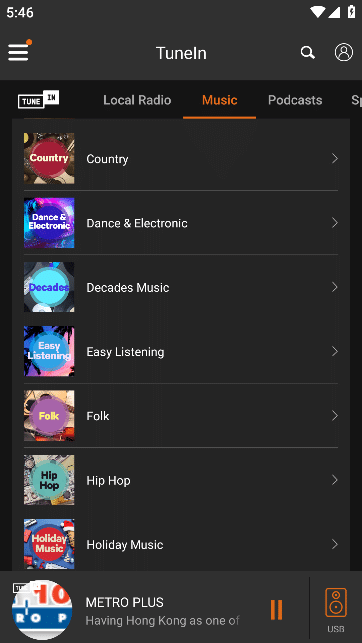
3.5.8.5.3. Explore
see more " Explore " by sliding up Explore
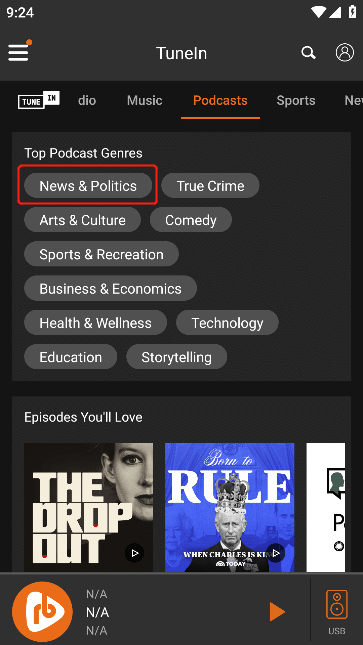
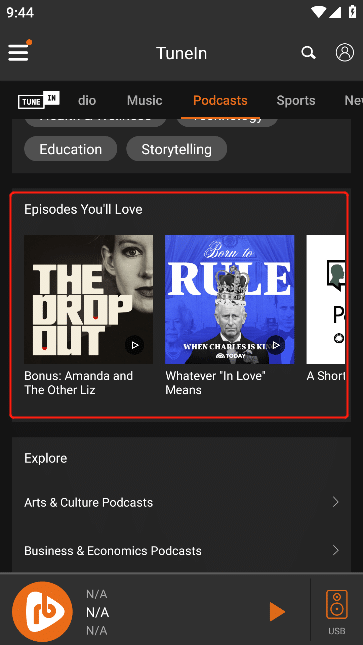
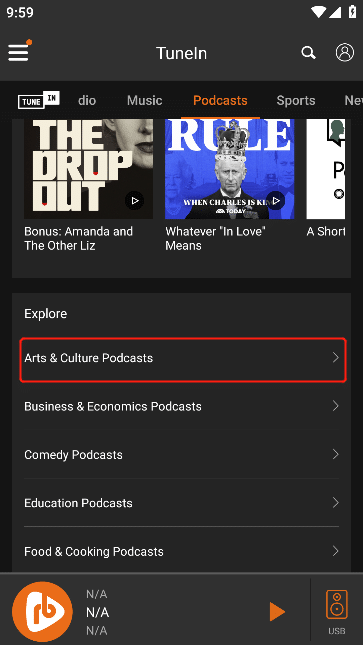
3.5.8.6. Podcasts
Click the upper menu "Podcasts" to enter the Podcasts interface.
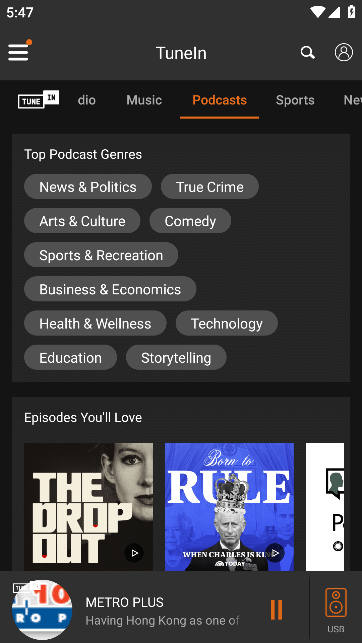
3.5.8.6.1. Top Podcast Cenres
In "Top Podcast Cenres" , view all Top Podcast Cenres
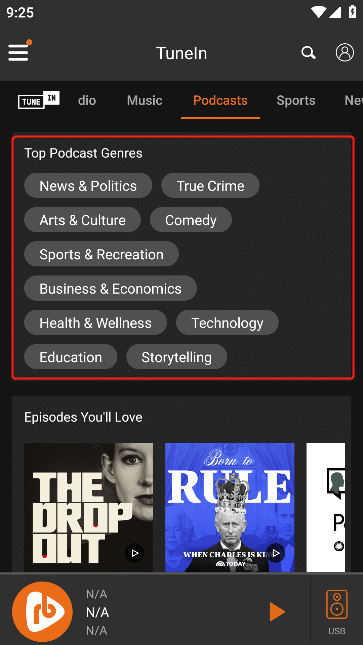
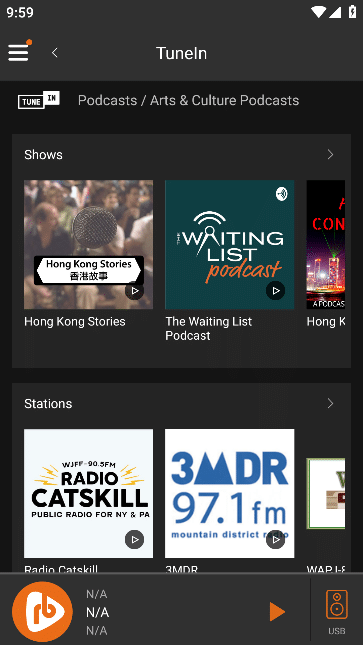
Select any of the " Popular Podcast Categories " to go to the " Shows and Radio Stations " interface for that blog
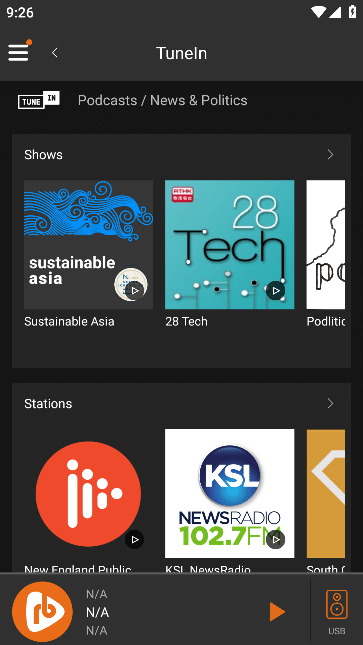
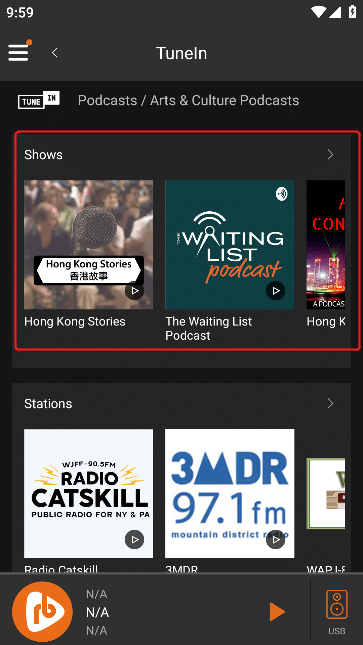
3.5.8.6.1.1. Shows
view more " Shows " by sliding " Shows " to the left
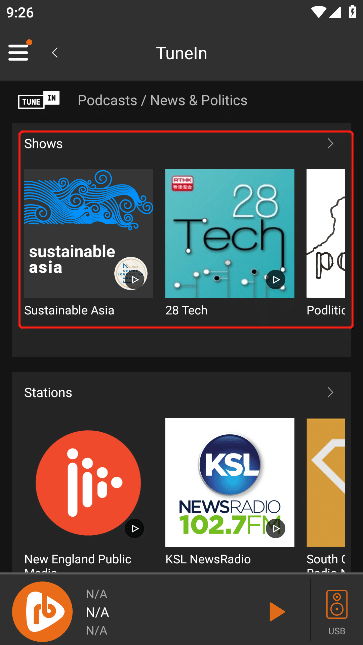
Click the ">" button on the right side of " Programs " to enter the "All Programs " interface.
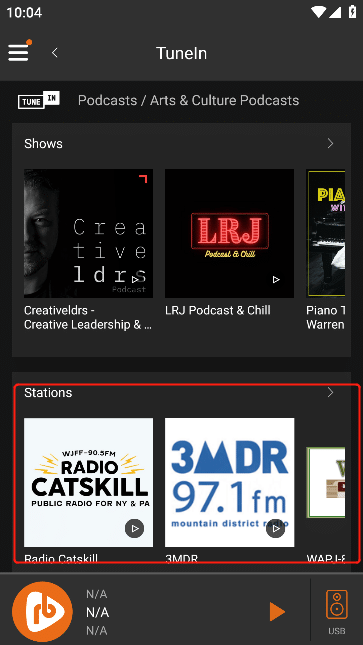
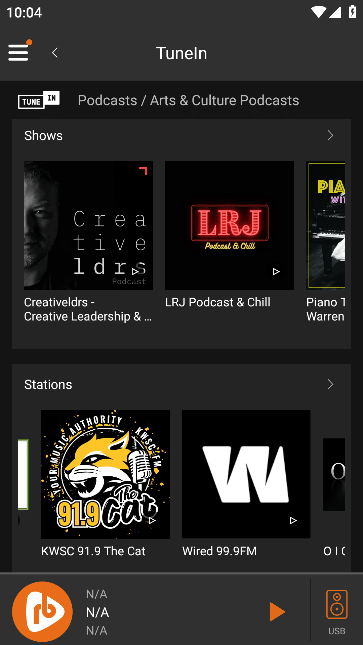
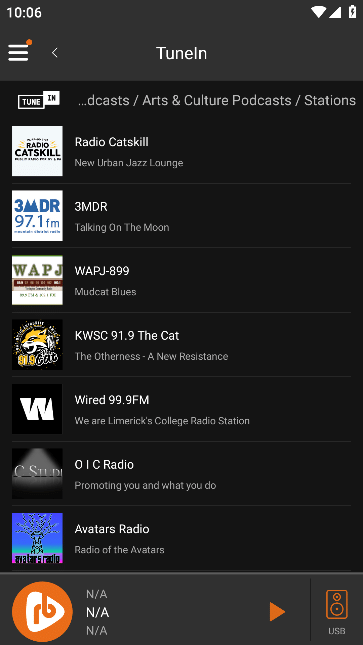
3.5.8.6.1.2. Stations
view more " Stations " by sliding " Stations " to the left

Click the ">" button on the right side of " Radio Stations " to enter the " All Radio Stations " interface.
3.5.8.6.2. Episodes You’ll Love
Swipe left on " Episodes You’ll Love" to see more Episodes You’ll Love
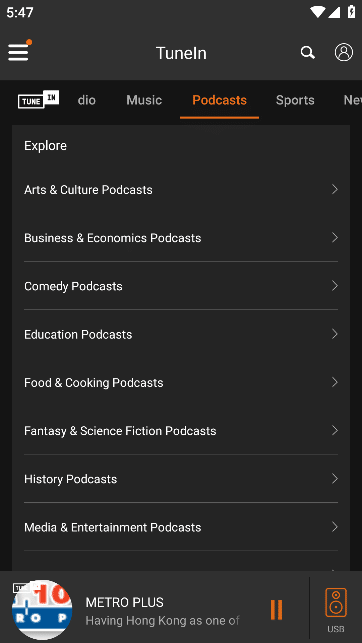
3.5.8.6.3. Explore
In " Explore " , you can swipe up " Explore " to view more " Explore " content
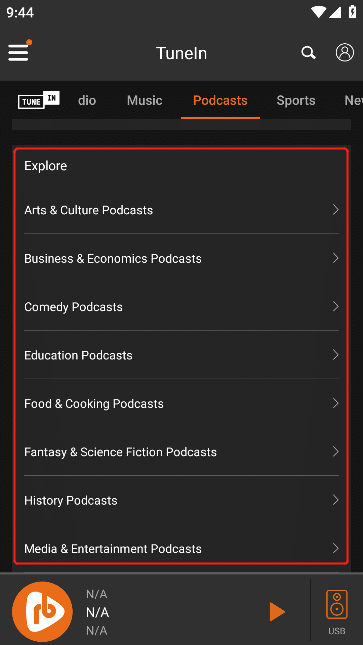
Select any " blog category " to enter the blog's " Programs and radio stations " interface
3.5.8.6.3.1. Shows
view more " Shows " by sliding " Shows " to the left

Click the ">" button on the right side of " Programs " to enter the "All Programs " interface.

3.5.8.6.3.2. Stations
view more " Stations " by sliding " Stations " to the left
Click the ">" button on the right side of " Radio Stations " to enter the " All Radio Stations " interface.

3.5.8.7. Sports
Click the upper menu "Sports" to enter the "Sports Menu" interface.

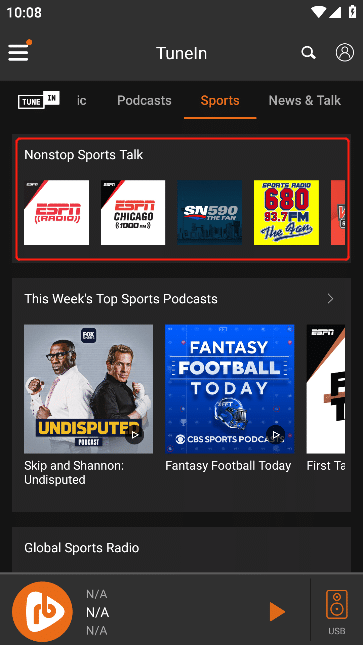
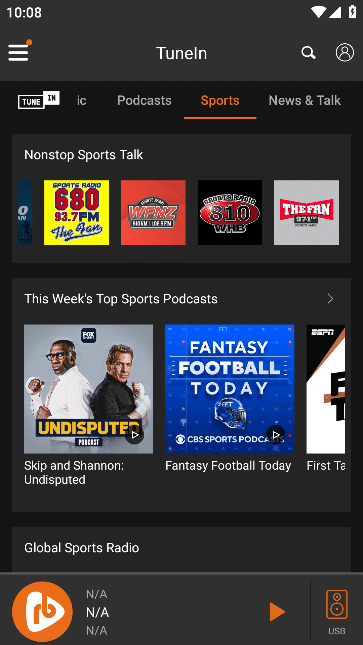
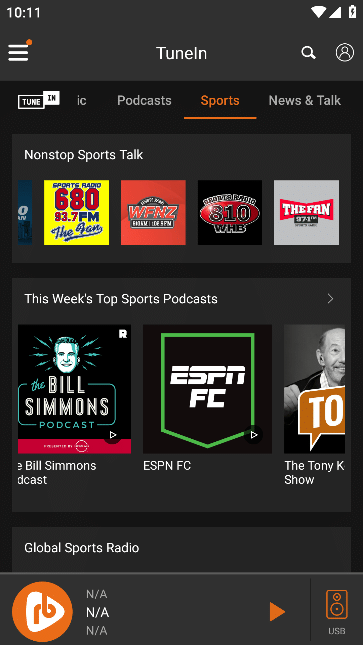
3.5.8.7.1. Nonstop Sports Talk
view more " Nonstop Sports Talk " by swiping left on " NonStop Sports Talk"
3.5.8.7.2. This Week’s Top Sports Podcasts
Swipe left on " This Week’s Top Sports Podcasts " to view more " This Week’s Top Sports Podcasts "

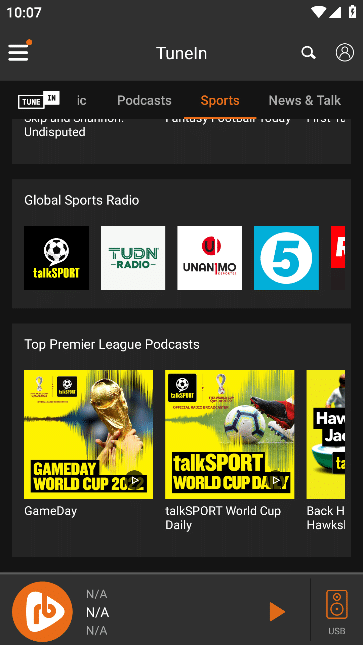
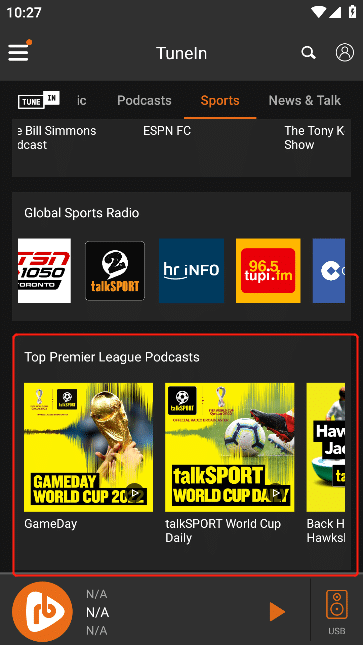
3.5.8.7.3. Global Sports Radio
Swipe left on " Global Sports Radio " to view more " Global Sports Radio "
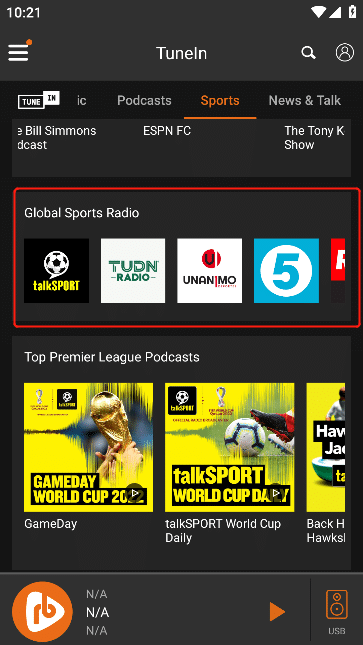

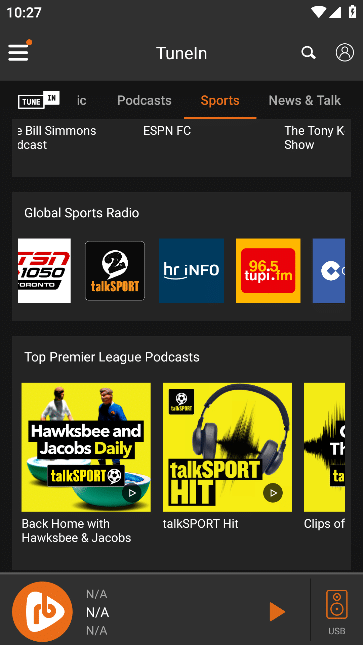
3.5.8.7.4. Top Premier League Podcasts
view more " Top Premier League Podcasts" by swiping left on " Top Premier League Podcasts "
3.5.8.8. News & Talk
Click on the upper menu "News & Talk" to enter the "News & Talk" interface.
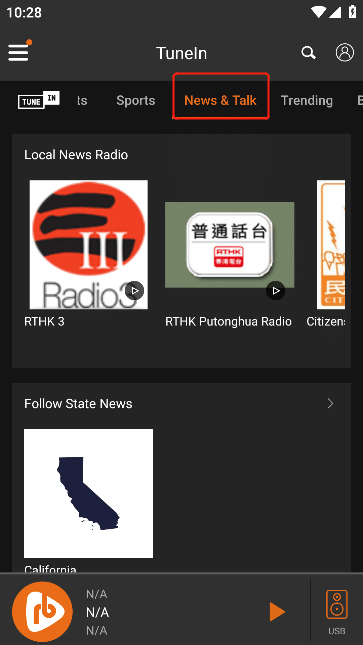
3.5.8.8.1. Local News Radio
view more " Local News Radio" by swiping left on " Local News Radio"

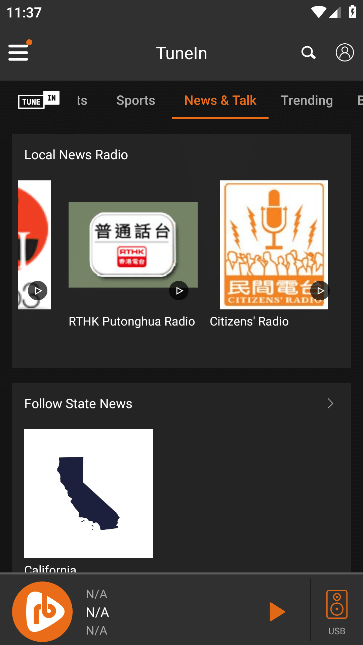
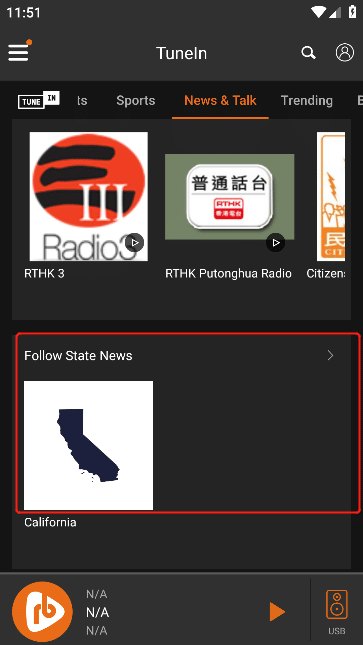
3.5.8.8.2. Follow State News
view more " Follow State News " by sliding the " Follow State News " to the left
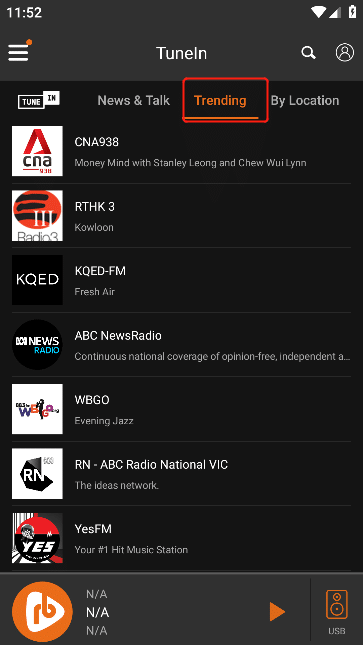
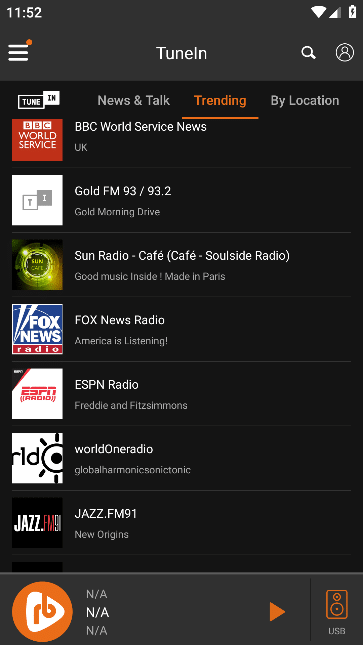
3.5.8.9. Trending
Click on the upper menu "Trending" to enter the "Trending List" interface. Swipe up on " Popular " to see more " Trending" content .
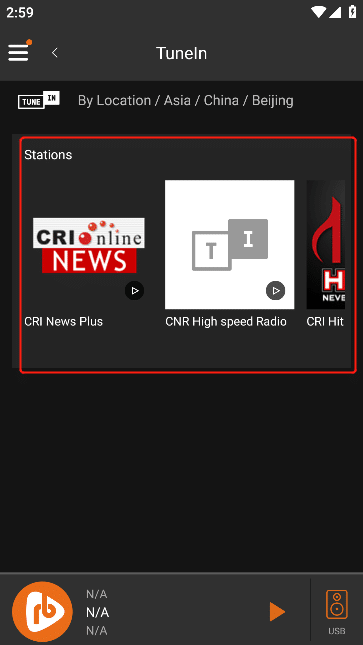
3.5.8.10. By Location
Click on the upper menu "By Location" to enter the "Area List" interface.
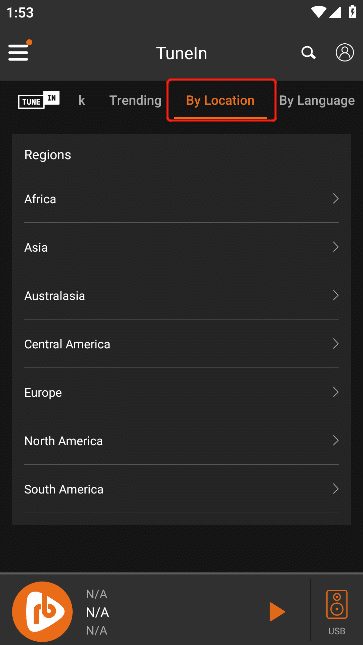
selecting " Region " , enter "Specific Location" to select the region

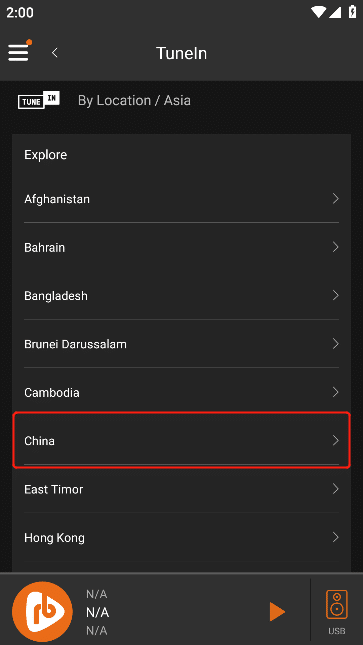
selecting the "Specific Location" of the area, you can view the "Radio Station and exploration list" of the location
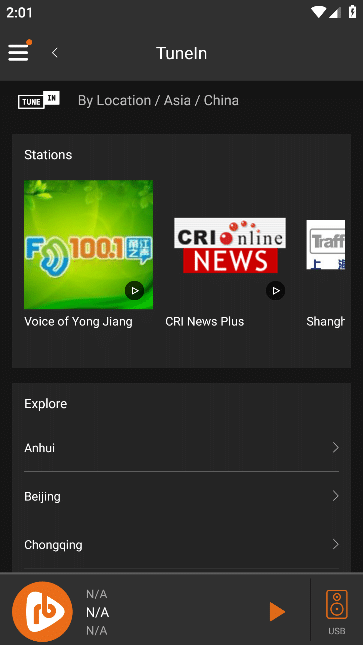
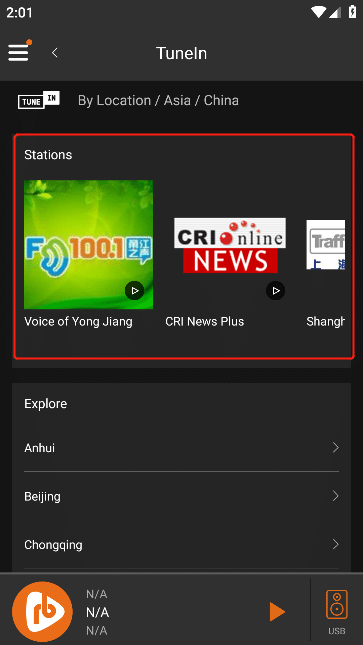
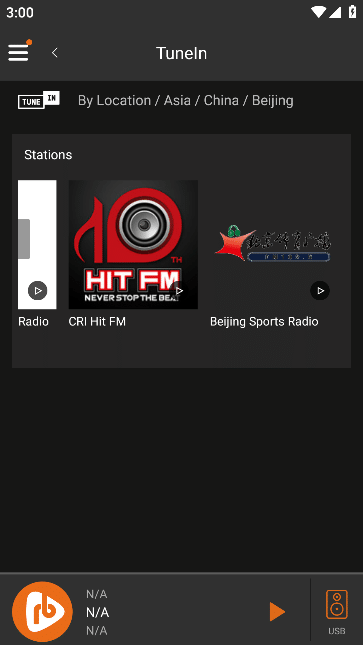
3.5.8.10.1. Stations
view more " Stations " by sliding "Stations " to the left
3.5.8.10.2. Explore
view more " Explore " locations by swiping up the " Explore " list
Select any "Explore" location to enter the "Radio Station" interface of that location

3.5.8.10.2.1. Stations
view more " Stations " by sliding " Stations " to the left
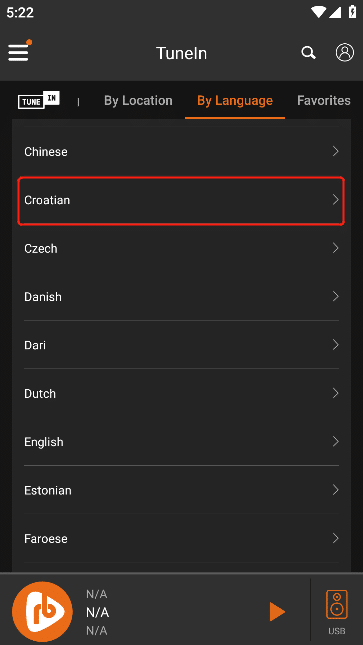
3.5.8.11. By Language
Click on the upper menu "By Location" to enter the "Language List" interface. You can view more " Language " content by sliding " Language " up .


selecting " Language " , enter the " Category " of selecting the language
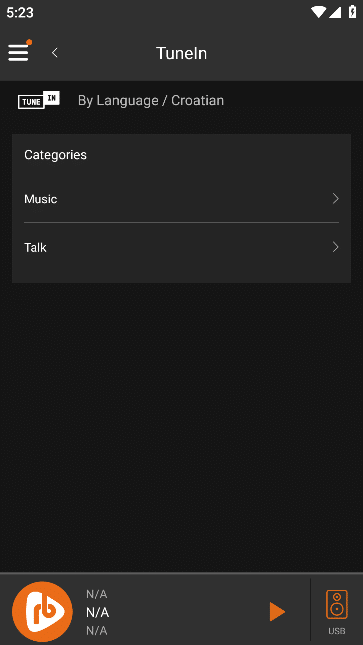
3.5.8.11.1. Music
selecting " Music " , enter the " Local Music Station and Discovery " interface of the music

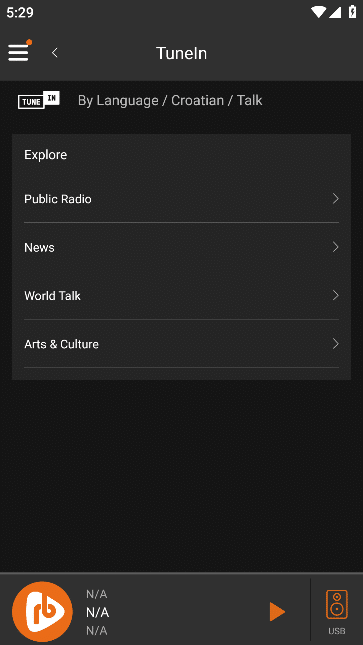
3.5.8.11.2. Talk
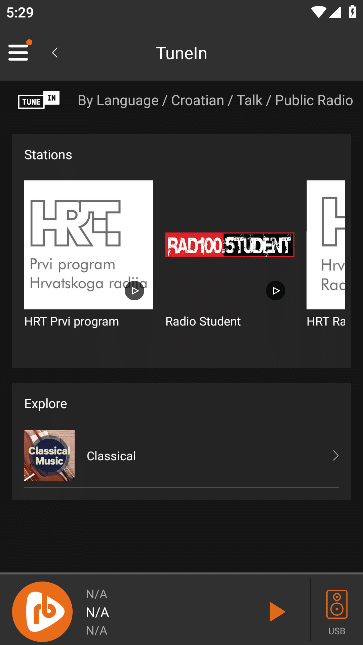
selecting " Talk " , enter the " Talk List " interface of the conversation, and then select any " Explore " content

Go to the "Stations 、Explore" screen for that Discovery .
3.5.8.12. Favorites
Click the upper menu "Favorites" to enter the "Favorites List" interface. You can view more " Favorites " content by sliding " Favorites " up .

3.5.8.13. Playback Operation
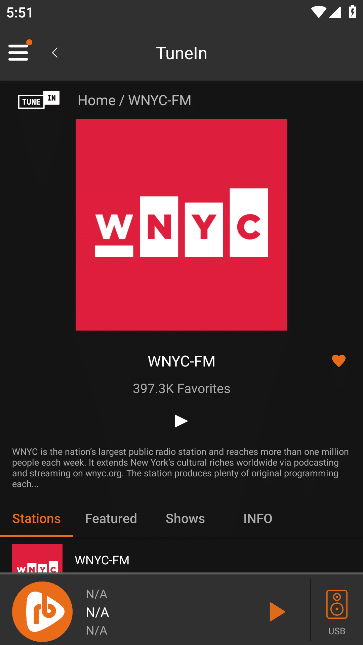
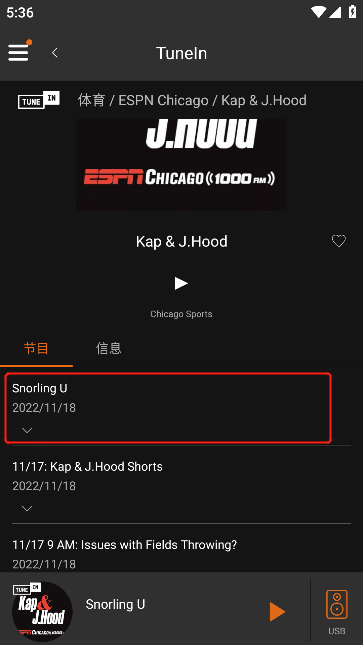
Select any "Station" to enter the "Station" information interface.
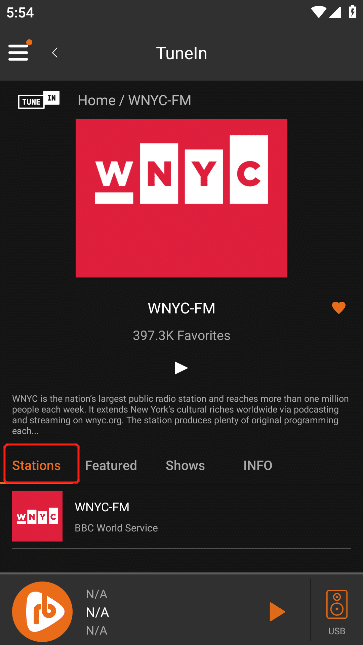
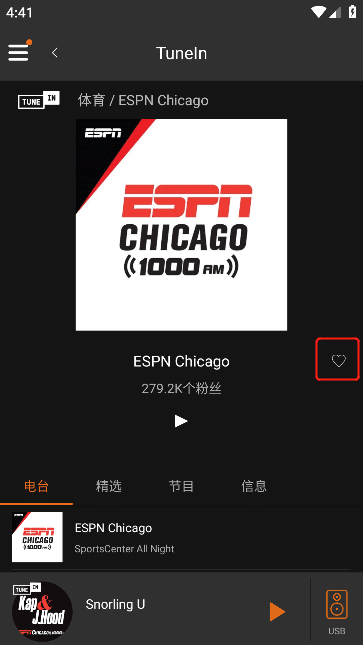
3.5.8.13.1. Stations
Enter the "Stations" interface, or click the upper menu "Stations" to enter.
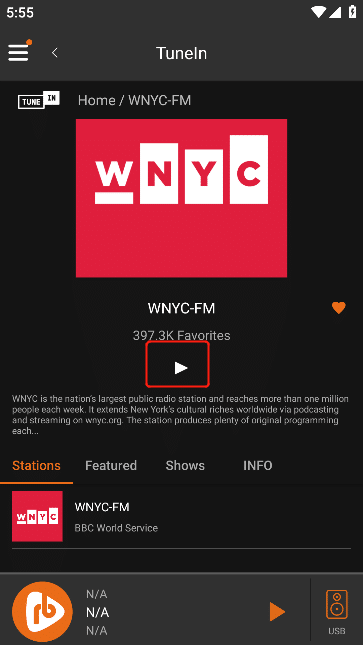
3.5.8.13.1.1. Stations Play
Click the " Play " button , or select the content in the " Stations" , you can play the radio station.
3.5.8.13.2. Featured
Click the upper menu "Featured" to enter the "Featured List" .
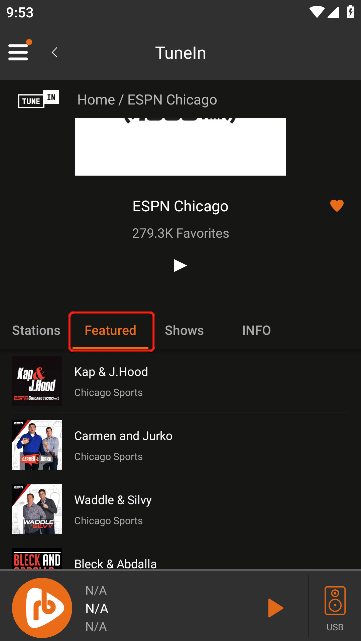
Select the content in the " Selected List " to enter the selected " Programs and Information " interface.

3.5.8.13.2.1. Episodes
Enter the selected "Episodes" list interface, or click the upper menu "Episodes" to enter. You can view more " Episodes" content by sliding up " Episodes" .
3.5.8.13.2.2. Episodes play
Click the " Play " button , or select the content in the " Episodes " , you can play the program.
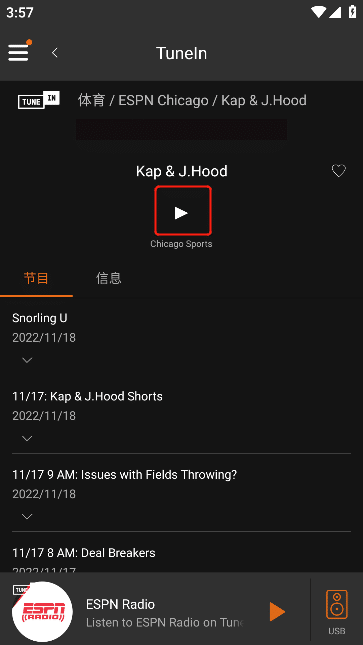
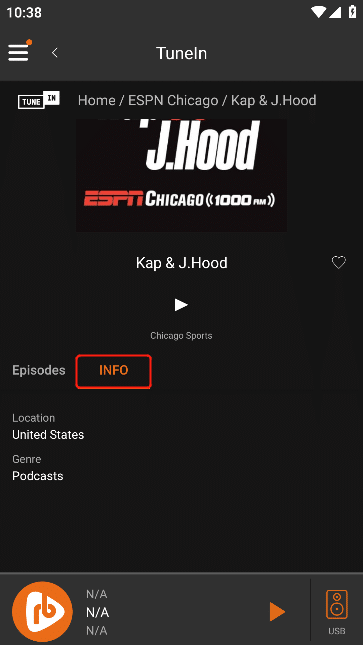
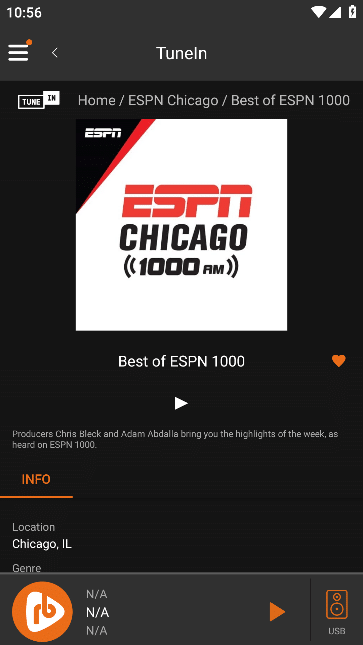
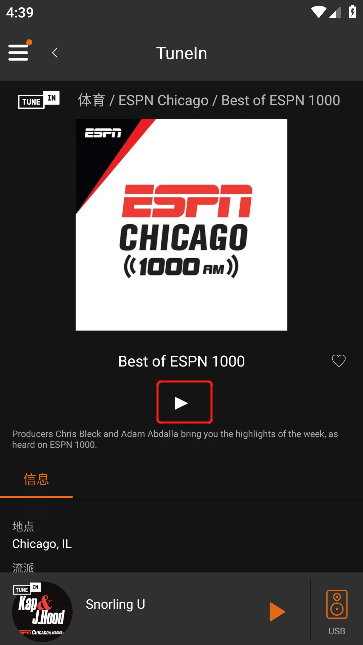
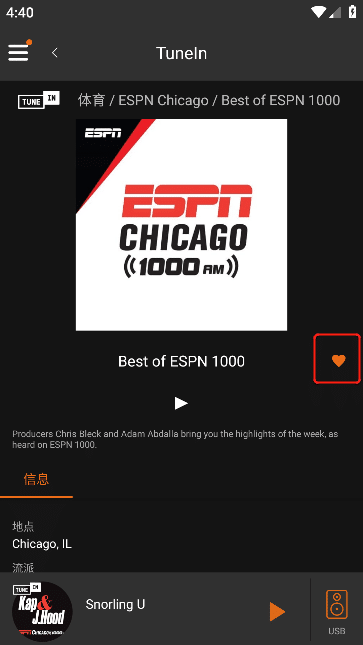
3.5.8.13.2.3. INFO
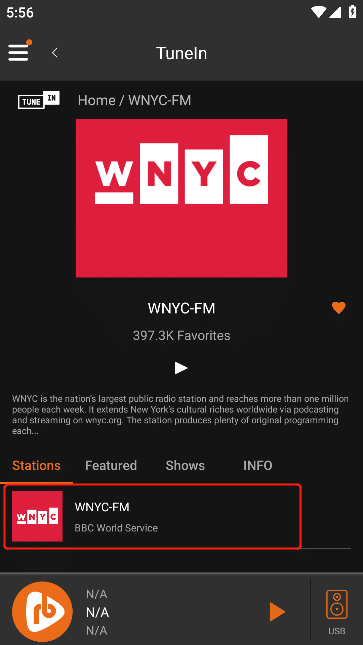
Click the upper menu "INFO" to enter the selected "INFO" interface .
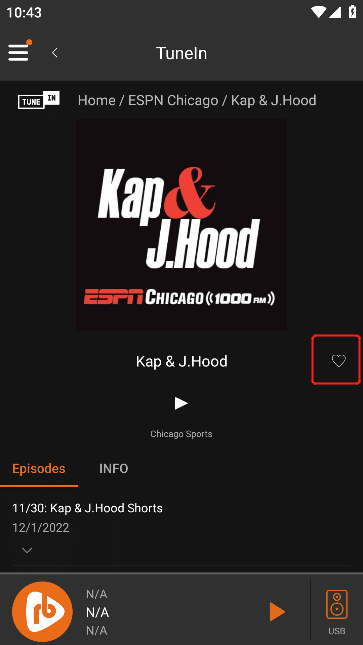
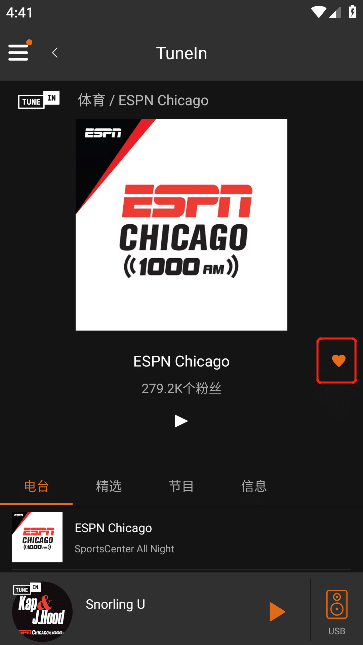
3.5.8.13.2.4. Favorites Featured
Click the heart-shaped icon on the right, if it turns orange after clicking, it means it has been successfully added to " Favorites", if it turns black after clicking, it means it has been deleted from " Favorites" (Note: " Favorites " can be viewed in step 3.5.8.11)

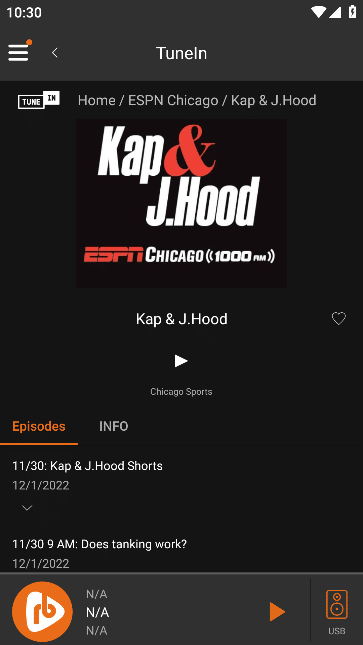
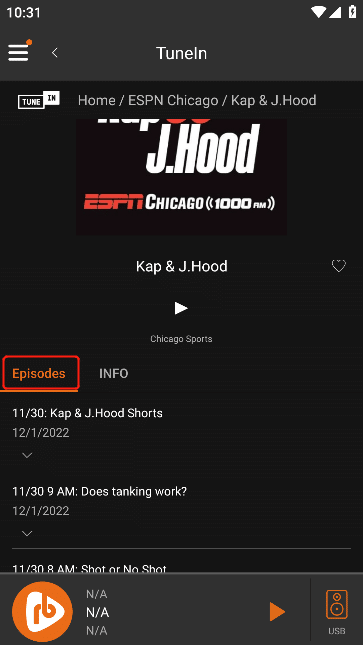
3.5.8.13.3. Shows
Click on the upper menu "Shows" to enter the "Shows" . You can view more " Programs " content by sliding up " Shows" .
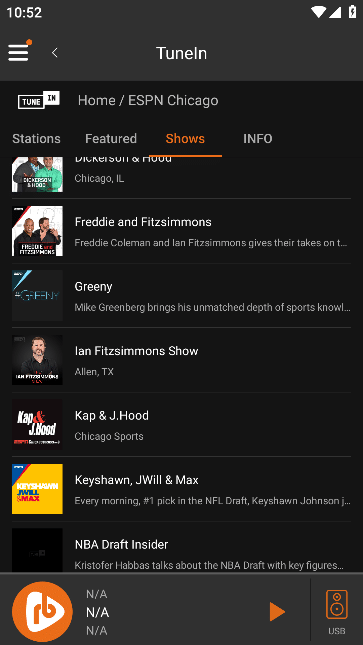
Select the content in the " Program List " to enter the " Information " interface of the program.

3.5.8.13.3.1. Show Play
Click the " Play " button to play the program.
3.5.8.13.3.2. Favorites Shows
Click the heart-shaped icon on the right, if it turns orange after clicking, it means it has been successfully added to " Favorites", if it turns black after clicking, it means it has been deleted from " Favorites" (Note: " Favorites " can be viewed in step 3.5.8.11)

3.5.8.13.4. INFO
Click on the upper menu "INFO" to enter the station's "INFO" interface .
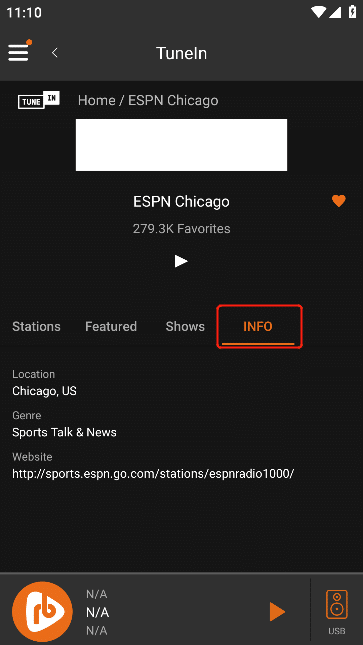
3.5.8.13.5. favorite station
Click the heart-shaped icon on the right, if it turns orange after clicking, it means it has been successfully added to " Favorites", if it turns black after clicking, it means it has been deleted from " Favorites" (Note: " Favorites " can be viewed in step 3.5.8.11)
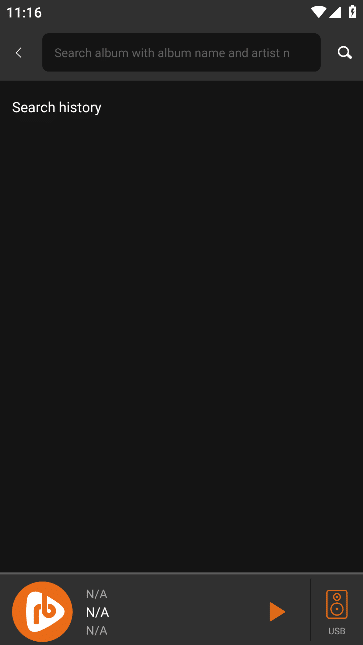
3.5.8.14. Search
Click the "Search" button in the upper right corner to enter the "Search" interface.
In the "Search" interface, enter the content to be searched, and click the "Start Search" button to view the stations, programs, and artists that match the search content .


After searching, you can see the "Search Record" on the "Search" interface . Click any search content to start searching again based on the search content.


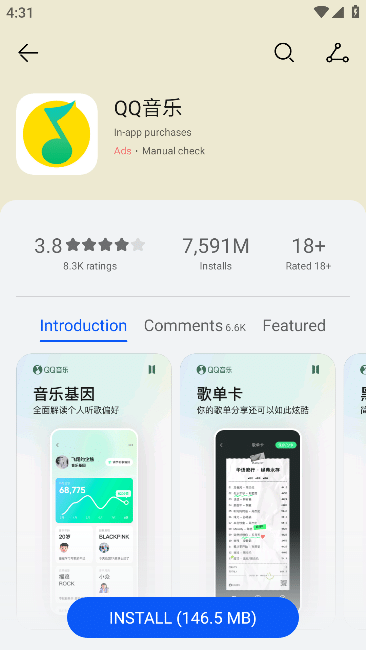
3.5.9. QQ Music
Click "QQ Music" If you have installed "QQ Music", then open "QQ Music", if you have not installed "QQ Music", then jump to the application market "QQ Music" installation interface.
3.5.9.1. Device Launch
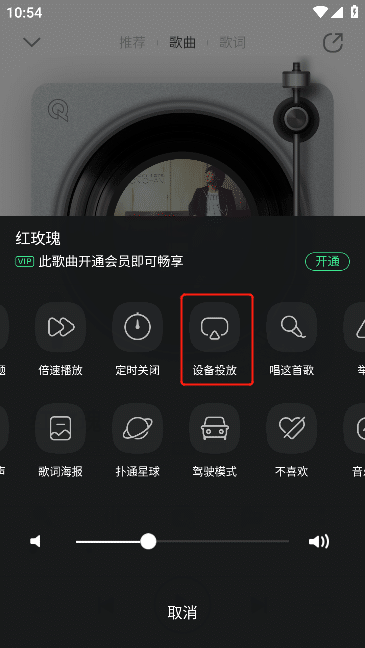
Click "Small Player" to jump to the "Big Player" interface and select the "More Operations" button

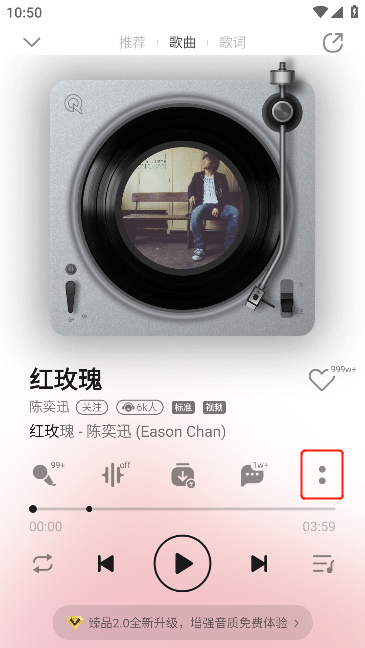
Click the "Device Delivery" button to enter the "Select Device" interface, and select the name of your corresponding player.
3.5.9.2. Small Player
On the "Mini Player" interface, the label "QQ Music" is displayed on the upper left corner of the cover
3.5.9.3. Big Player
On the "Big Player" interface, the label "QQ Music" is displayed on the upper left corner of the cover
3.5.9.4. Play Queue
In the "Big Player" interface, click the "Play Queue" button, and the "QQ Music" label will be displayed in the upper left corner, and the tracks in the list are all "QQ Music" tracks.
3.5.10. TIDAL Connect
Click "TIDAL Connect" to enter the "TIDAL Connect Enable" interface.

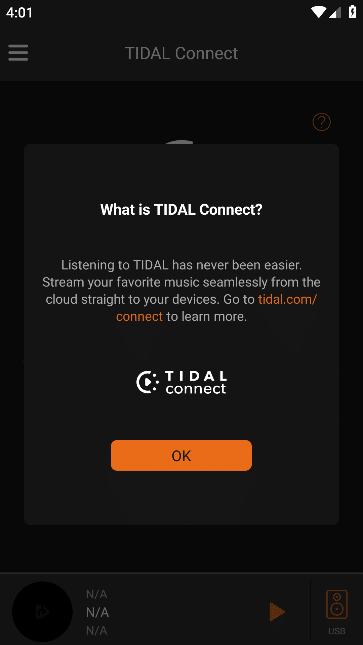
Click the "?" button in the upper right corner, and "What is Tidal Connect?" pops up.
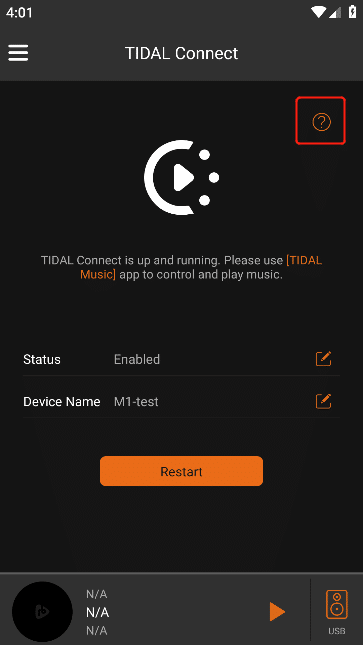
3.5.10.1. Set TIDAL Connect Status
Click the "Edit" button on the right side of "Status", and the interface for selecting "Status" will pop up.


The TIDAL Connect function can be "Enabled" or "disabled" on the "Status" interface.
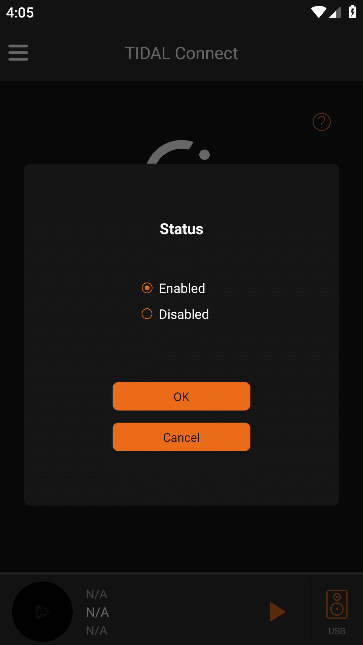

After selecting the status, click the "OK" button, and the "Status" will be updated to the last selected status.


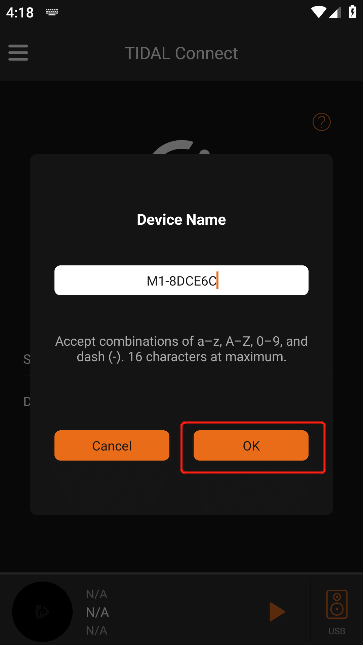
3.5.10.2. Set TIDAL Connect Device Name
Click the "Edit" button on the right side of "Device Name", and the "Edit Device Name" interface will pop up.
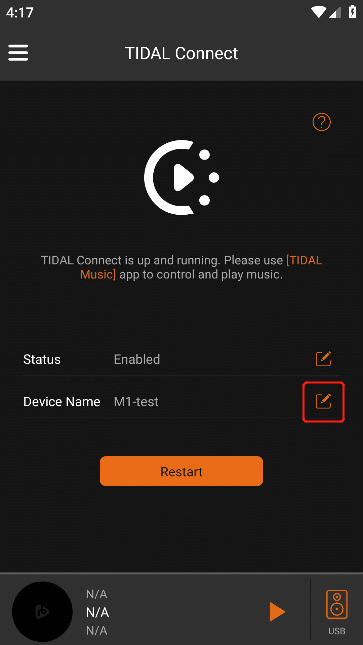
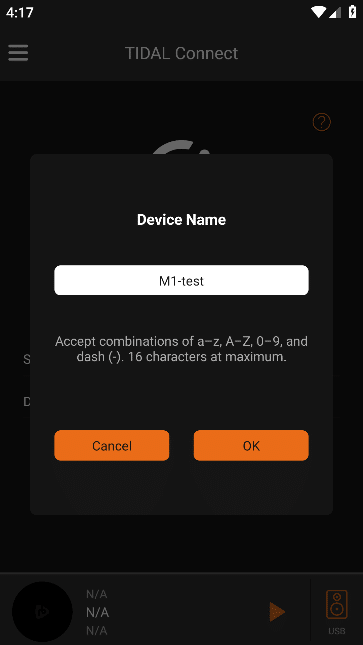
After editing, click "OK", and the "Device Name" will be updated with the new device name.

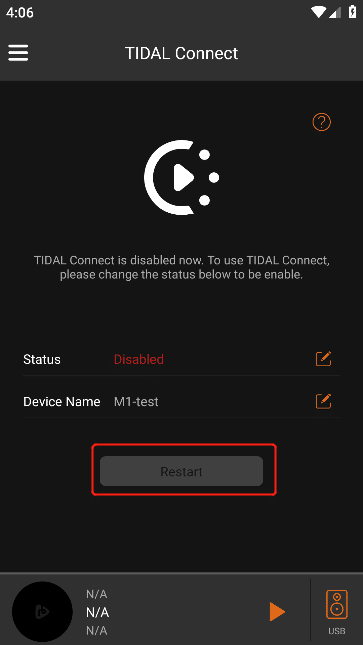
3.5.10.3. Restart TIDAL Connect
When the current TIDAL Connect status is "Start", you can click the "Restart" button below to enable the TIDAL Connect function again.
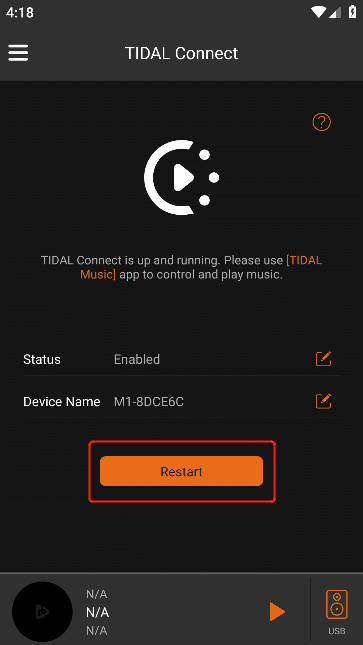
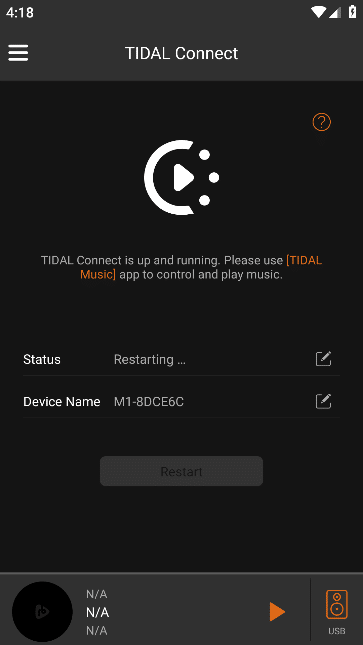
When the current TIDAL Connect status is "Disabled", the "Restart" button below cannot be clicked.
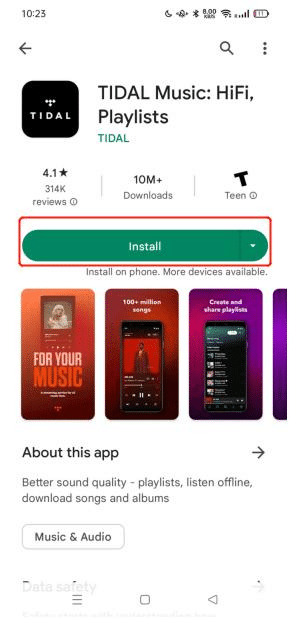
3.5.10.4. Download TIDAL App
Before using TIDAL Connect, you need to make sure that the TIDAL App has been installed on the current mobile phone. If you have not installed it, you need to download the "TIDAL" App.

3.5.10.5. Connect to TIDAL App
Open the TIDAL App, enter and log in your TIDAL account, log in and enter the TIDAL App
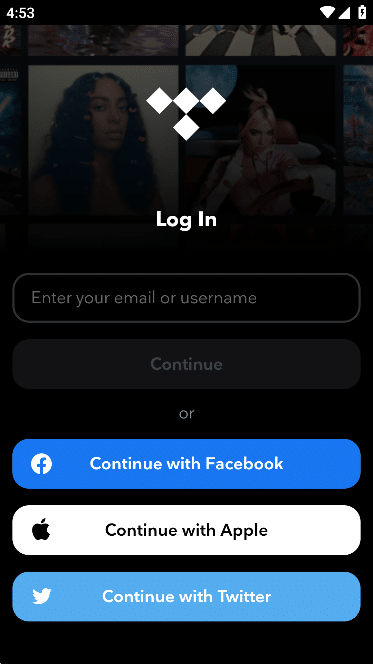
After playing the track in the TIDAL App, click to open the large player interface, select the device button marked on the upper right corner, find the device name set in the VitOS Orbiter App, and click to connect.
3.6. Player
3.6.1. Small Player
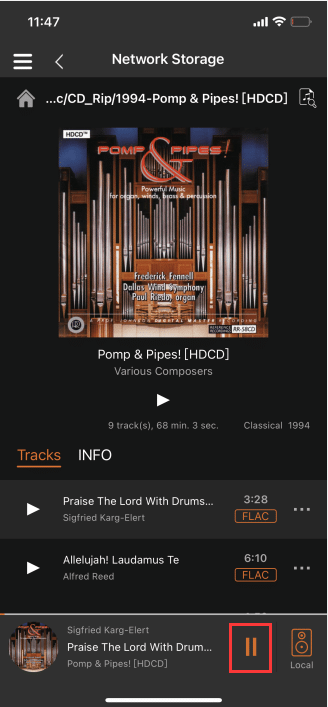
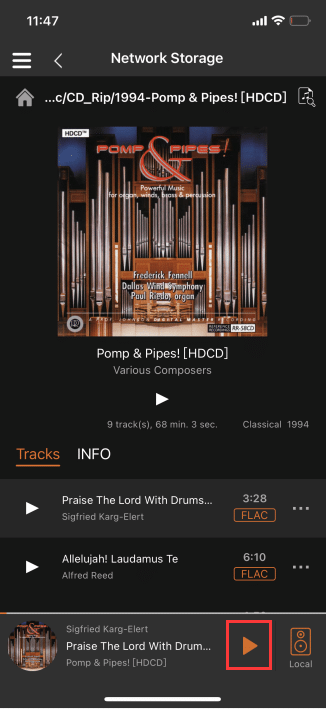
3.6.1.1. Play And Pause
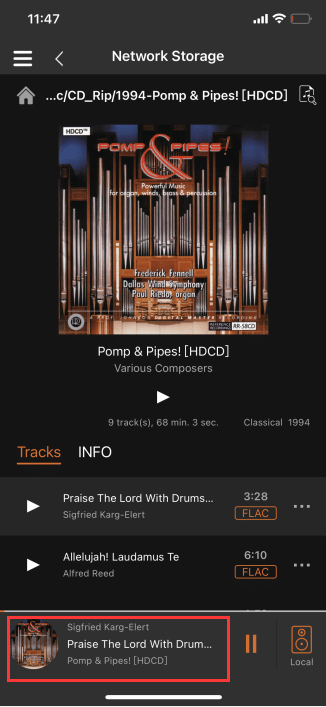
![]()
![]() After playing the song, click the "||" button, the song will pause, click the " " button, the song will continue to play,“||” means playing, “ ” means pause playing.
After playing the song, click the "||" button, the song will pause, click the " " button, the song will continue to play,“||” means playing, “ ” means pause playing.
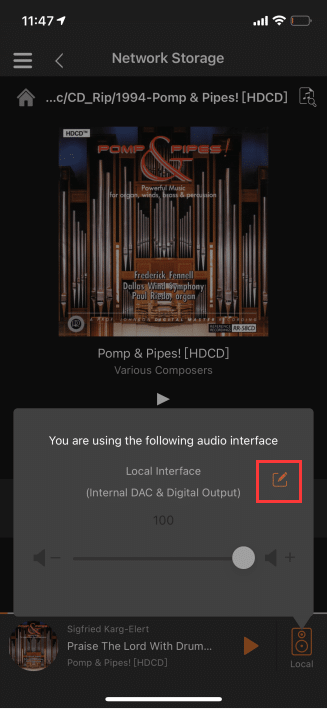
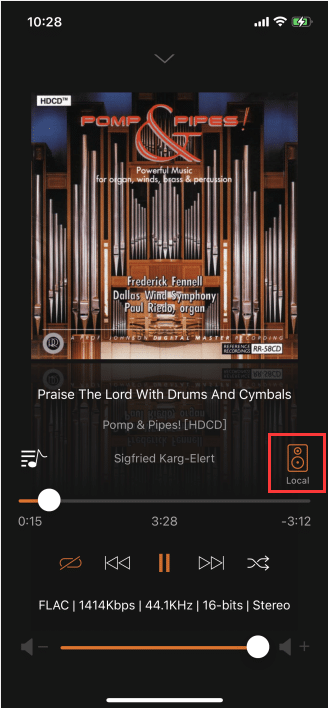
3.6.1.2. Local
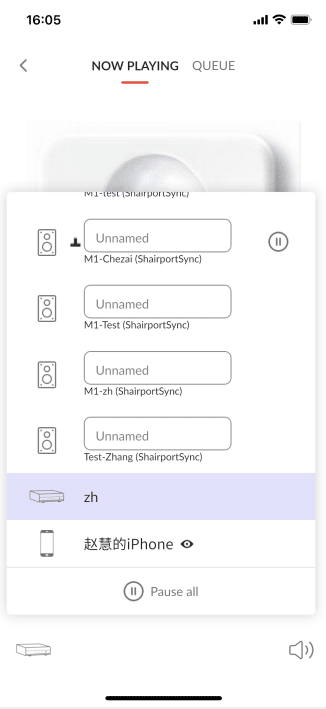
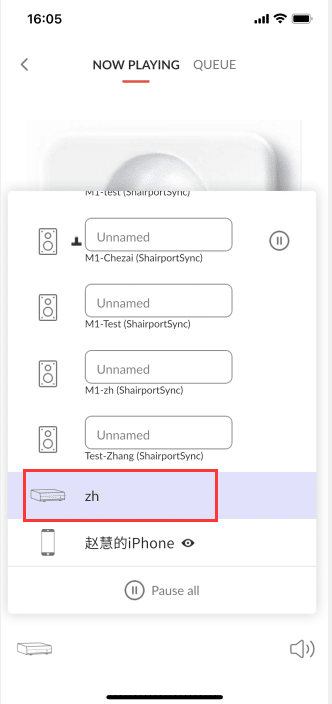
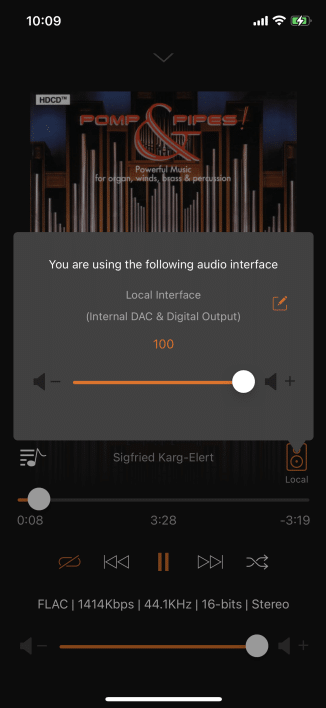
Click the "Local" button to pop up the "Audio Interface", where you can adjust the volume of the song playing.

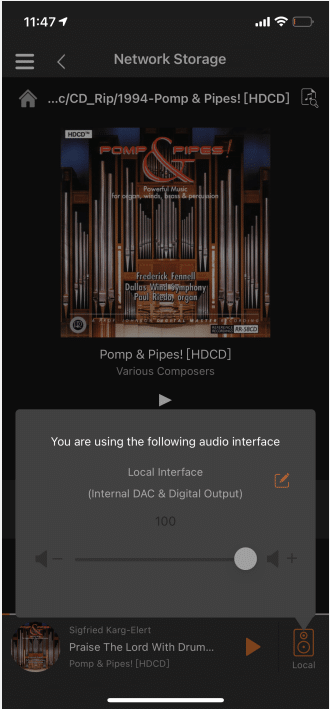
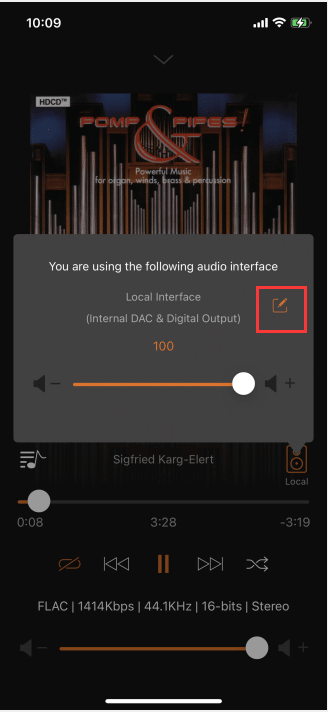
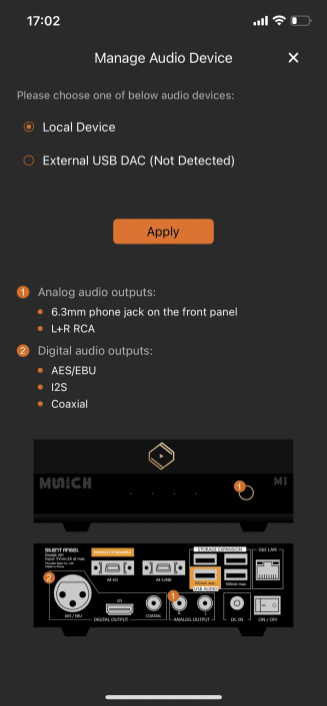
Click the "Edit" button on the right side of "Audio Output Device" to enter the "Manage Audio Output Device" interface.(Note: "Managing Audio Output Devices" is in "Local Music" file Step 3.5.1)

3.6.2. Big Player
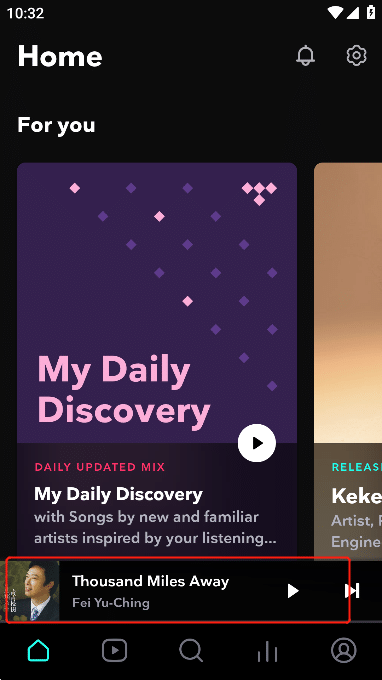
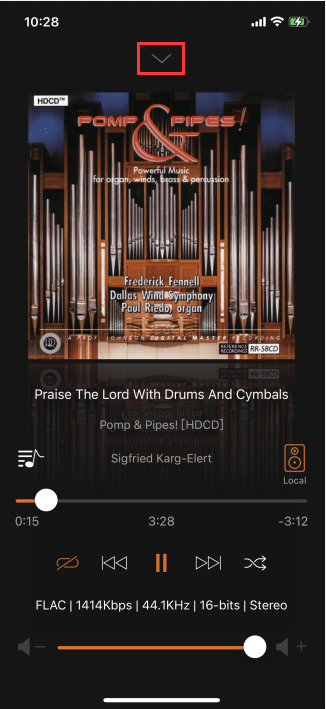
After playing the song, click the "small player" below to enter the "big player" interface.
Click the "![]() " icon above the "big player" to switch to the "small player" interface.
" icon above the "big player" to switch to the "small player" interface.
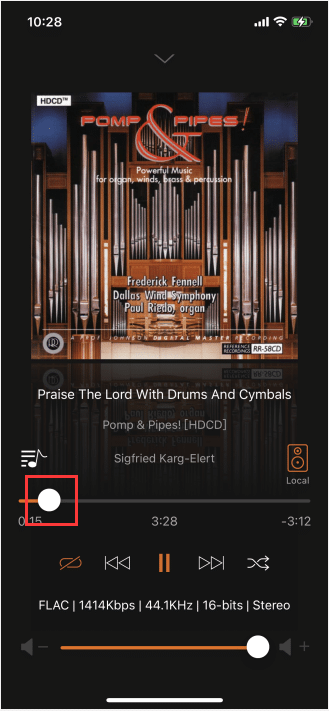
3.6.2.1. Song Play Bar
Click the "Song Play Bar" button, you can slide to control the position of playing the song.
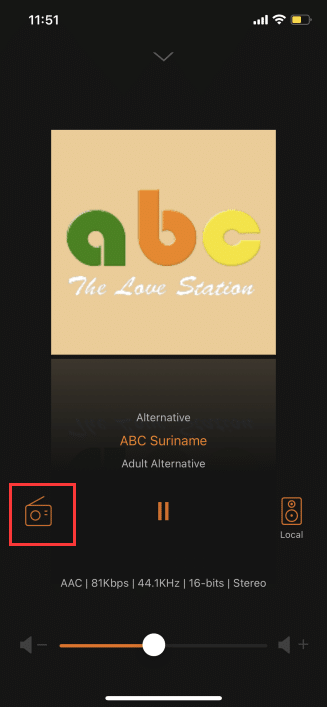
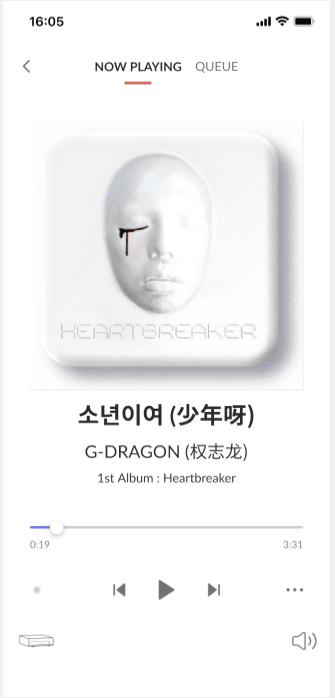
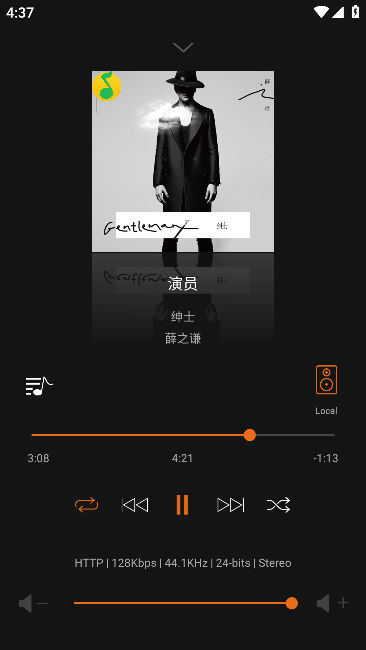
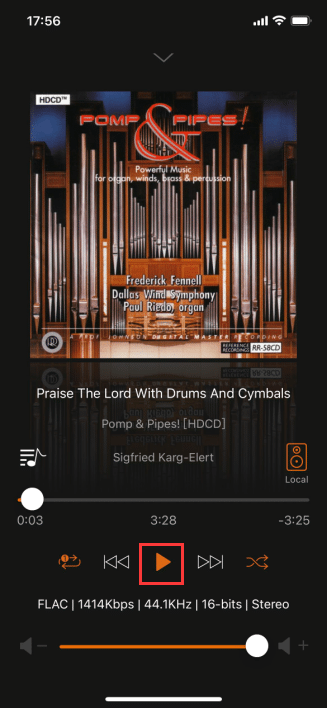
3.6.2.2. Play And Pause
![]() After playing the song, click the “||” button, the song will pause, click the“ ”button, the song will continue to play.
After playing the song, click the “||” button, the song will pause, click the“ ”button, the song will continue to play.

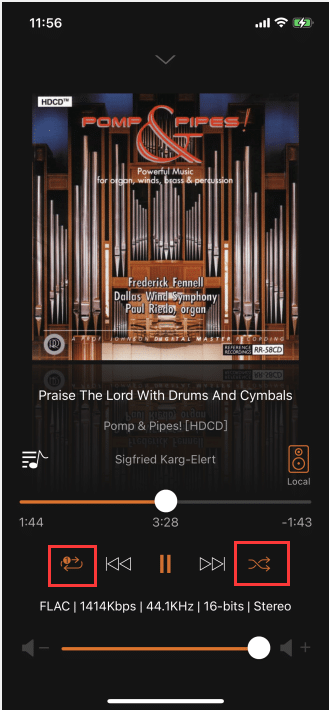
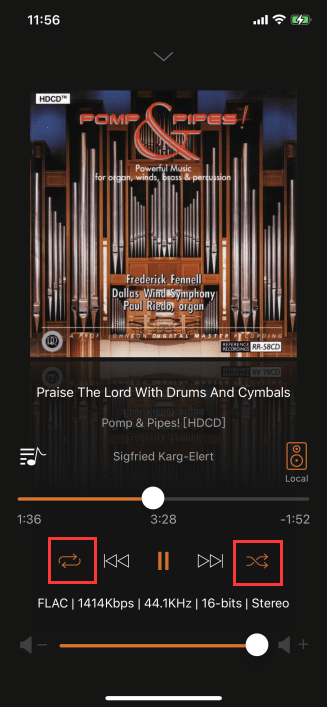
3.6.2.3. Play Rules
Click the "Playing Rules" button, different graphics represent different playing rules, "Playing Rules" only control the songs in the "Playing Queue".
(plays the songs in the queue in sequence, and pauses when finished)
(single loop)
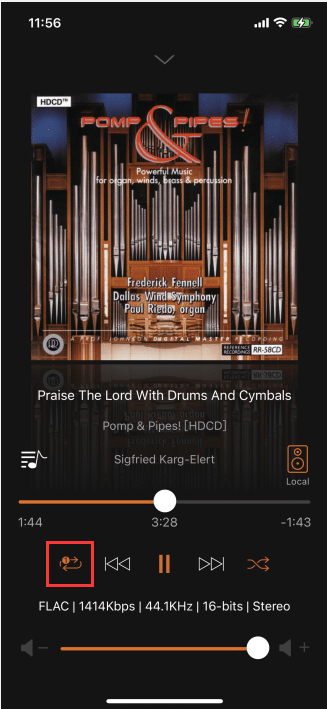
(plays the songs in the queue in sequence)
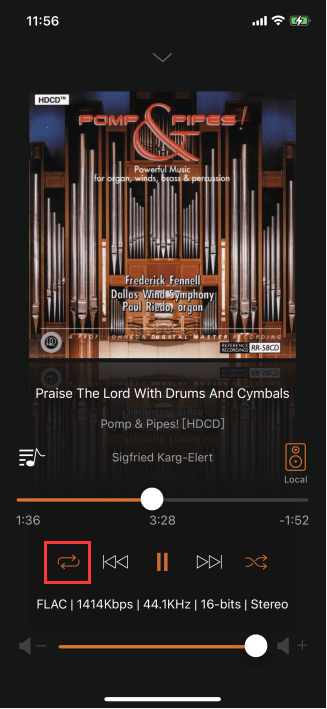
Click the "Shuffle" button, the next song will randomly select the song in the "Play Queue" to play.
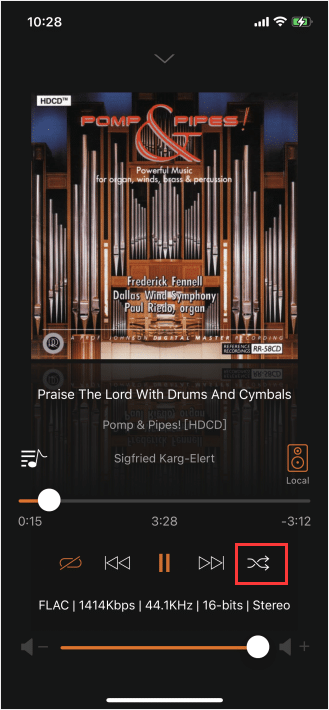
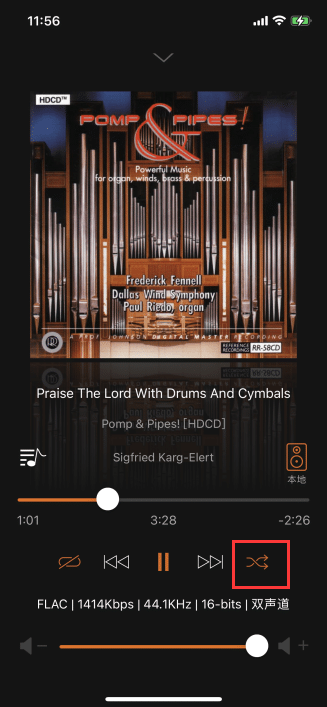
Click the "Previous" button, if the "Shuffle" button has been clicked, the songs in the "Play Queue" will be randomly selected to play.If the "Shuffle" button is not clicked, the previous song of the current song in the "Play Queue" will be played.
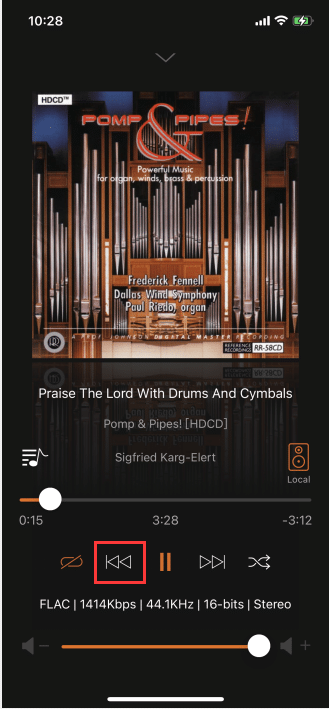
Click the "Next" button, if the "Shuffle" button has been clicked, the songs in the "Play Queue" will be randomly selected to play.If the "Shuffle" button is not clicked, the next song from the current song in the "Play Queue" is played.
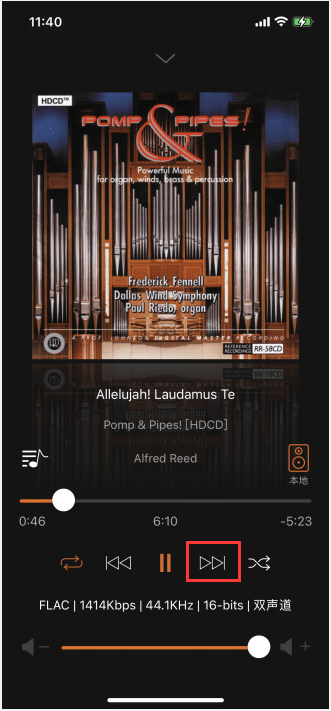
If the "Single Loop" button and the "Shuffle Play" button are clicked at the same time, the next play song will be "Single Loop". if clicked at the same time "Play in order" and "Shuffle" buttons, the next play song is "Shuffle". If "Play in sequence" is clicked at the same time and the "Shuffle" button, the next playing song is "Shuffle".

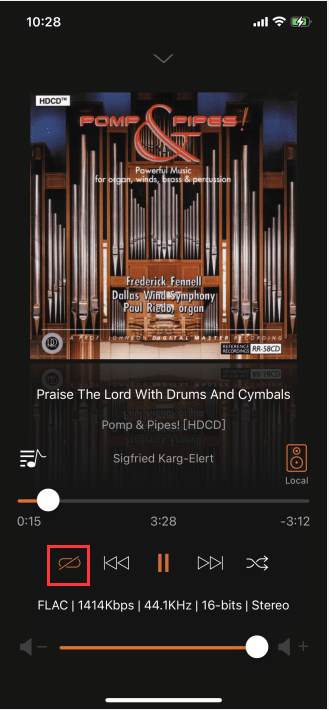
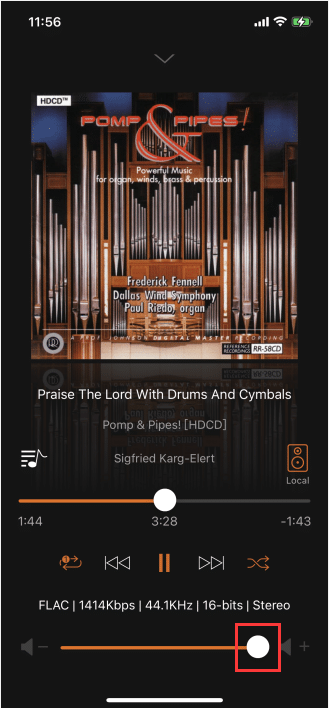
3.6.2.4. Volume Adjustment
Click the "Volume Adjustment" button in the lower volume bar to adjust the volume of the playing song.
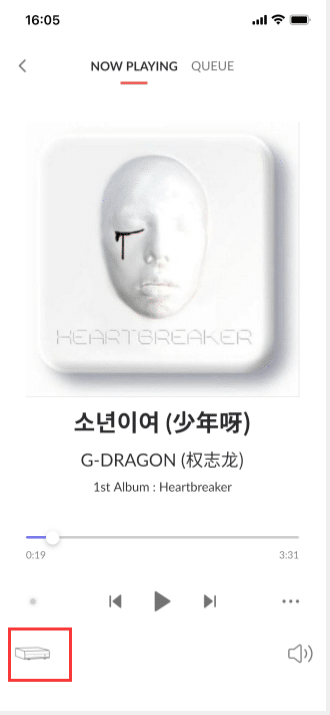
3.6.2.5. Local
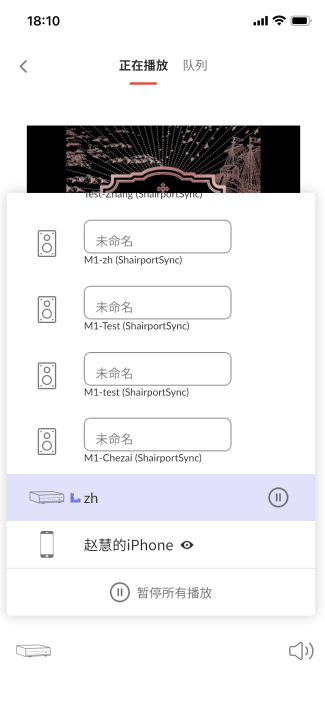
Click the "Local" button to adjust the volume of the playing song in the pop-up interface.
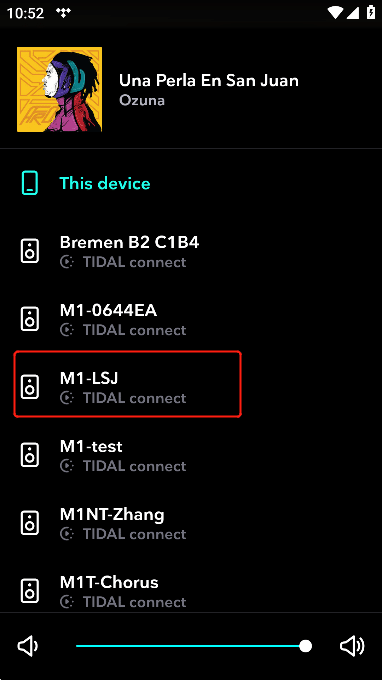
Click the "Manage" button in the volume adjustment interface to enter the "Manage Audio Output Devices" interface.(Note:"Manage Audio Devices" in "Local Music" file step 3.5.1)
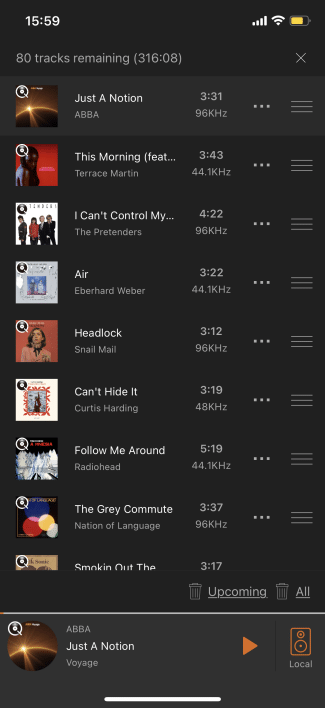
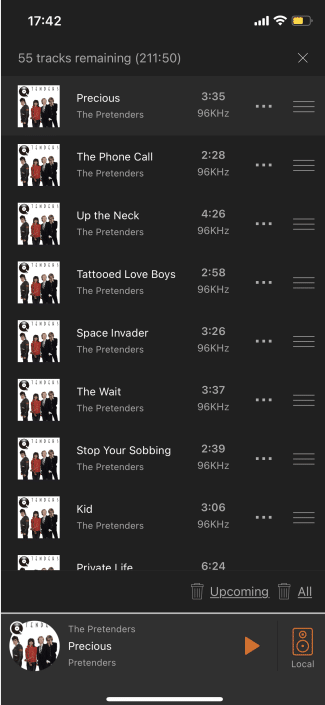
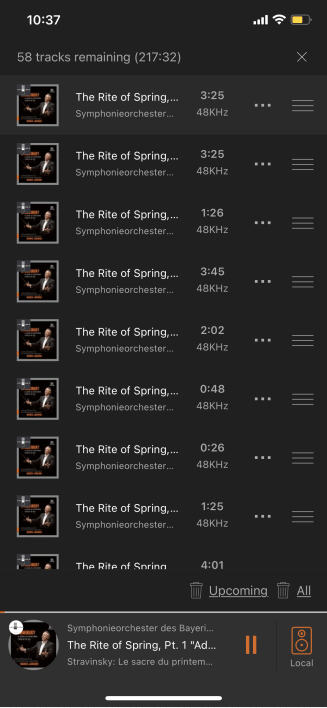
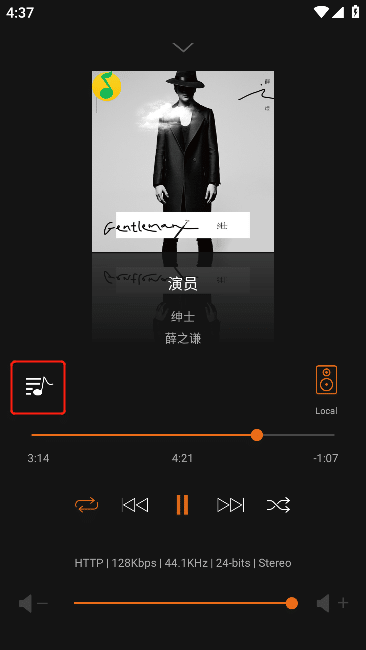
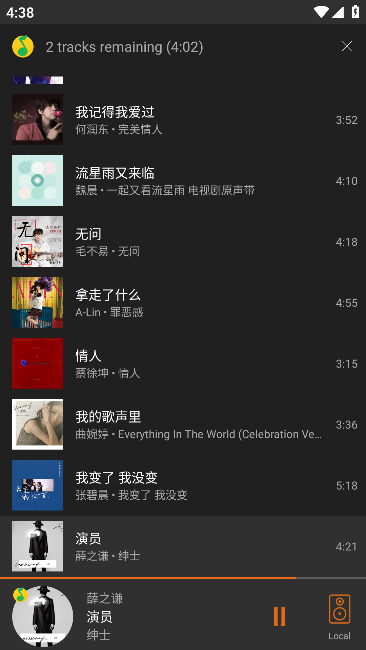
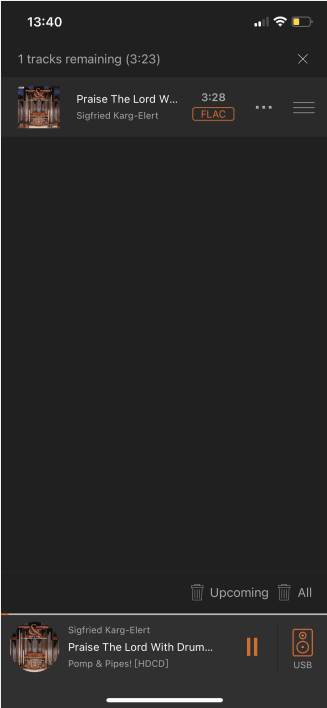
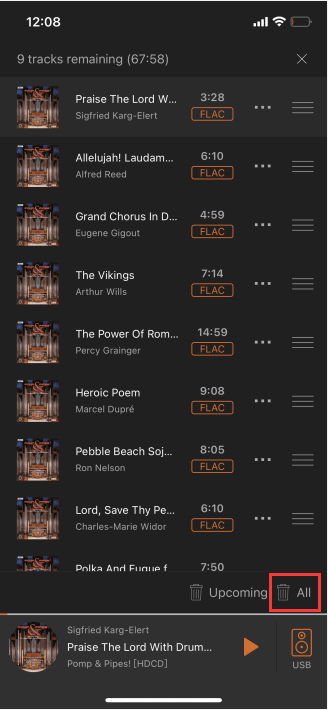
3.6.2.6. Play Queue
Click the "Play Queue" button on the left test to enter the "Play Queue" interface.
3.6.2.6.1. Play Queue Operation
Click the "..." button on the right side of the song, a selection box will pop up, and you can operate the corresponding song.
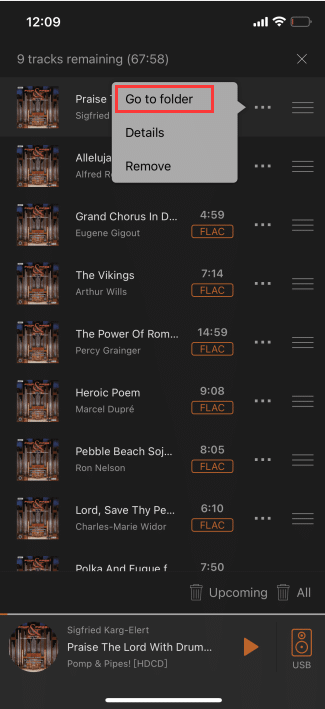
3.6.2.6.1.1. Go To Folder
Click "Go to the folder" to switch to the "Album" interface.

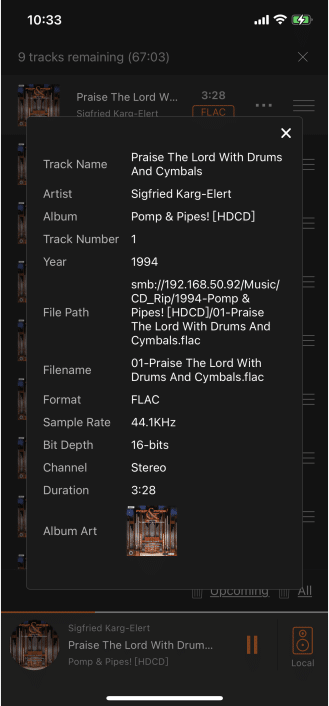
3.6.2.6.1.2. Details
Click "Details" to view the detailed information of the corresponding song.

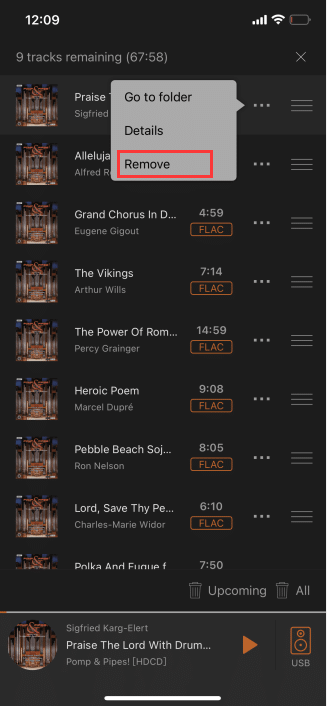
3.6.2.6.1.3. Remove
Click "Delete" to clear the corresponding song in "Play Queue".
3.6.2.6.1.4. Upcoming
Click "Upcoming" to keep the currently playing song in the "Play Queue" and clear all other songs.
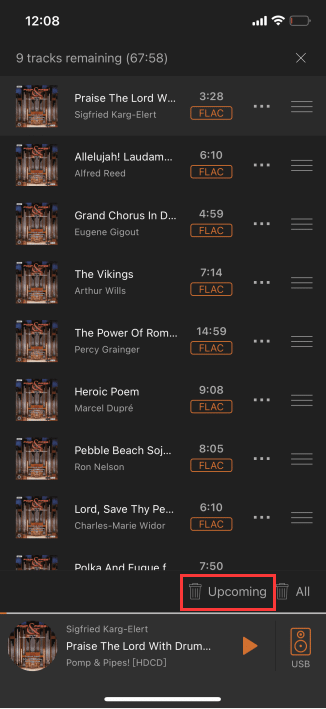
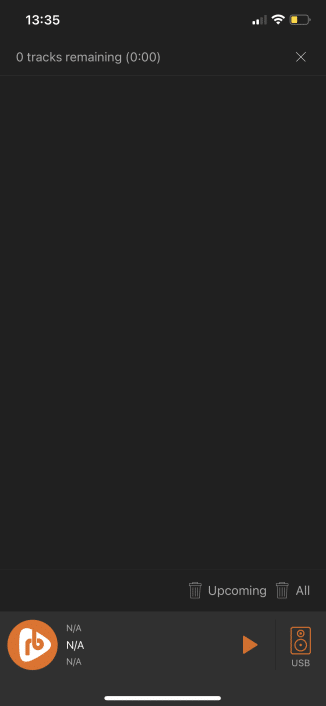
3.6.2.6.1.5. All
Click "All" to clear all songs in "Play Queue".
3.6.2.7. Internet Radio
After playing the radio station, click the "Small Player" below to enter the "Large Player" interface.

3.6.2.7.1. Radio List
Click the "Radio" button on the left test to enter the "Radio List" interface.